
Super AdminTenant Admin
The Devices module lets you register SIP desk phones, ATA adapters, and other hardware endpoints in ICTPBX. You store the device’s MAC address and link it to an extension, which enables zero-touch provisioning for supported phone models.
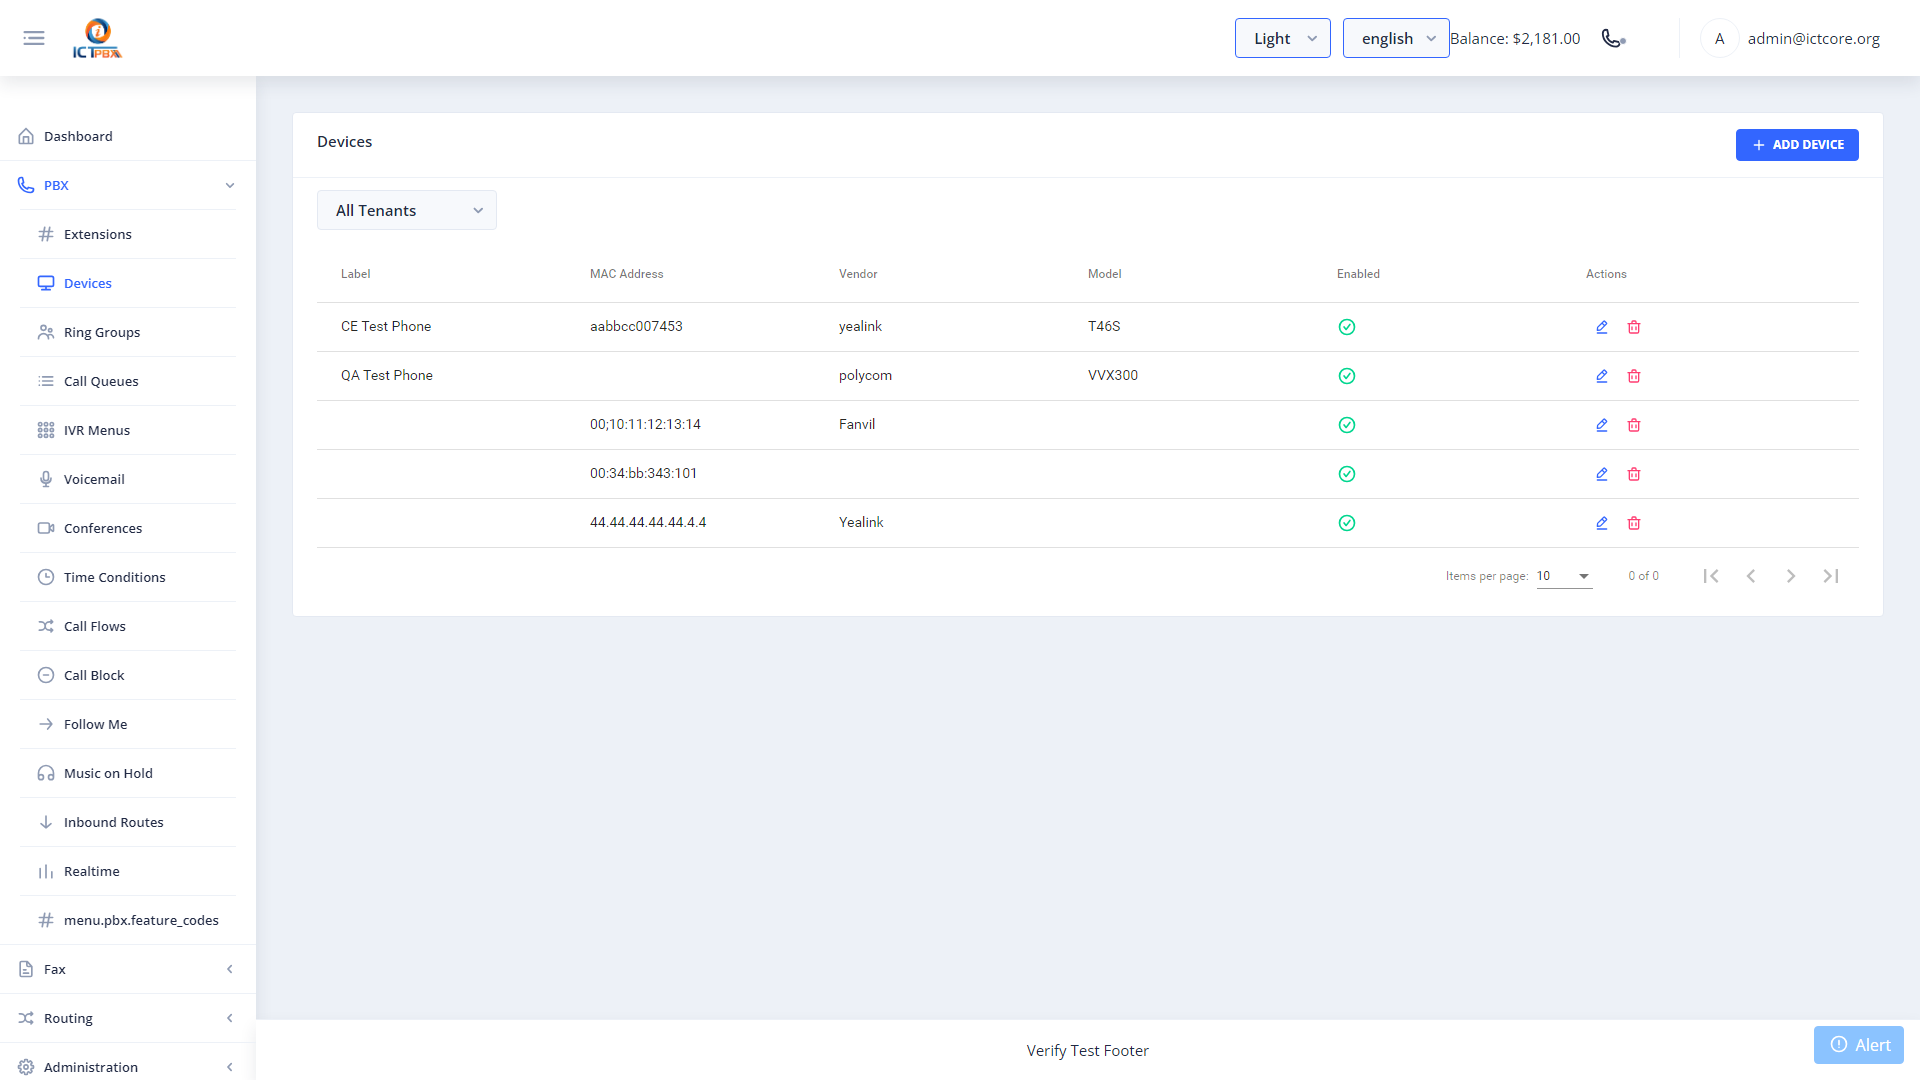
Adding a Device
- Go to PBX › Devices
- Click Add Device
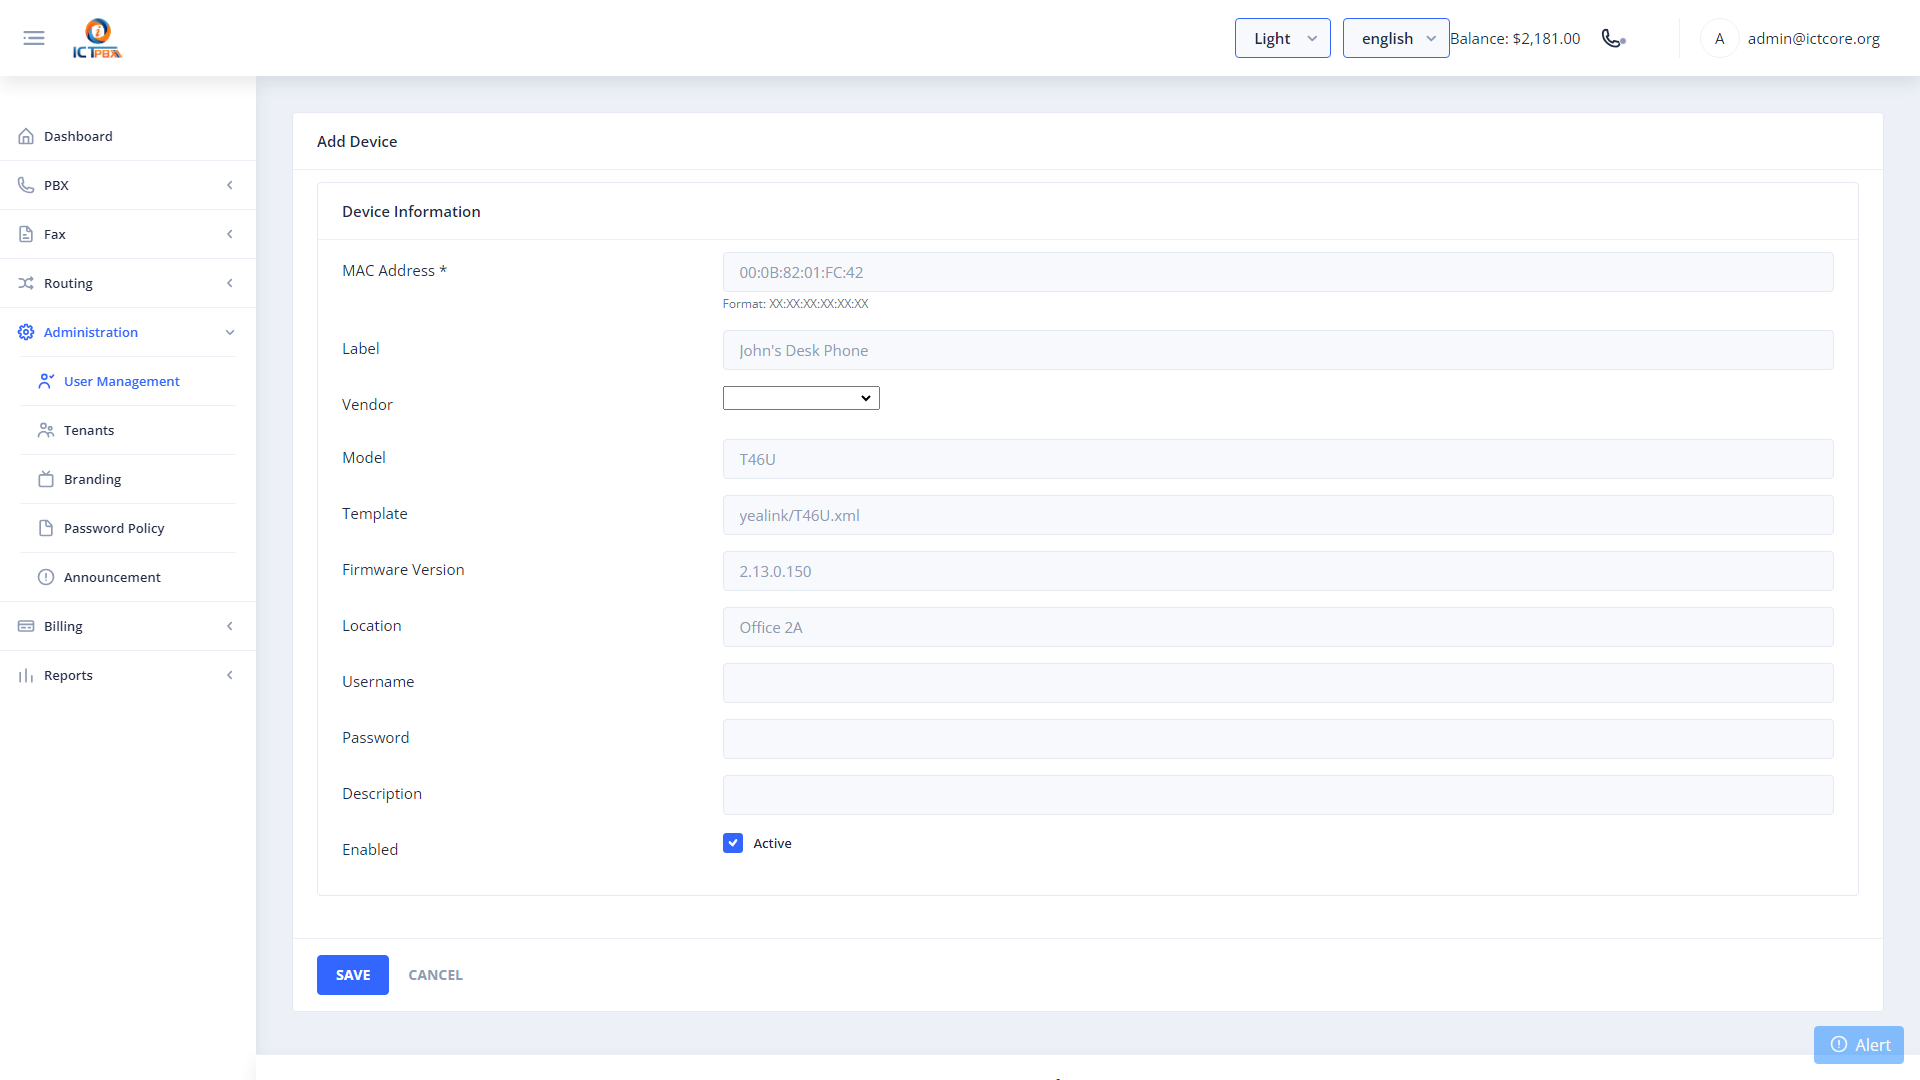
- Enter the MAC address of the phone (found on the label on the bottom of the device)
- Select the extension to assign this device to
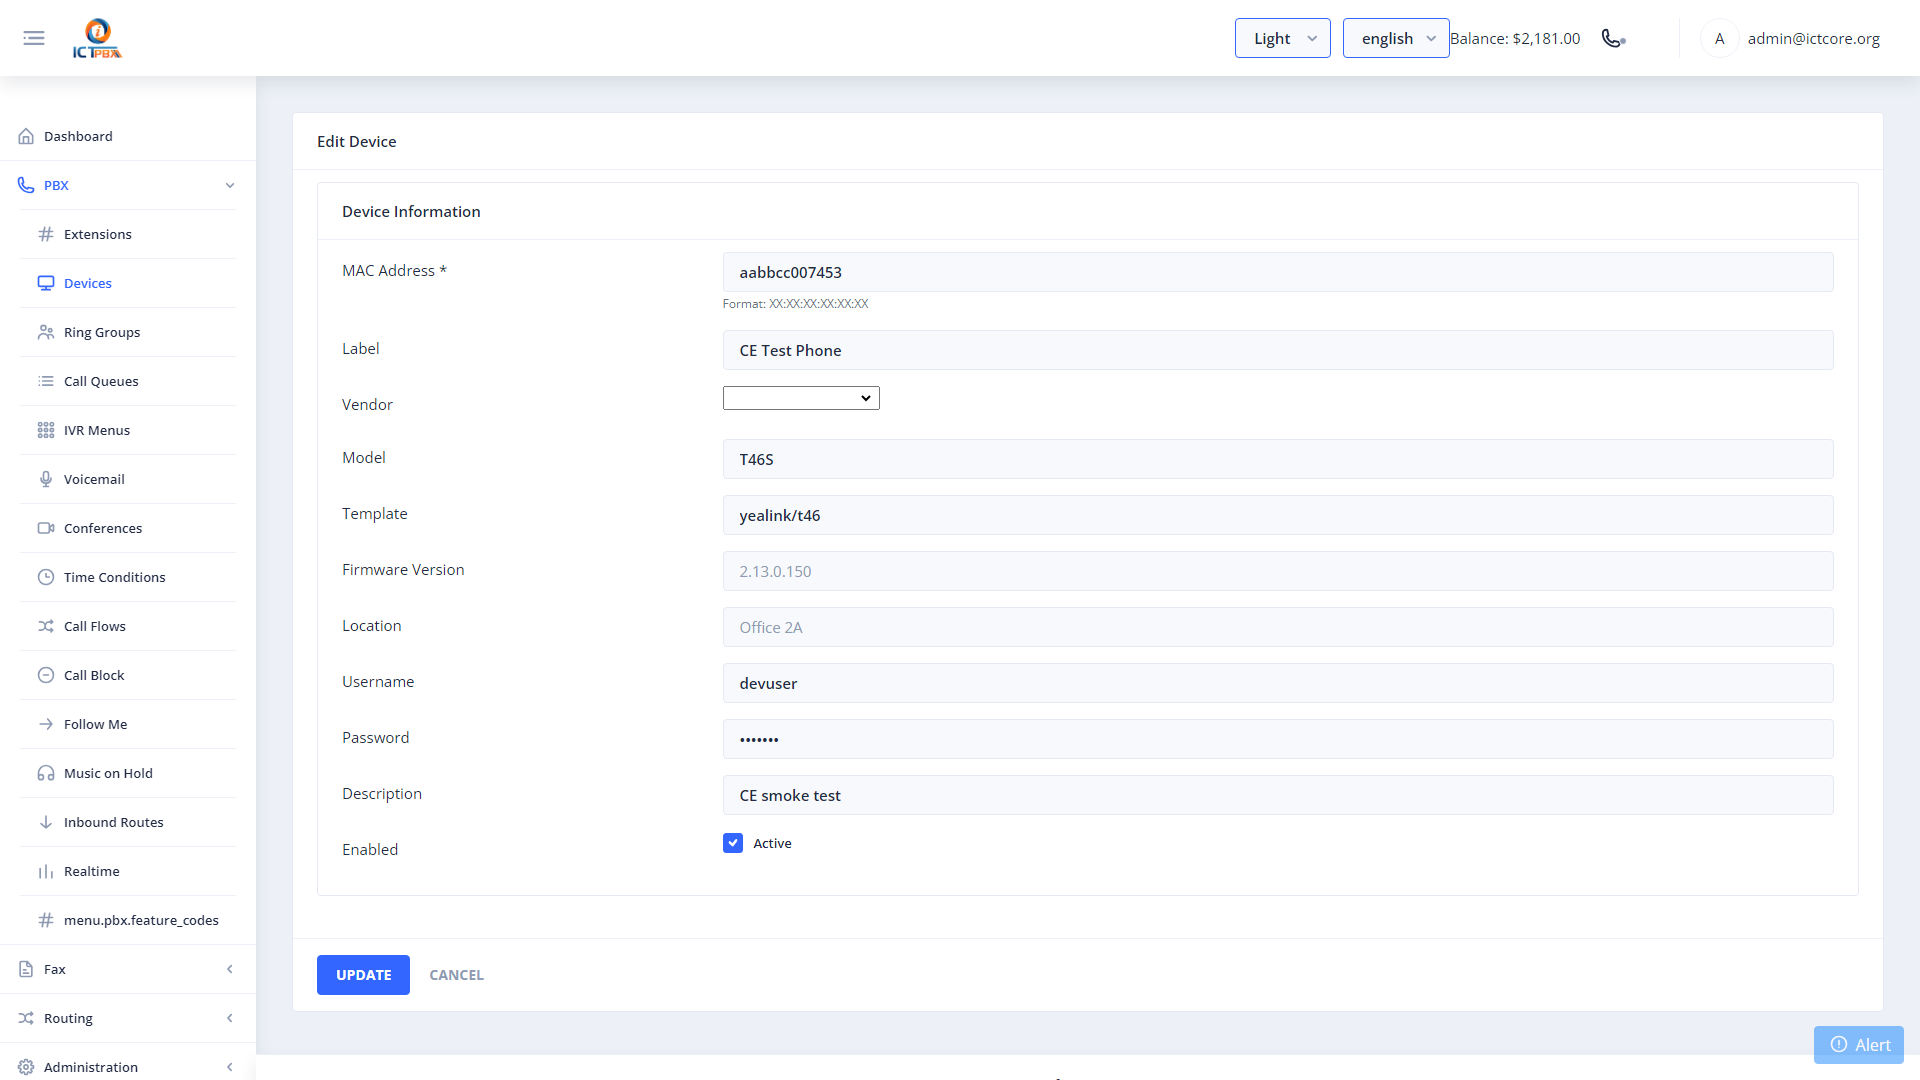
- Fill in any provisioning parameters required for your phone model
- Click Save
How Zero-Touch Provisioning Works
Zero-touch provisioning removes manual phone configuration. Instead of typing SIP credentials into every handset, you register the device once in ICTPBX and let the phone configure itself. The flow looks like this:
- You add the phone’s MAC address in PBX › Devices and link it to an extension
- The phone is told where your provisioning server lives (its auto-provisioning URL)
- On boot, the phone requests its configuration file, identified by its MAC address
- ICTPBX returns the SIP account settings for the linked extension
- The phone applies the config and registers, ready to make and receive calls
Swapping a broken handset becomes a two-minute job: update the MAC address on the device record, plug in the new phone, and it picks up the same extension.
Pointing the Phone at Your Provisioning Server
There are two common ways to hand the provisioning URL to a phone:
- Per phone, through its web interface. Open the phone’s admin page, find the auto-provisioning or config server setting, and enter your ICTPBX portal’s provisioning URL. Fine for a handful of phones.
- Fleet-wide, through DHCP. Configure your DHCP server to advertise the provisioning URL (most phones read Option 66, some vendors use Option 43). Every factory-reset phone on that network then finds the server on its own. This is the right approach for offices with many handsets.
Example: Grandstream Desk Phones
- Log in to the phone’s web interface
- Go to Maintenance › Upgrade and Provisioning
- Set the config server path to your ICTPBX provisioning URL and select HTTP or HTTPS as the upgrade method
- Save and reboot the phone
- Watch the device registration appear against its extension in ICTPBX
Troubleshooting
- Phone boots but never registers. Double-check the MAC address on the device record. A single transposed digit means the phone’s config request finds no match.
- Config request never reaches the server. Verify the provisioning URL is reachable from the phone’s network segment. Firewalls and voice VLANs often block it.
- Phone registers with old settings. Reboot the phone after changing its device record. Config is fetched at boot, not continuously.
- One model works, another does not. Check the provisioning parameters on the device record match your phone model, and confirm the handset runs current firmware.
Package Quotas
Your package defines a device slot limit. When you reach it, ICTPBX blocks new device registration. Ask your Super Admin to upgrade your subscription if you need more devices.
Related Features
- Extensions – create the extension before assigning a device
- My Account – end users can configure any SIP client using their credentials