
Tenant Admin
Role: Tenant Administrator | Access Level: Level 2 — Full Tenant Scope
Introduction
The Tenant Administrator role in ICTPBX Service Provider Edition provides complete control over a single tenant organisation. As Tenant Admin you can create and manage users, configure all PBX features (extensions, devices, ring groups, queues, IVR menus, voicemail boxes, conference rooms, inbound routes, call flows, call blocking, follow-me rules, and music on hold), manage DID phone numbers, send and receive faxes, monitor active calls in real time, and review billing and call reports — all from a single browser-based portal.
This guide covers every function available to your role.
1. Logging In
Navigate to your ICTPBX portal URL (e.g. https://ictpbx.com).
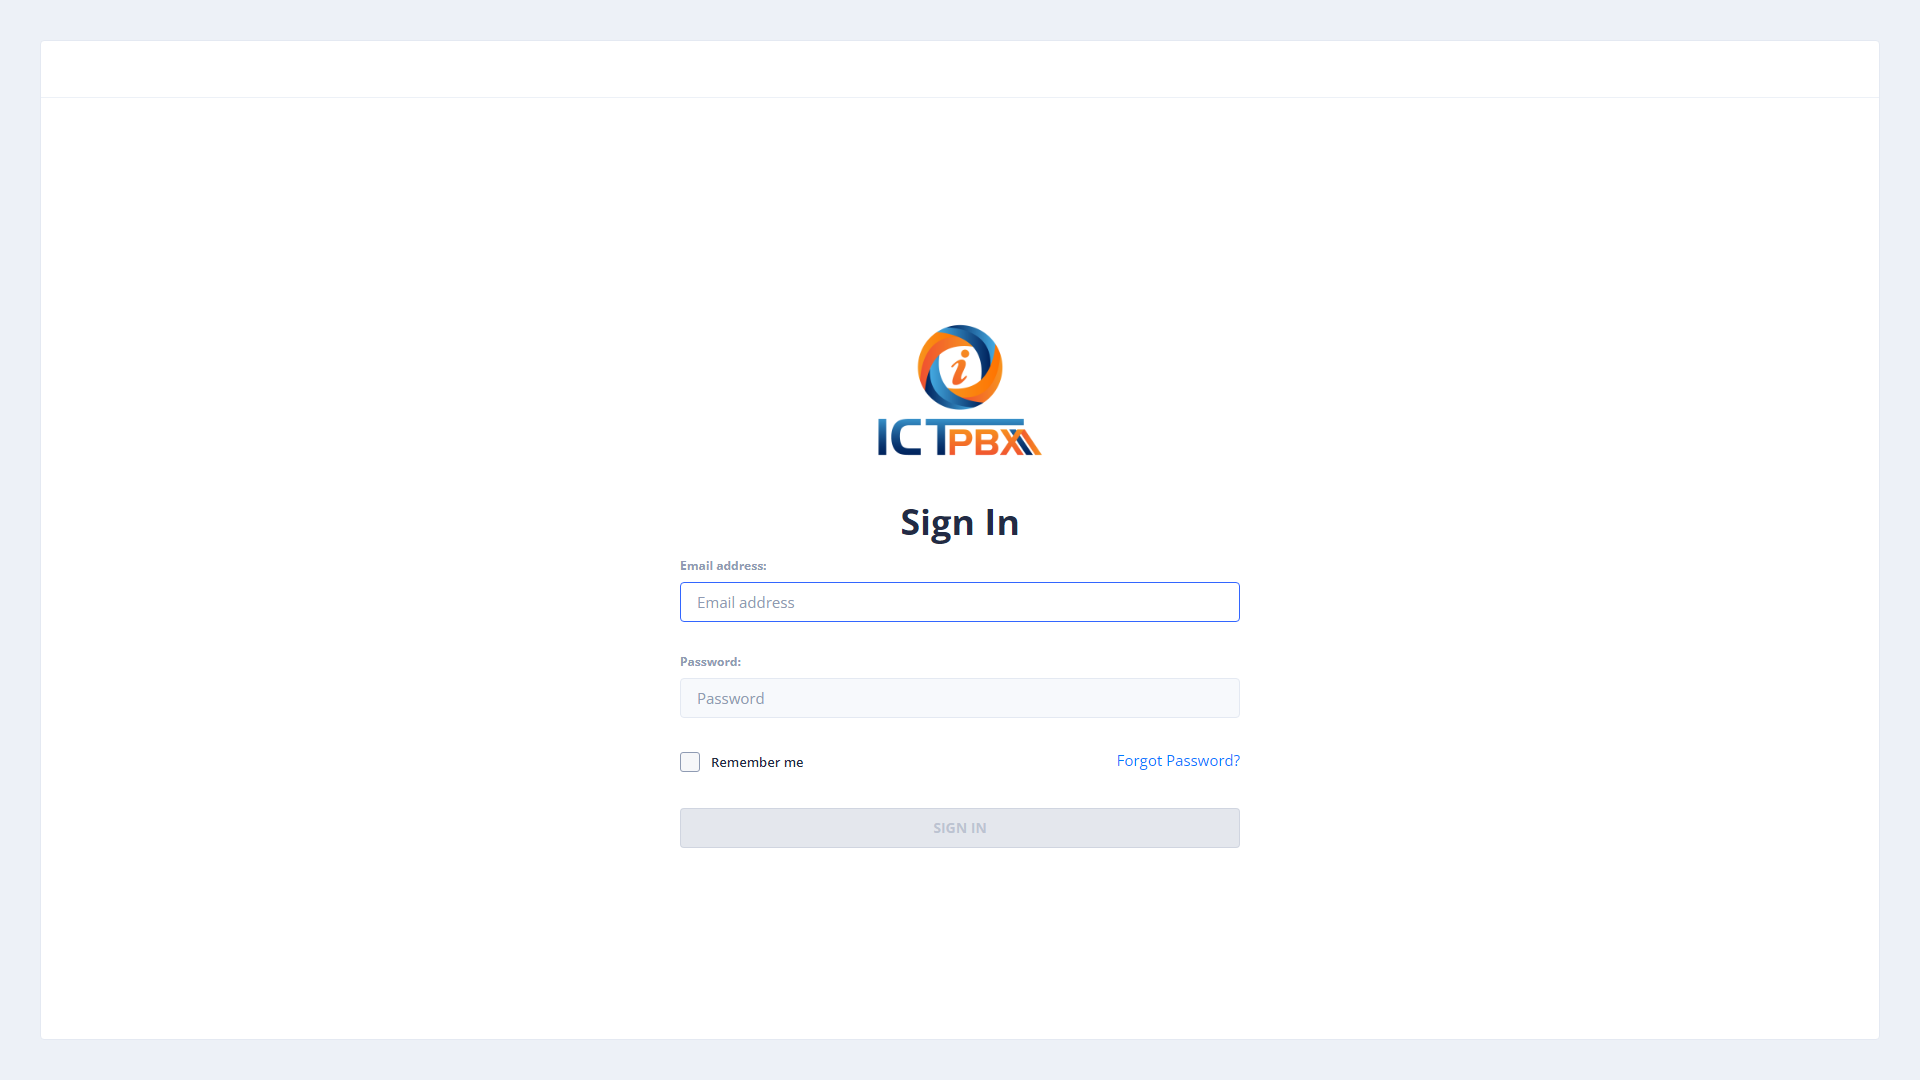
- Enter your Email Address.
- Enter your Password.
- Optionally tick Remember me.
- Click SIGN IN.
Tip: After several failed attempts your account may be locked. Contact your service provider administrator to unlock it.
2. Dashboard
After login you land on the Tenant Dashboard showing live system statistics scoped to your organisation — active extensions, devices, queues, fax counts, and your credit balance.
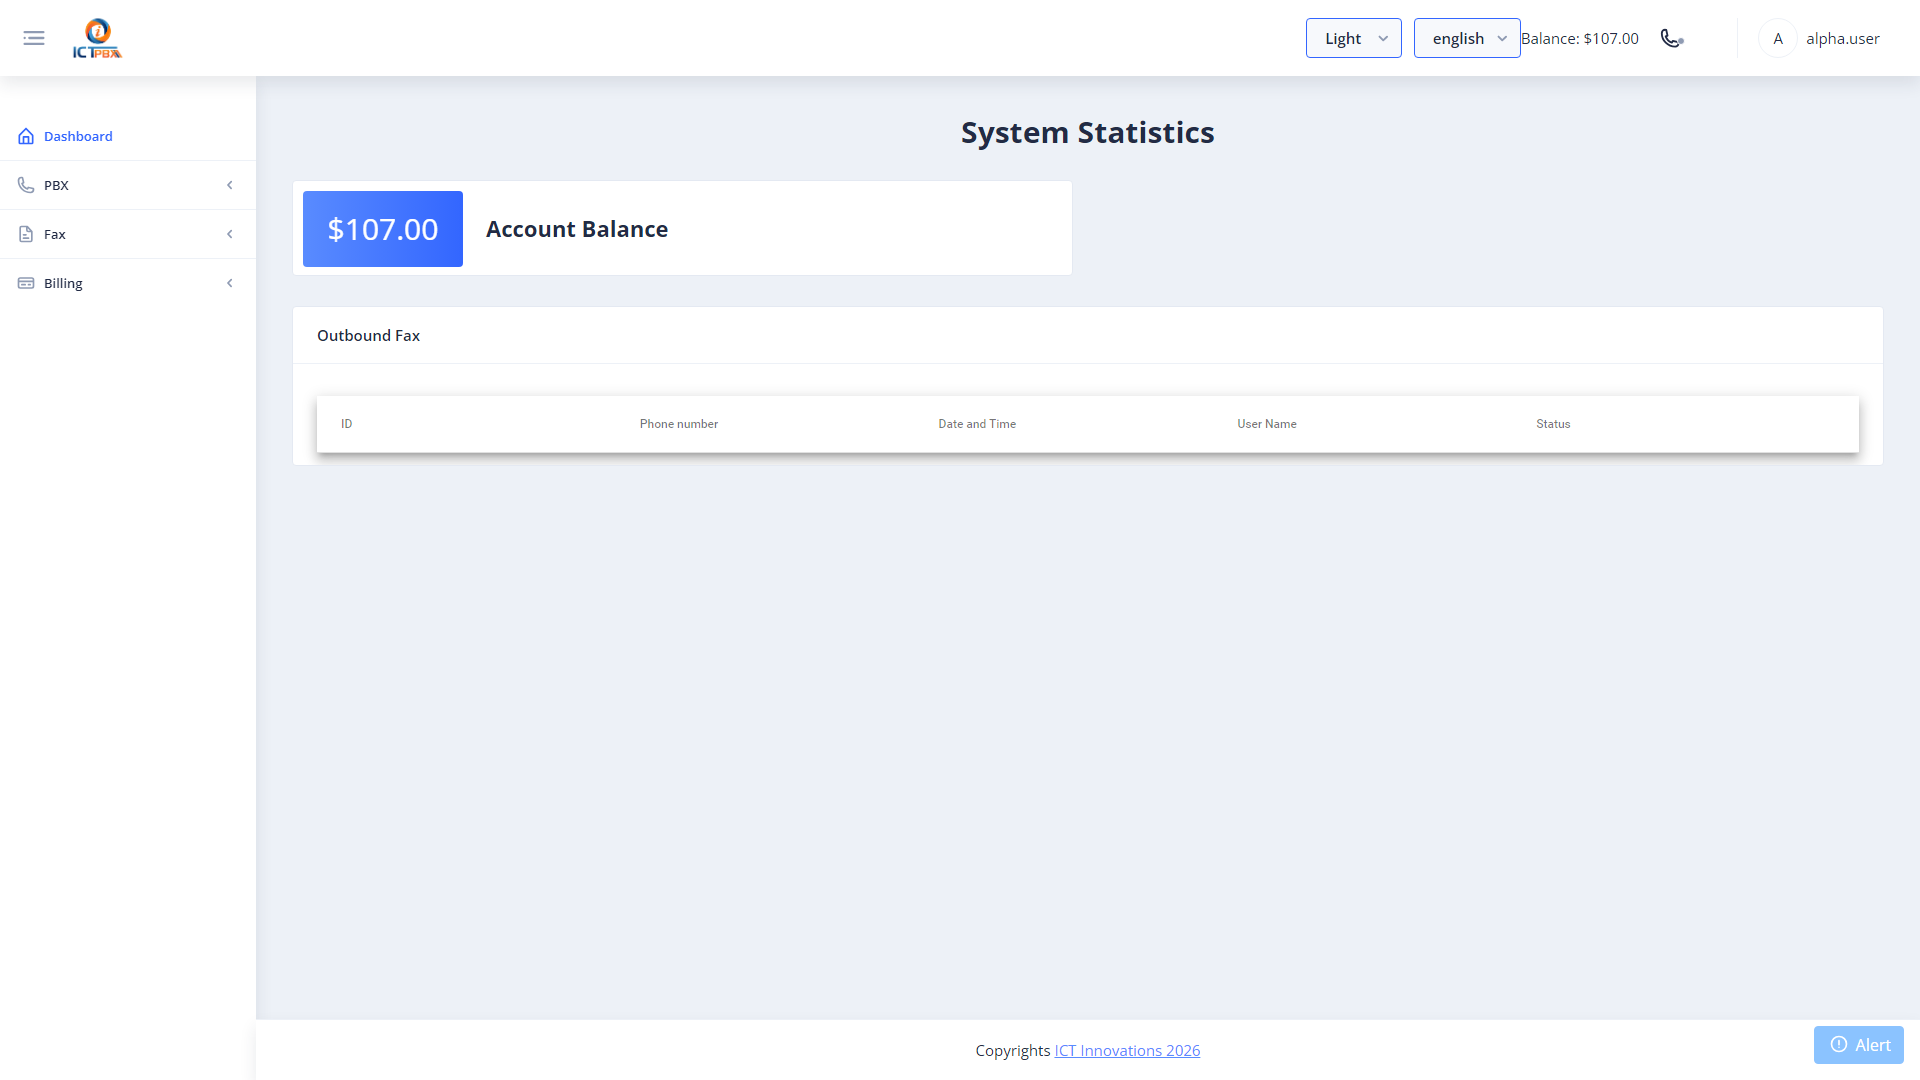
Your credit balance is displayed in the top-right header and refreshes automatically every 10 seconds.
3. User Management
Navigate to Administration → Users from the left sidebar.
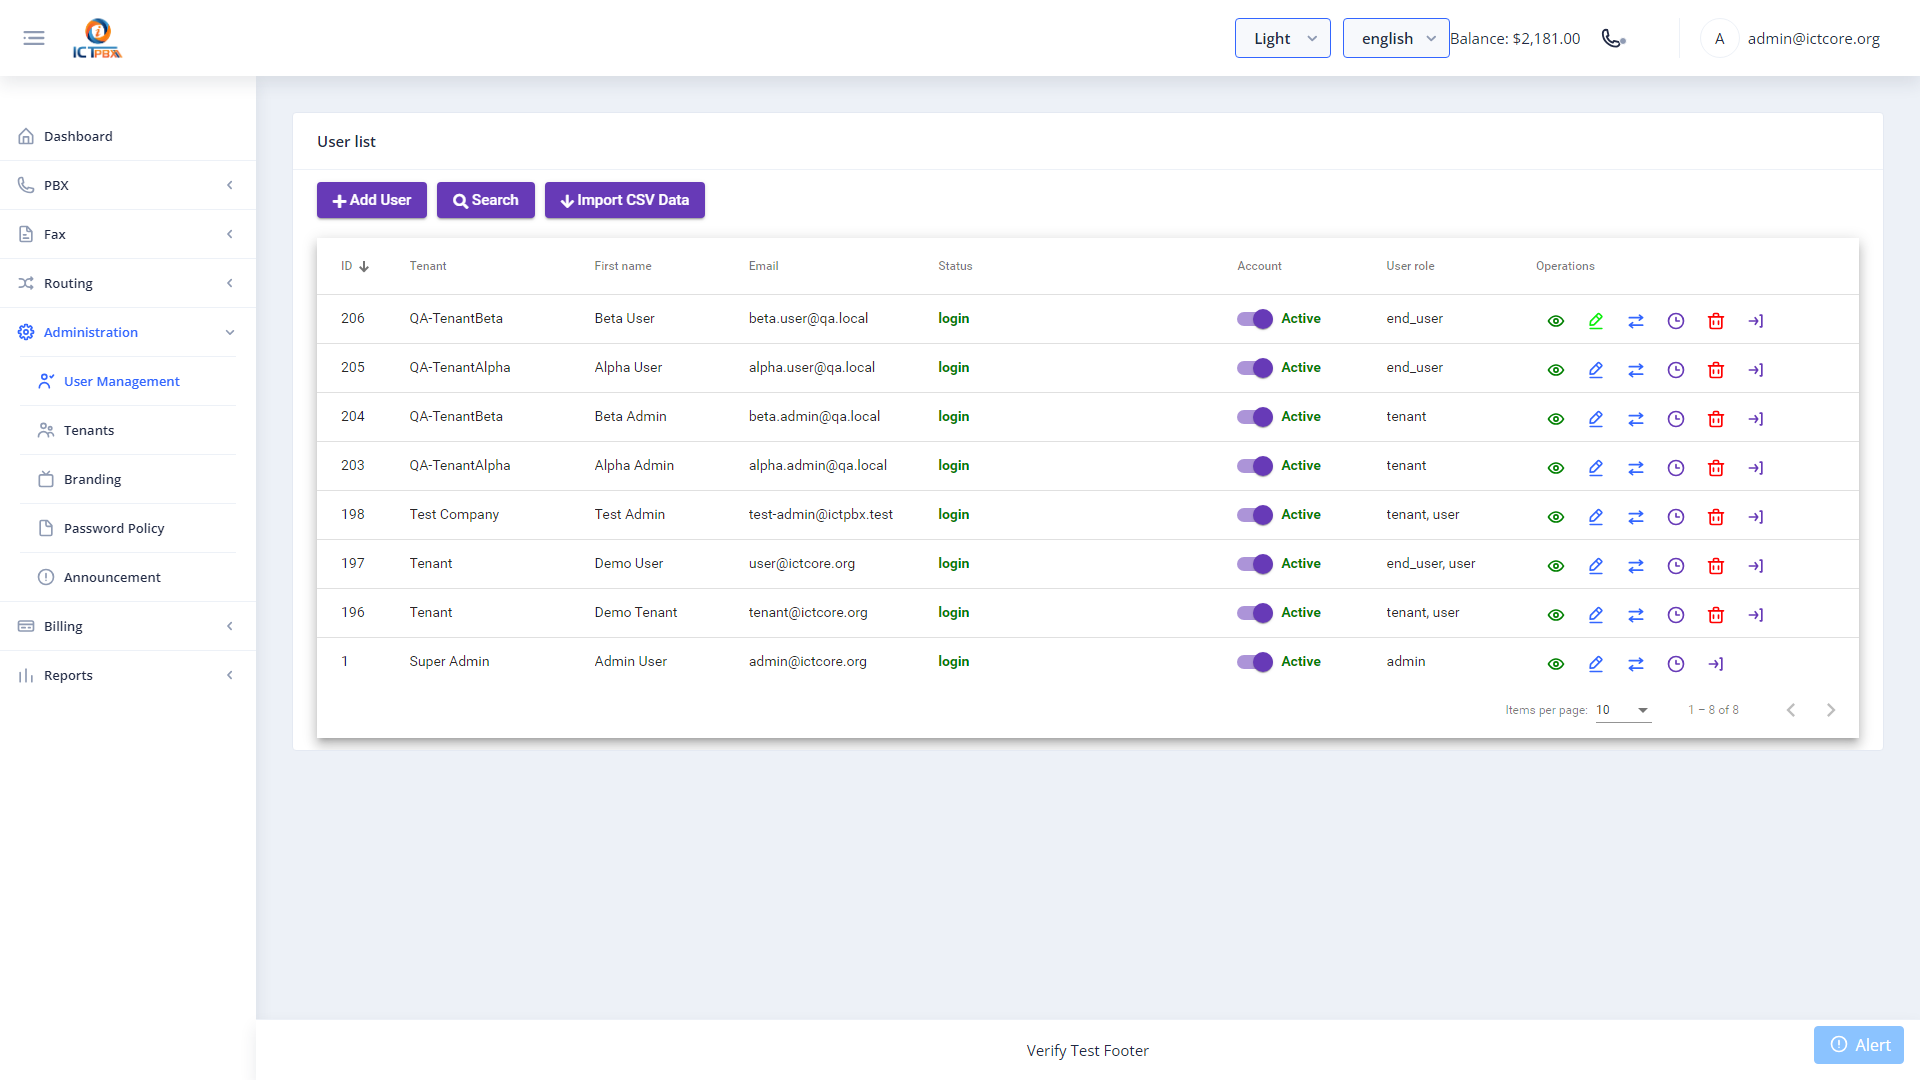
As Tenant Admin you see only the users that belong to your organisation. You cannot see or modify users in other tenants.
3.1 Creating a New User
- Click New.
- Fill in First Name, Last Name, Email, and Password.
- Set Role — choose End User for a standard agent or Agent for a call-centre agent role.
- Assign Permissions by selecting features the user should access (e.g.
extensions,devices,cdr_reports). - Click Save.
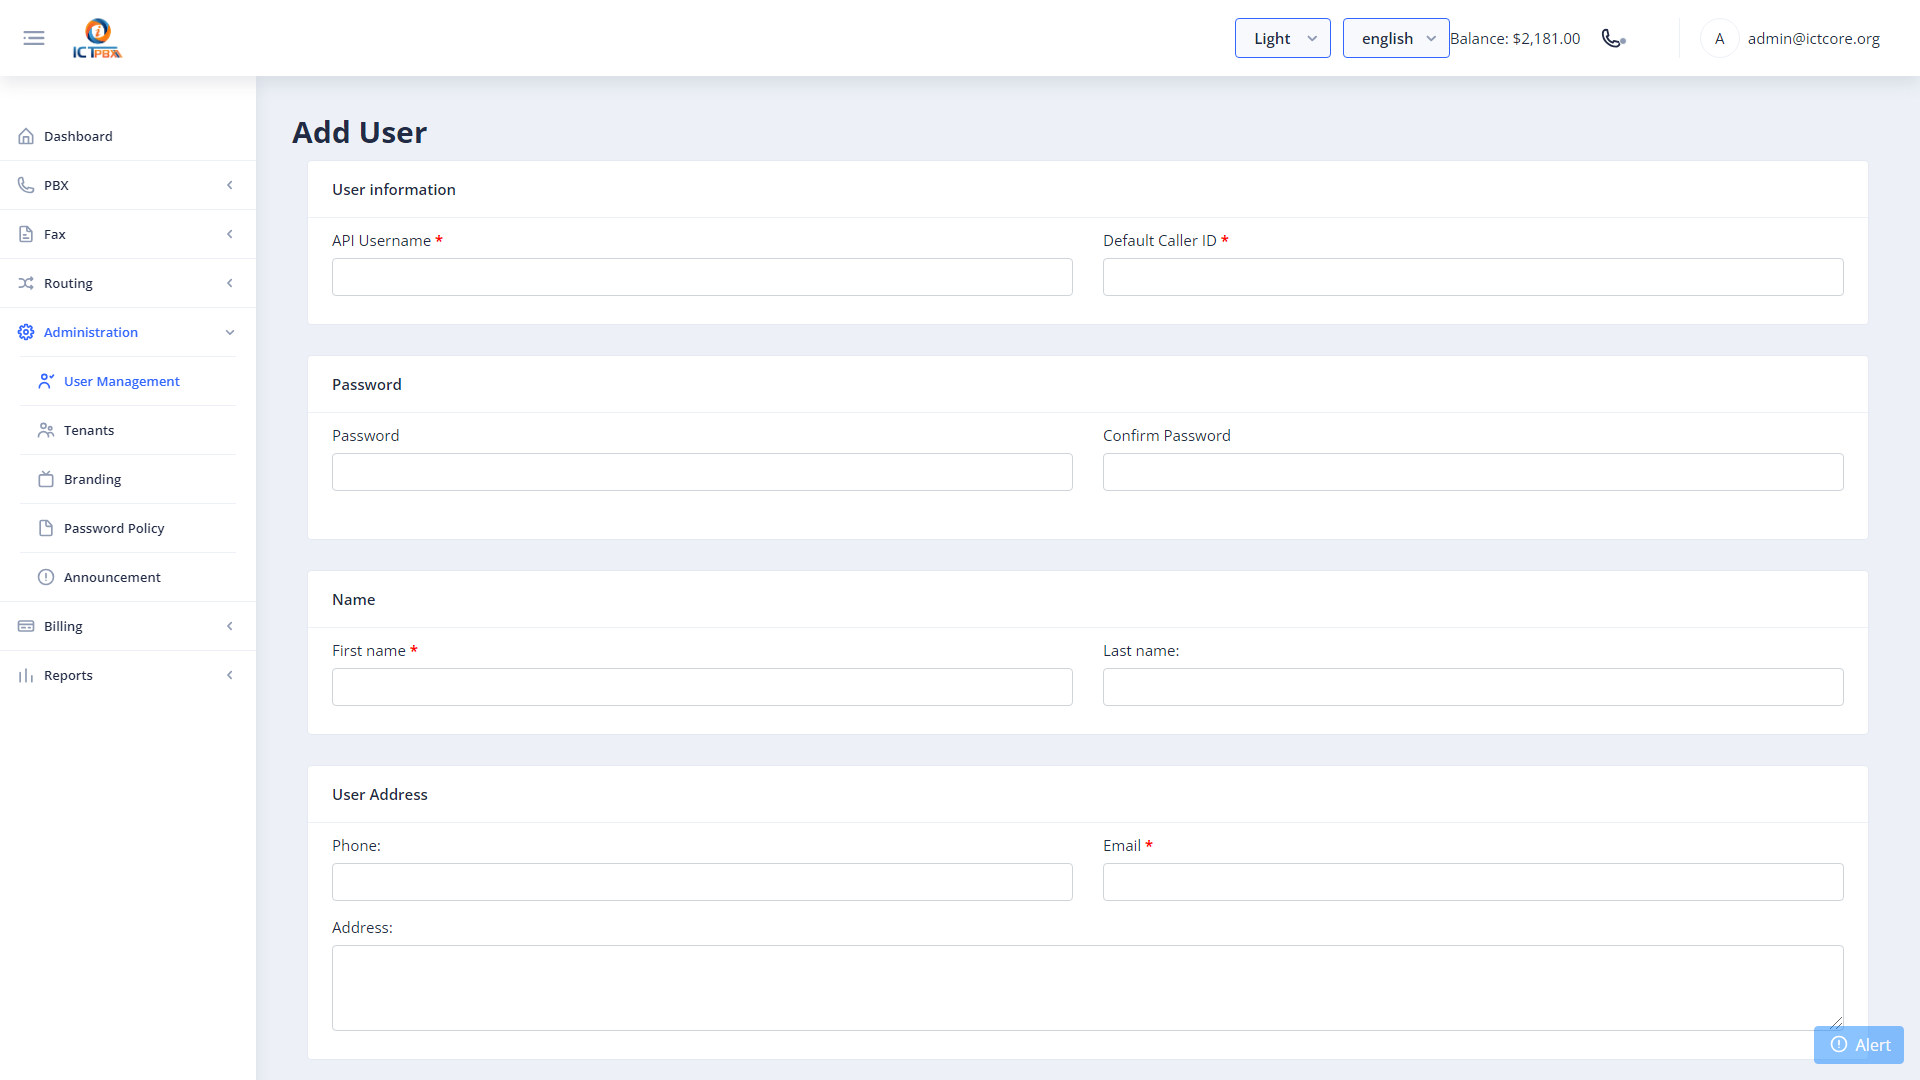
Note: You cannot create admin-level users. User caps are inherited from your own tenant permissions — you cannot grant permissions you do not hold yourself.
3.2 Editing a User
Click any user row to open the edit form. You can update their password, permissions, and role. Click Save when done.
3.3 Deleting a User
Click the Delete icon on the user row. Confirm when prompted. Deleting a user does not automatically remove their PBX extension or device — remove those separately under PBX.
4. Extensions
Navigate to PBX → Extensions from the sidebar.
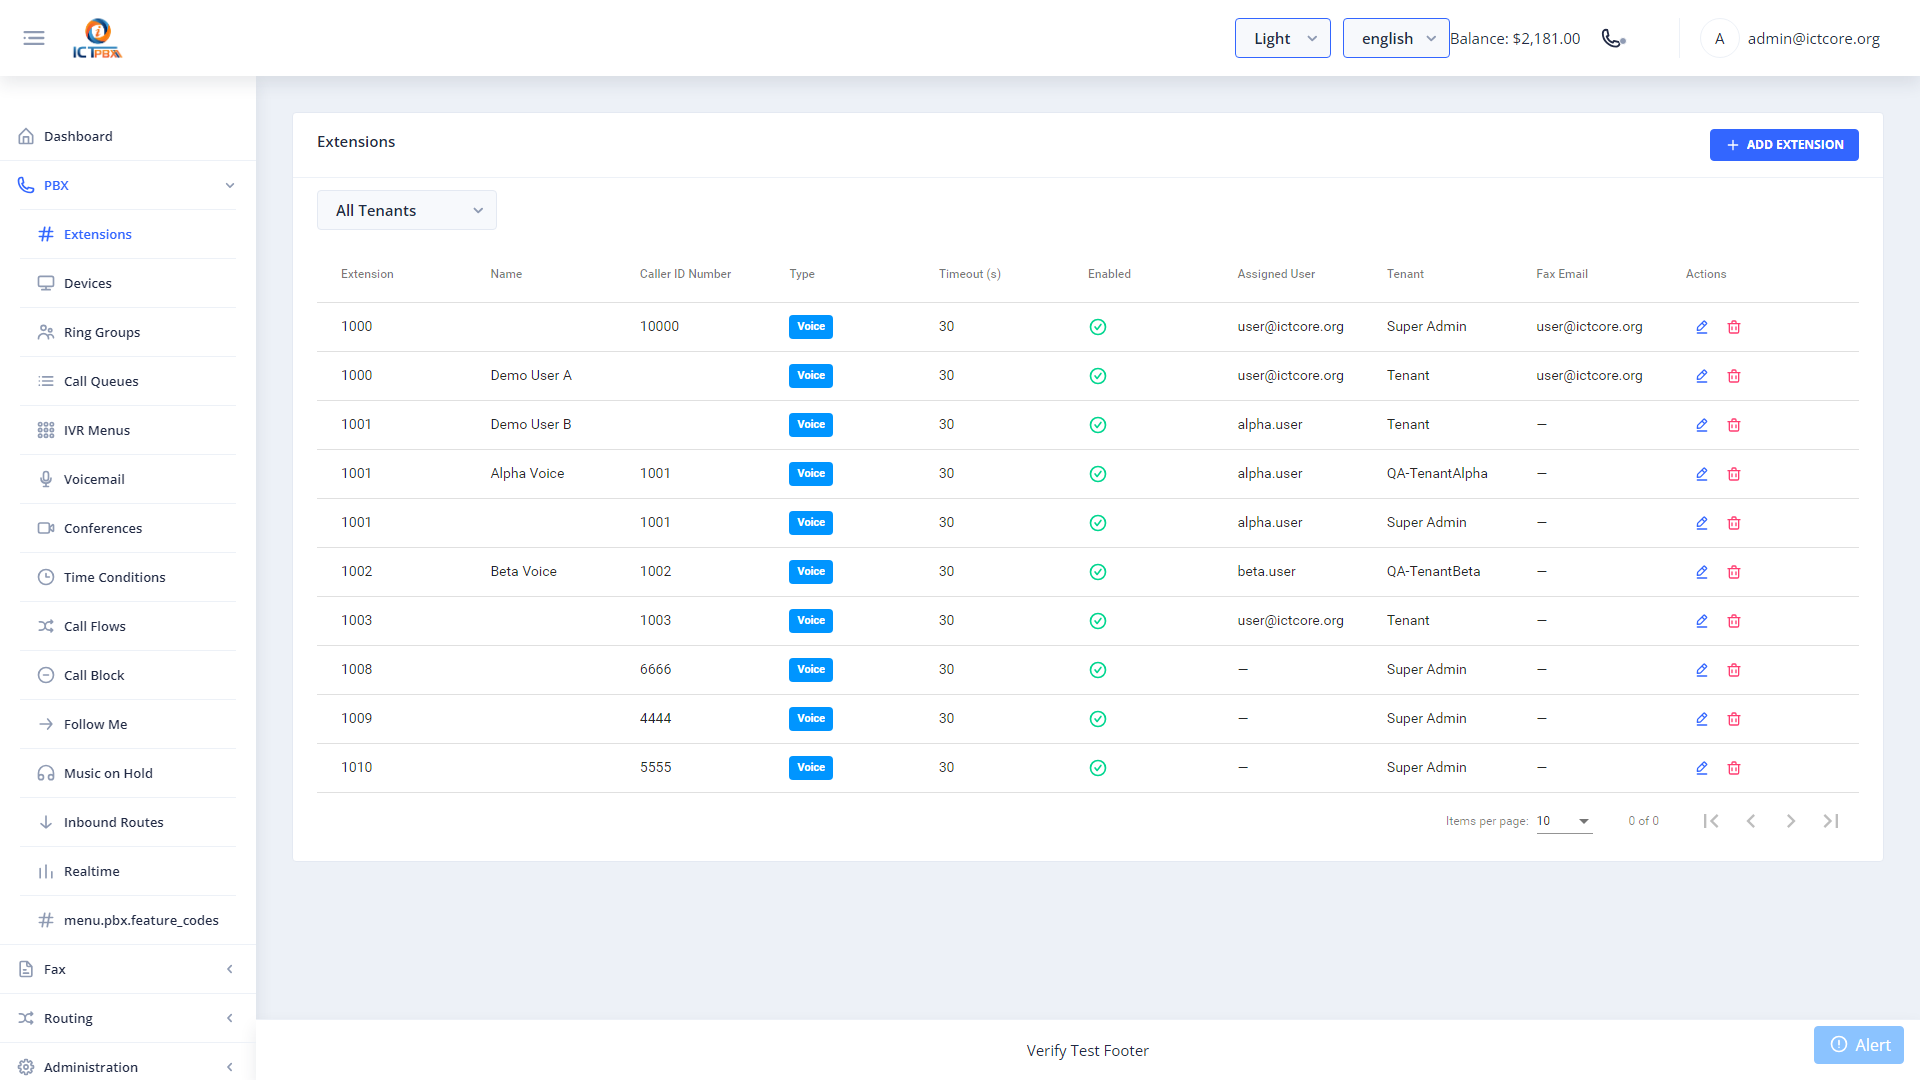
Extensions are the SIP endpoints your users register against. Each extension has a 4-digit (or longer) number, a password, and optional voicemail settings.
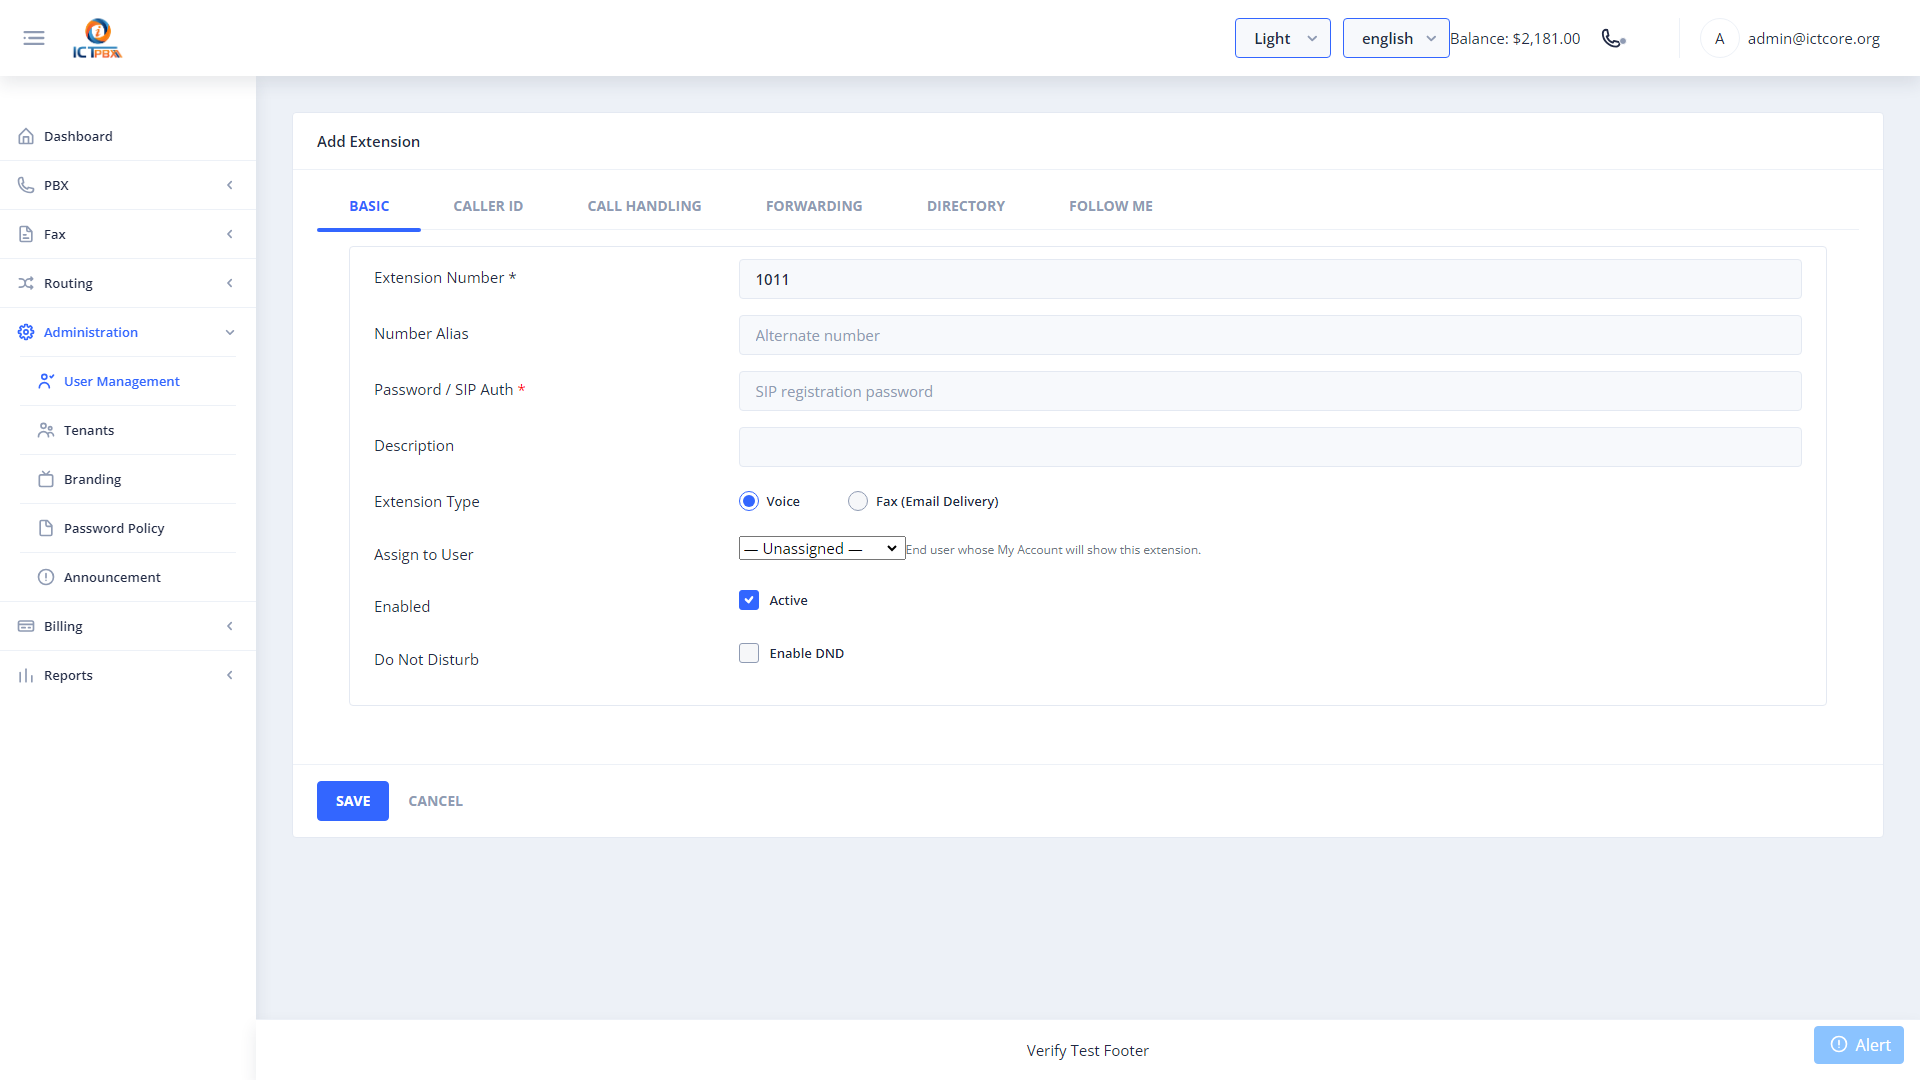
4.1 Creating an Extension
- Click New.
- Enter the Extension number (e.g.
1001). - Enter a Password for SIP registration.
- Set the Caller ID Name and Caller ID Number.
- Choose Extension Type — Voice or Fax.
- Configure voicemail options if required.
- Click Save.
4.2 Editing an Extension
Click an extension row to open the edit form. You can change the password, caller ID, DND status, and voicemail settings.
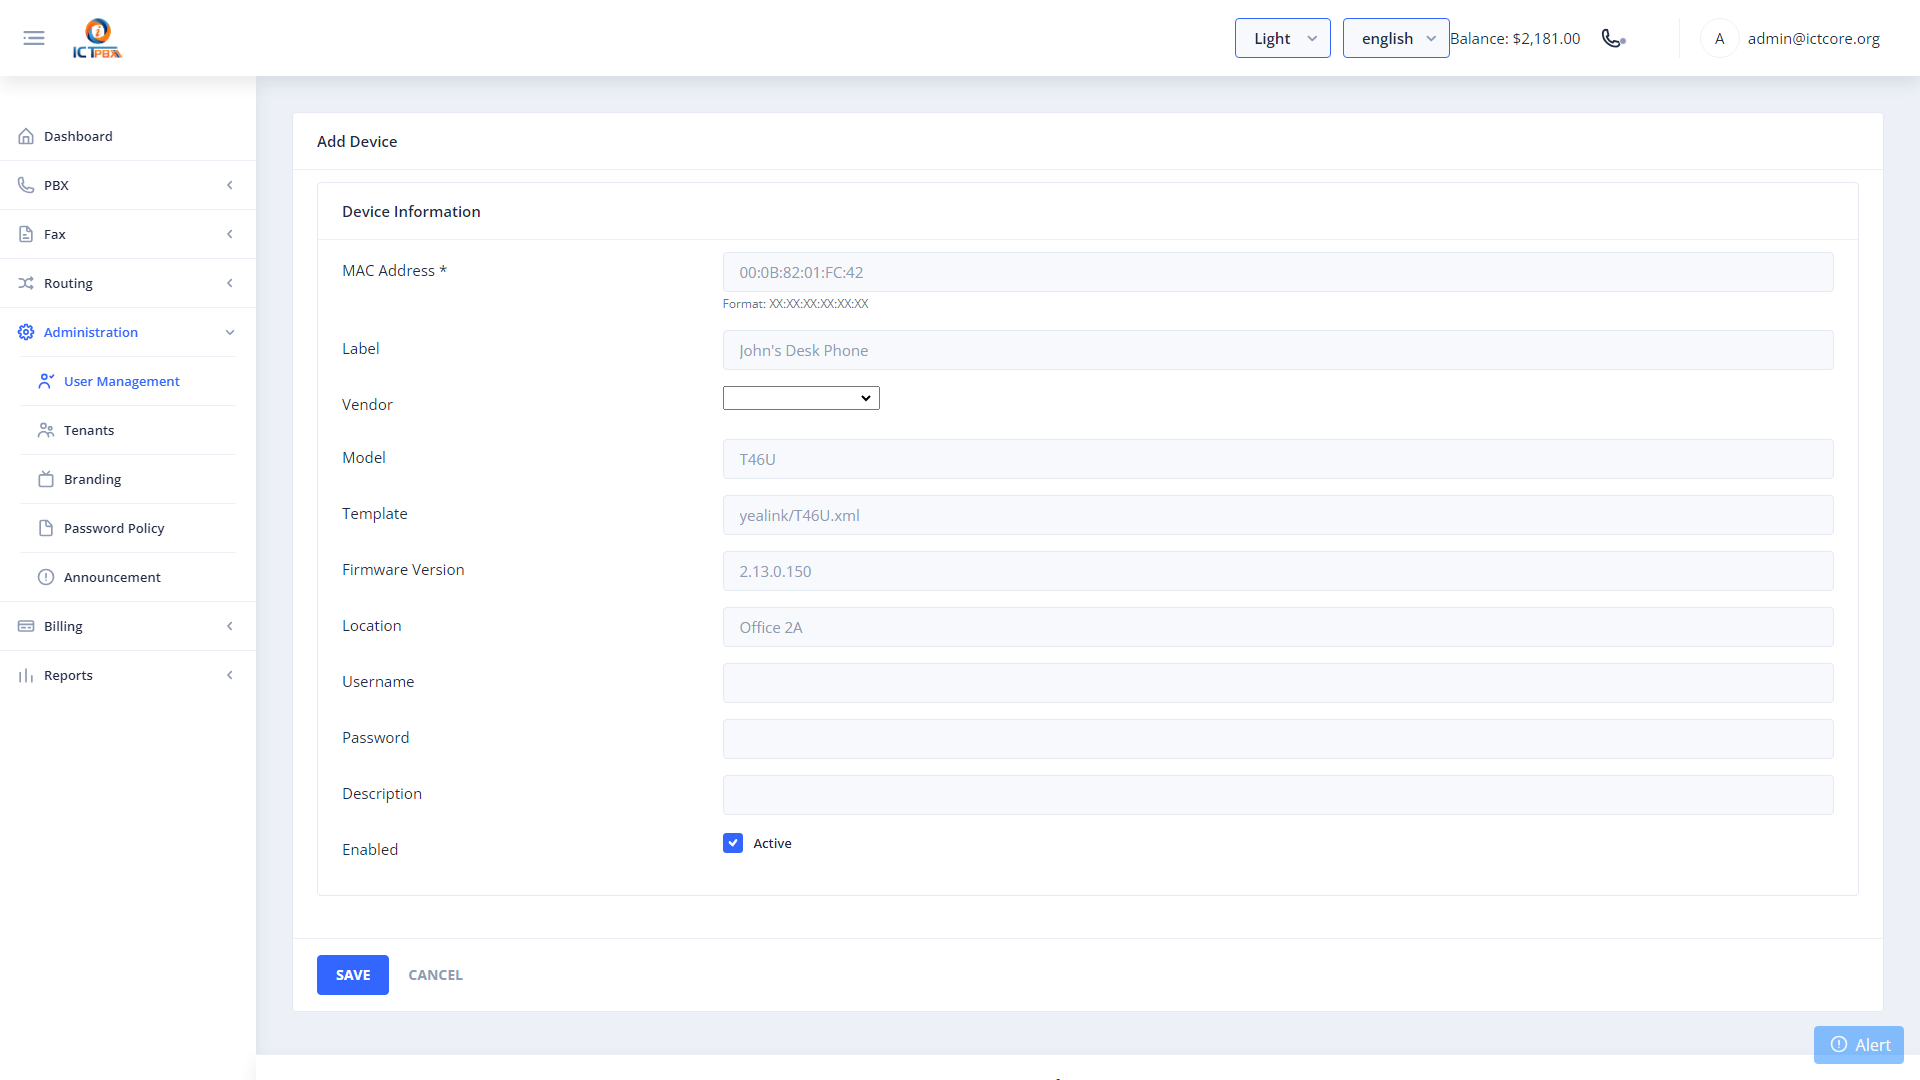
5. Devices
Navigate to PBX → Devices from the sidebar.
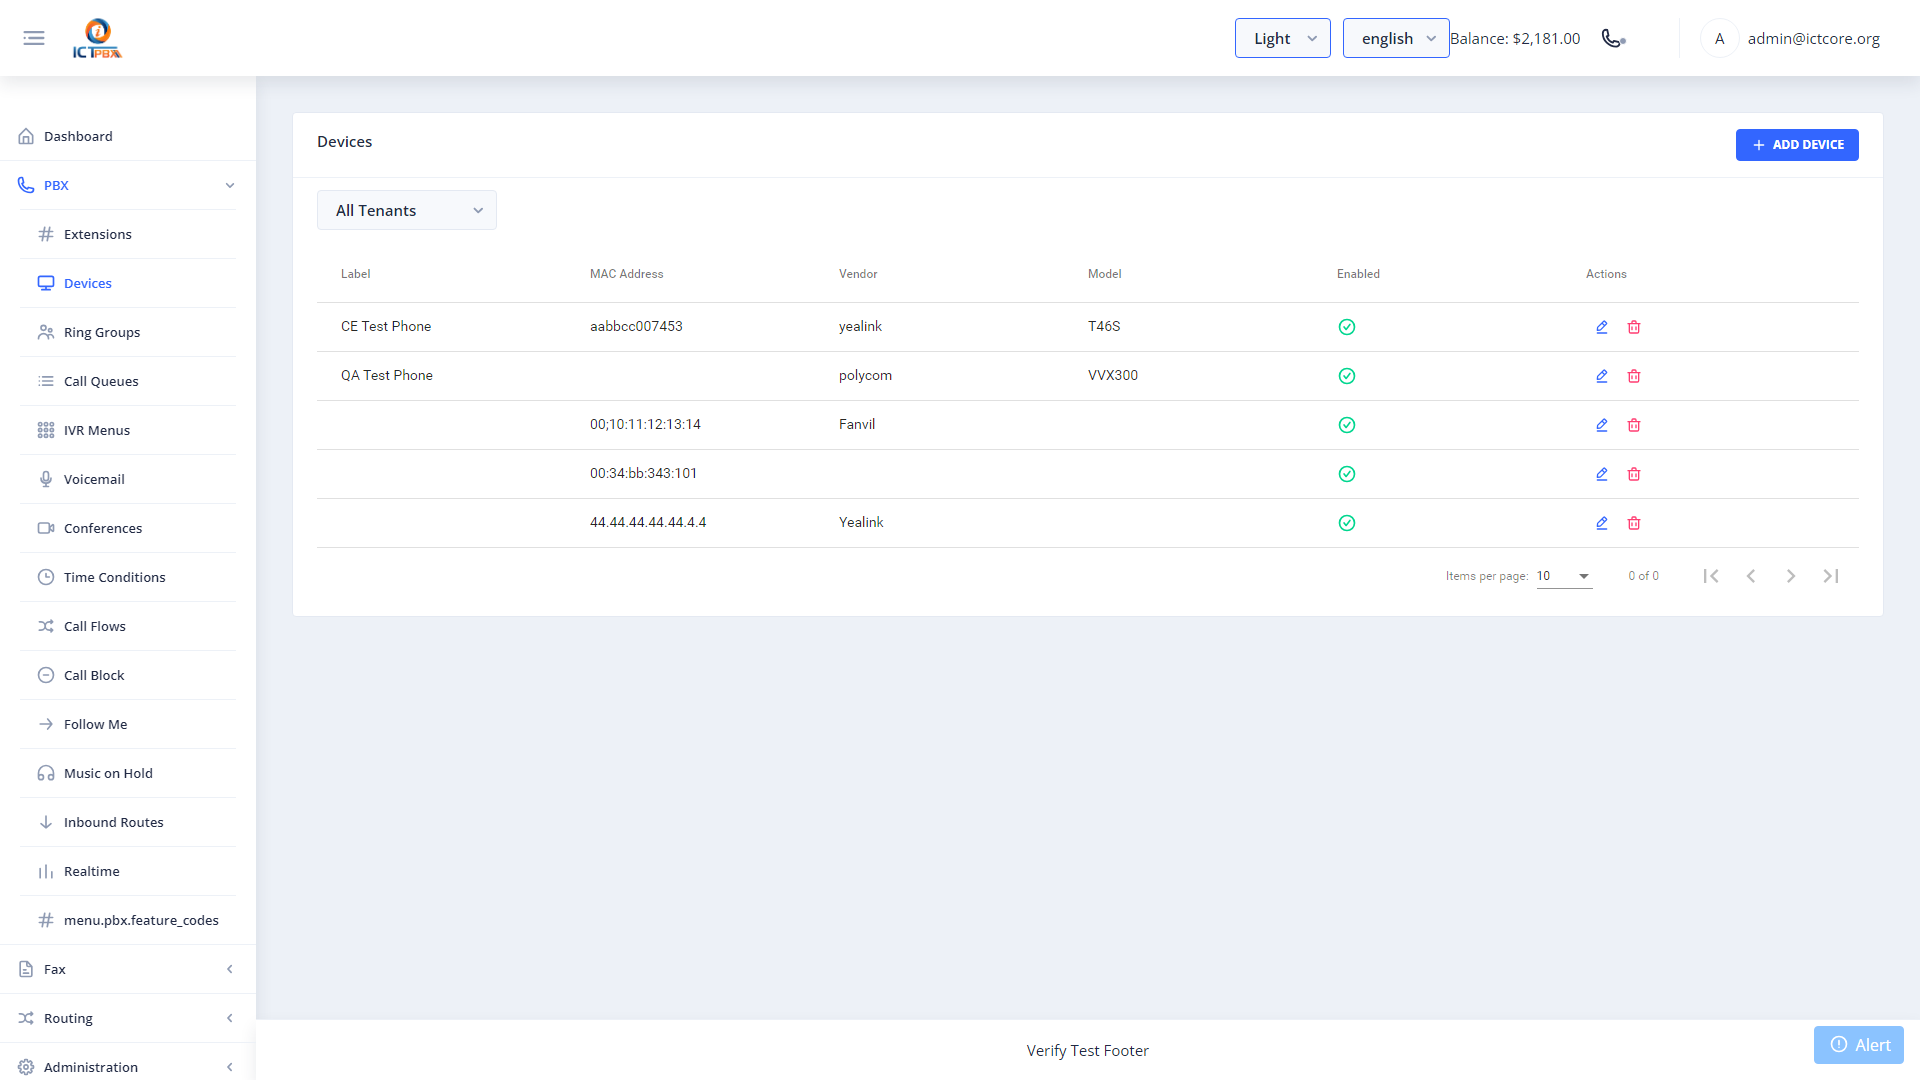
Devices represent physical IP phones or softphone clients registered to your tenant. Each device is bound to an extension.
5.1 Adding a Device
- Click New.
- Select the Extension to bind to.
- Enter the MAC Address (for auto-provisioning physical phones) or a device label.
- Choose the Device Template appropriate to the phone model.
- Click Save.
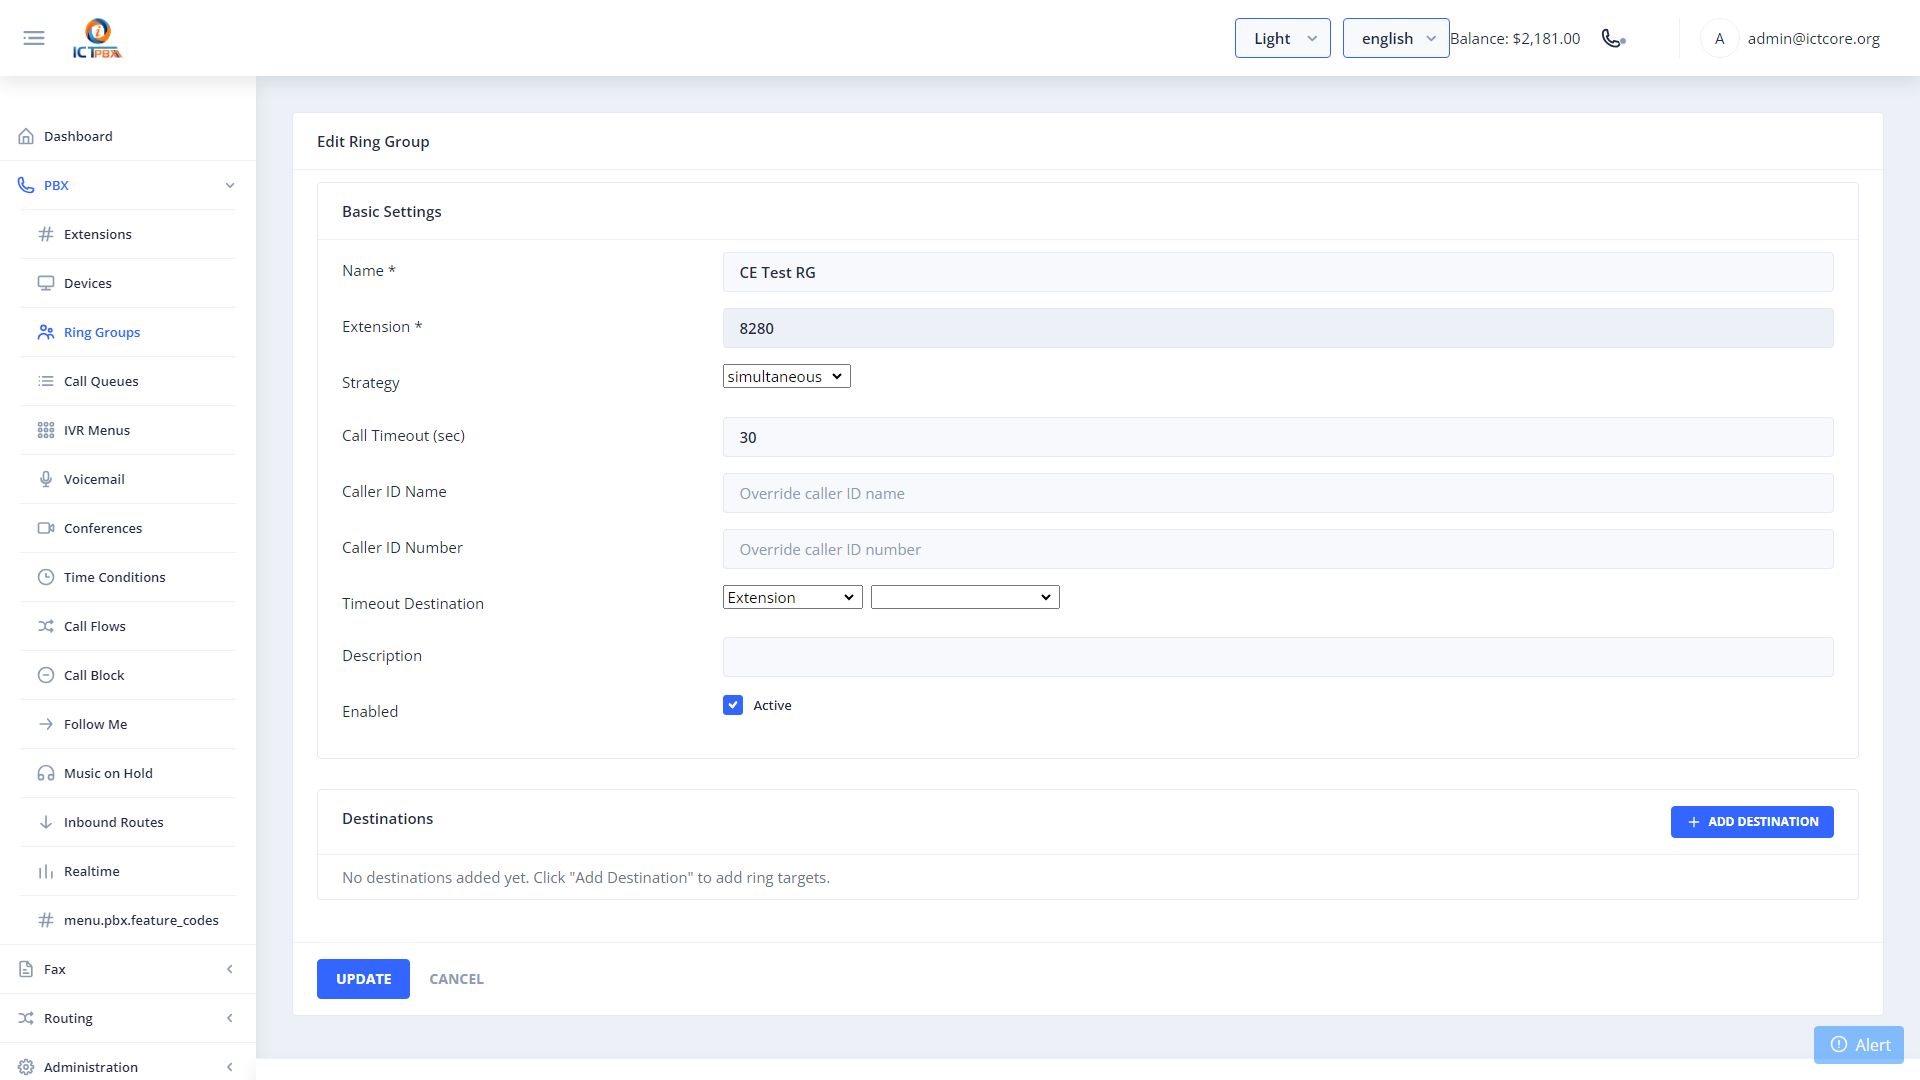
6. Ring Groups
Navigate to PBX → Ring Groups from the sidebar.
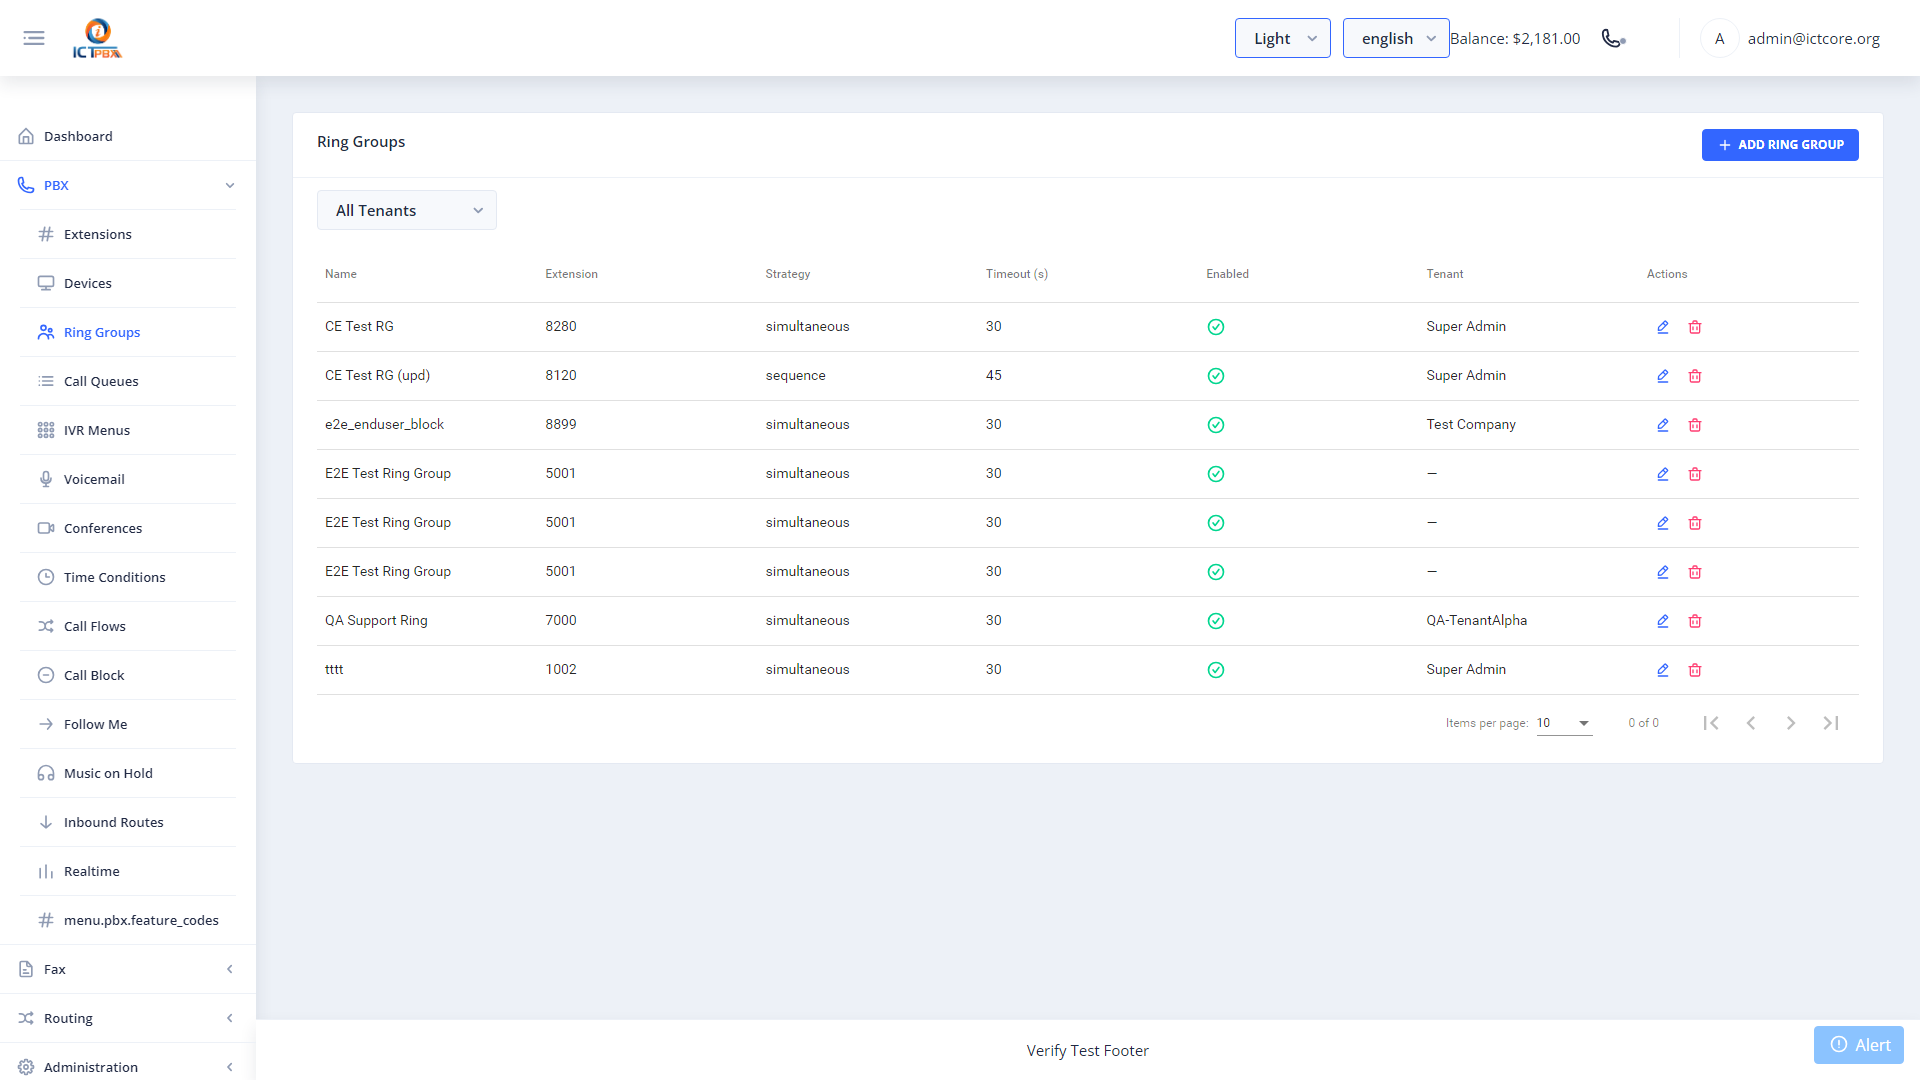
Ring Groups allow a single DID to simultaneously ring multiple extensions. Useful for hunt groups, support lines, and sales teams.
6.1 Creating a Ring Group
- Click New.
- Enter a Ring Group Name and Extension (the group’s internal number, e.g.
2000). - Set the Ring Strategy — simultaneous, sequential, or round-robin.
- Set Ring Timeout — seconds before forwarding to the destination.
- Click Add Member to add extensions.
- Set the Timeout Destination — where calls go if unanswered.
- Click Save.
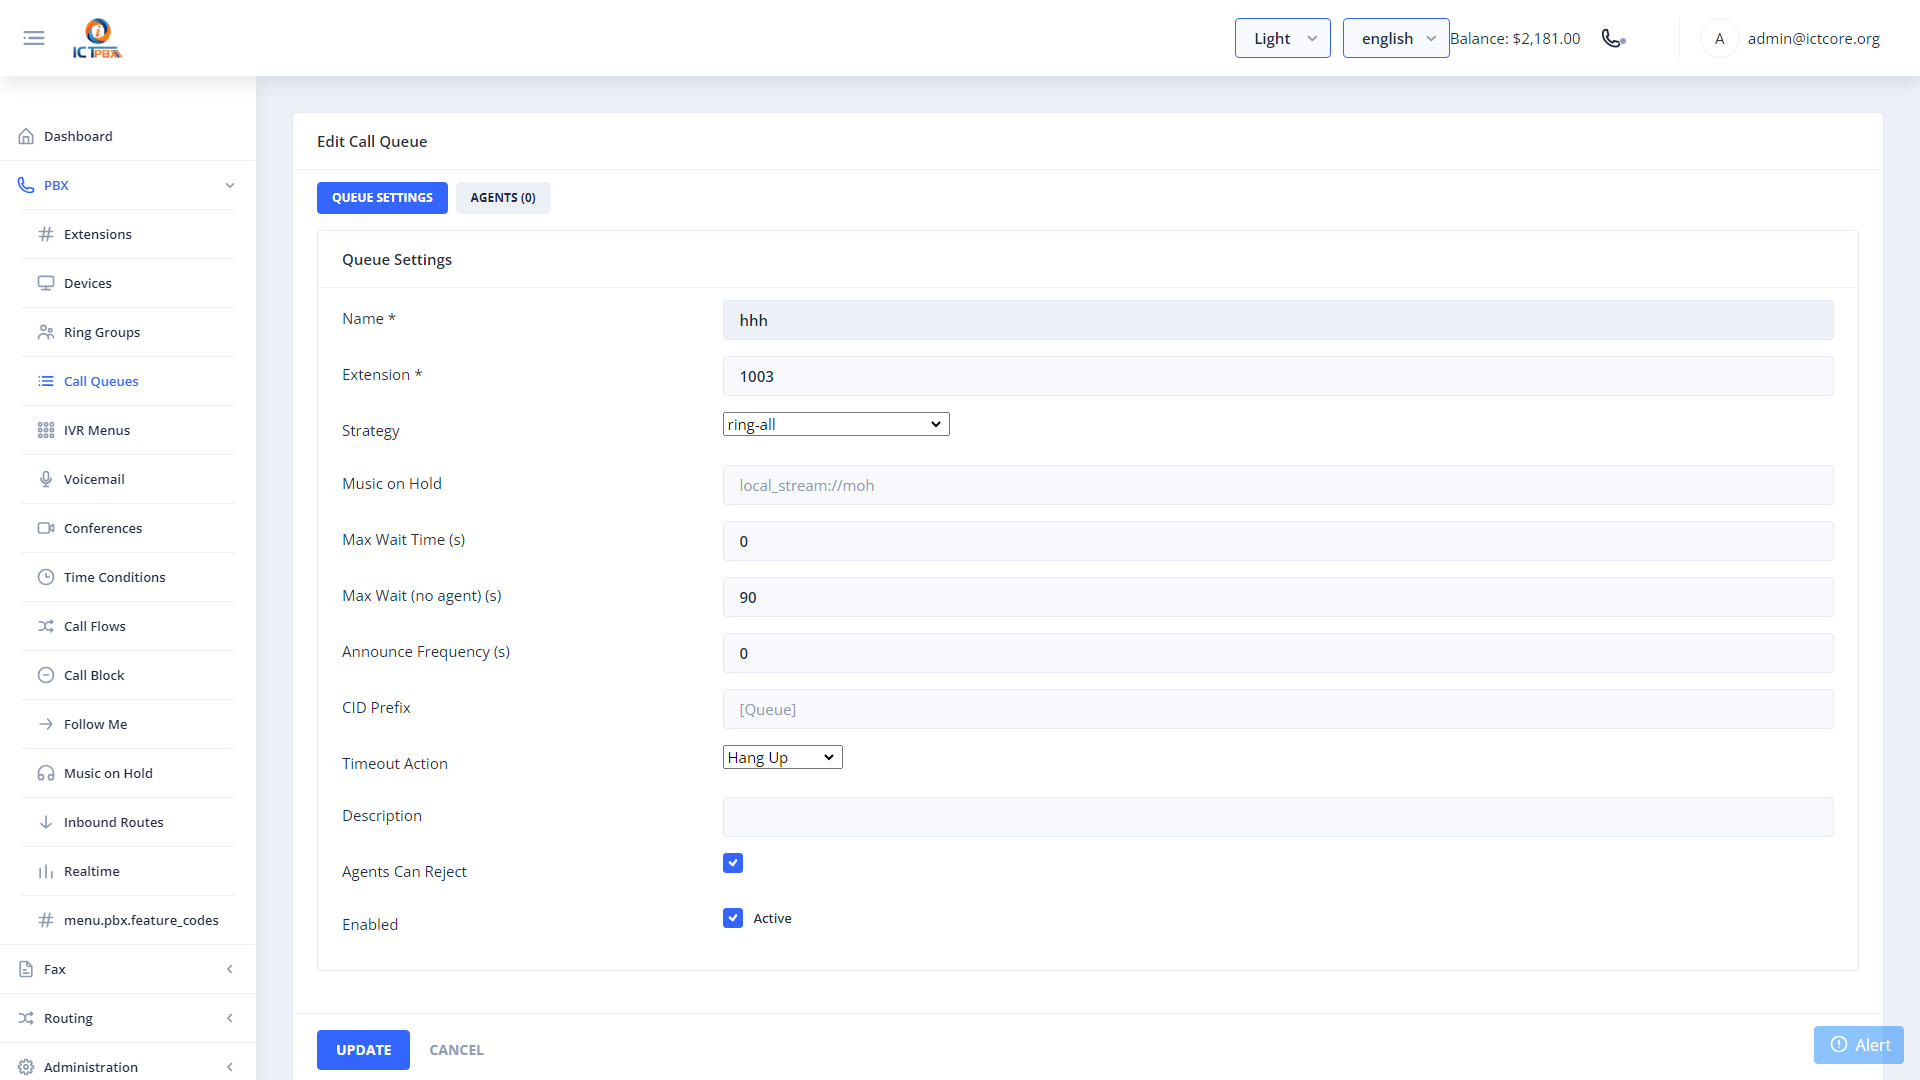
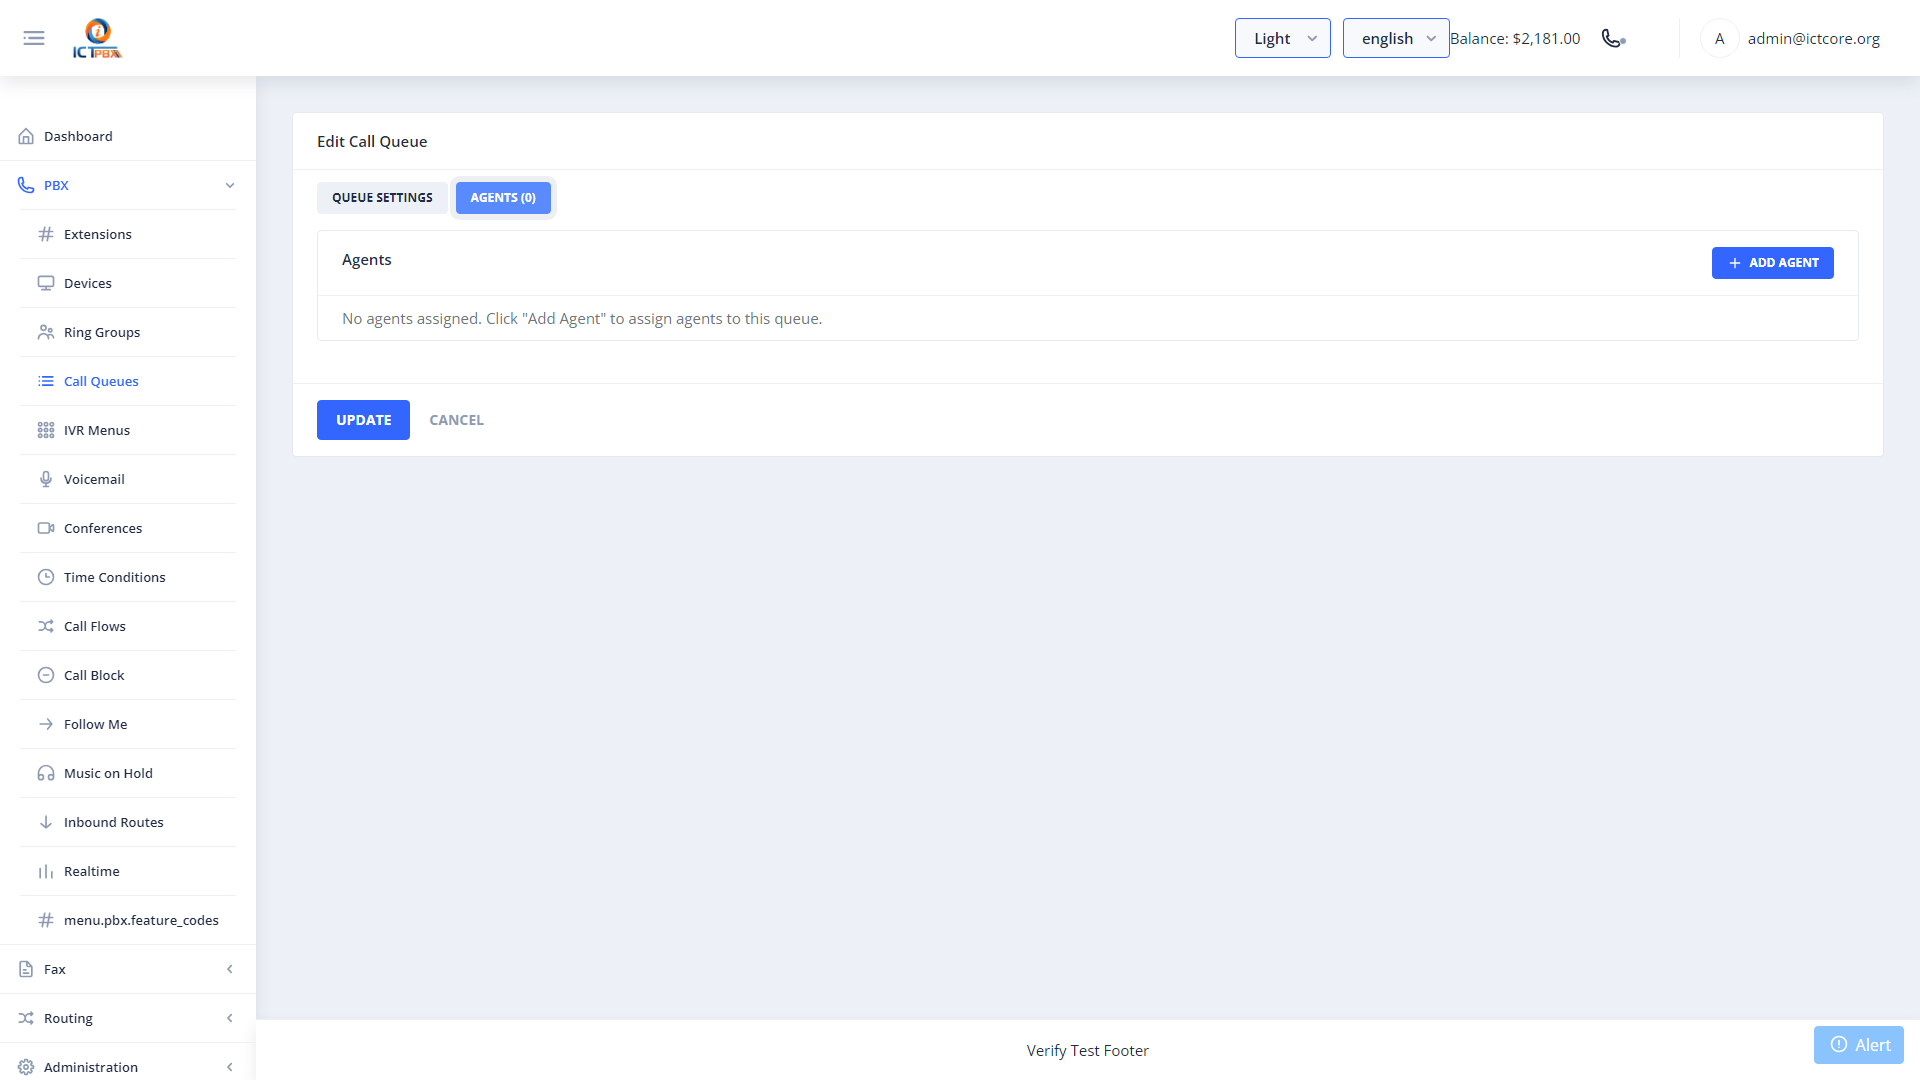
7. Call Queues (ACD)
Navigate to PBX → Call Queues from the sidebar.
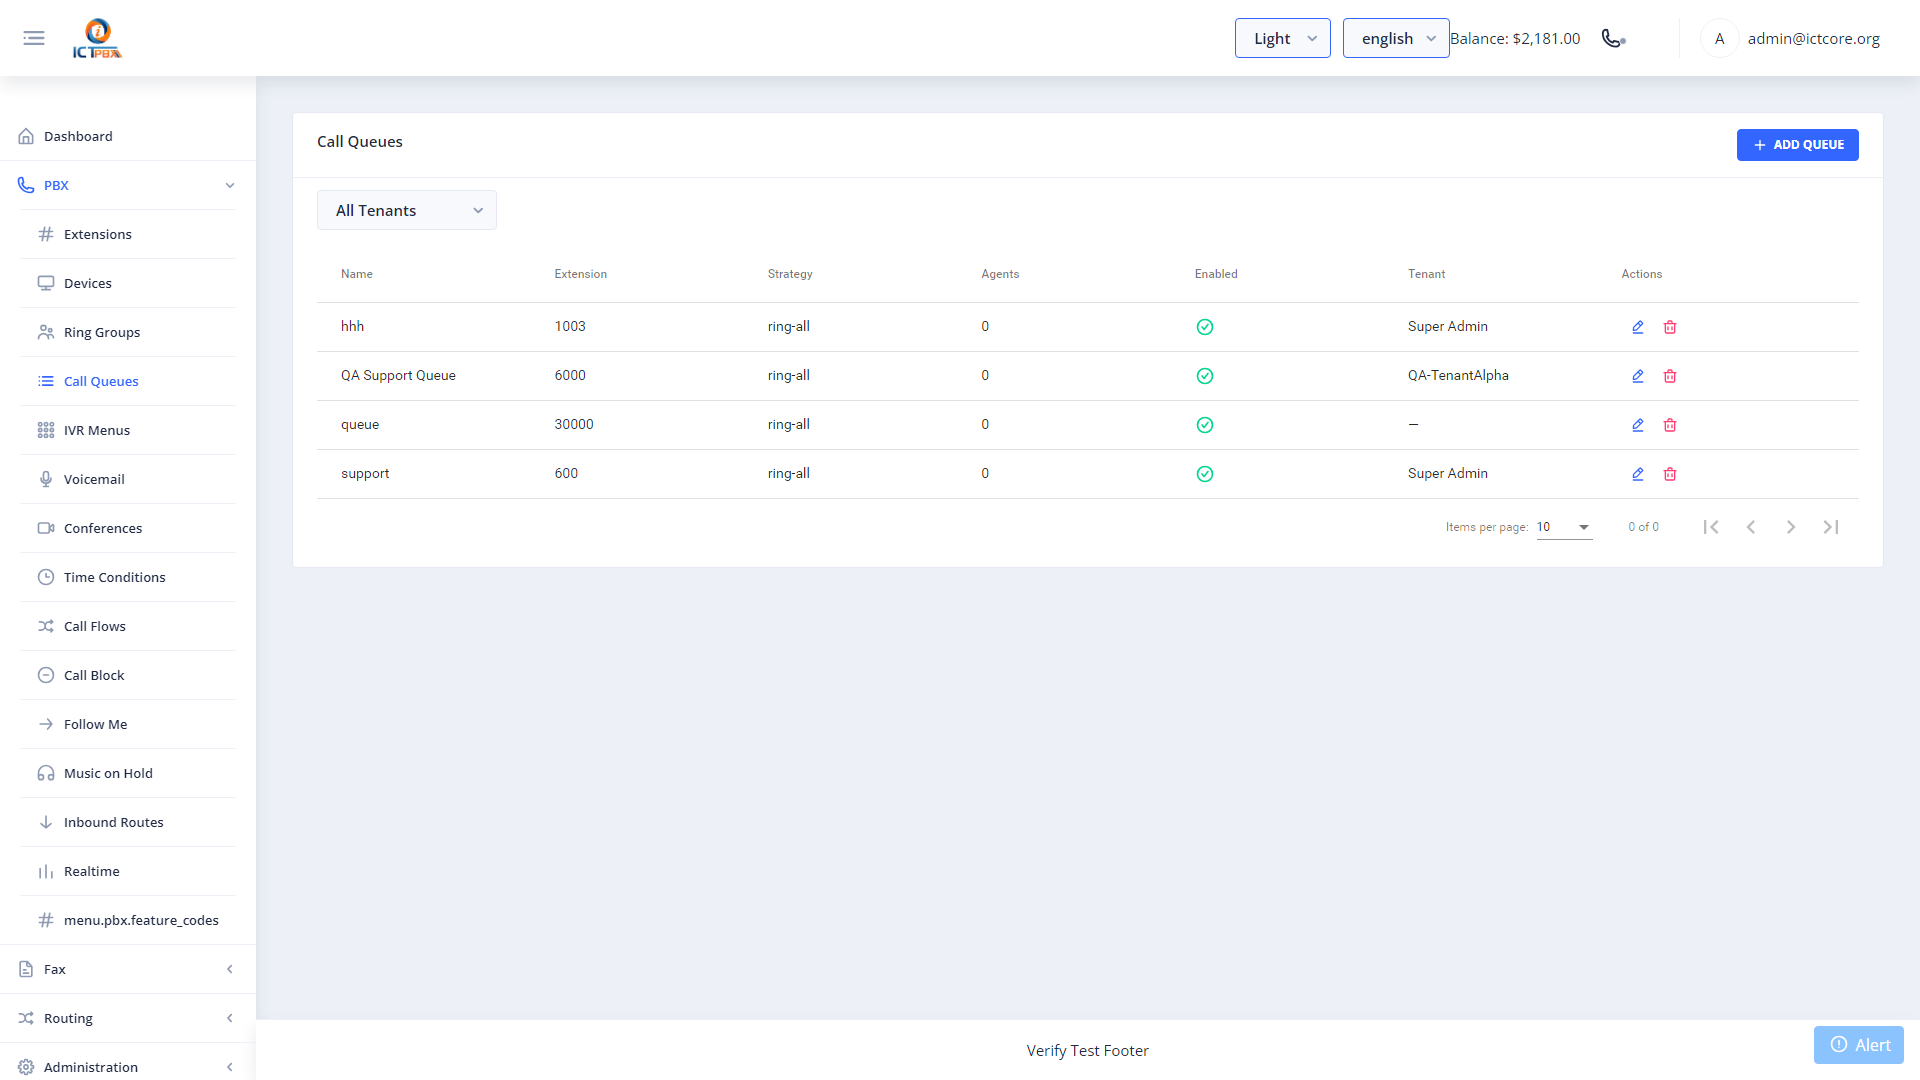
Call Queues provide advanced Automatic Call Distribution (ACD) with configurable strategies, hold music, and agent tier management.
7.1 Creating a Queue
- Click New.
- Enter a Queue Name and Extension.
- Set the Strategy — round-robin, longest-idle, etc.
- Set Max Wait Time and Max No Answer.
- Configure hold music and announcements.
- Click Save.
7.2 Managing Queue Agents
Click the Agents tab inside the queue form.
- Click Add Tier to add an agent extension to the queue.
- Set Tier Level and Tier Position to define call priority order.
- Click Save.
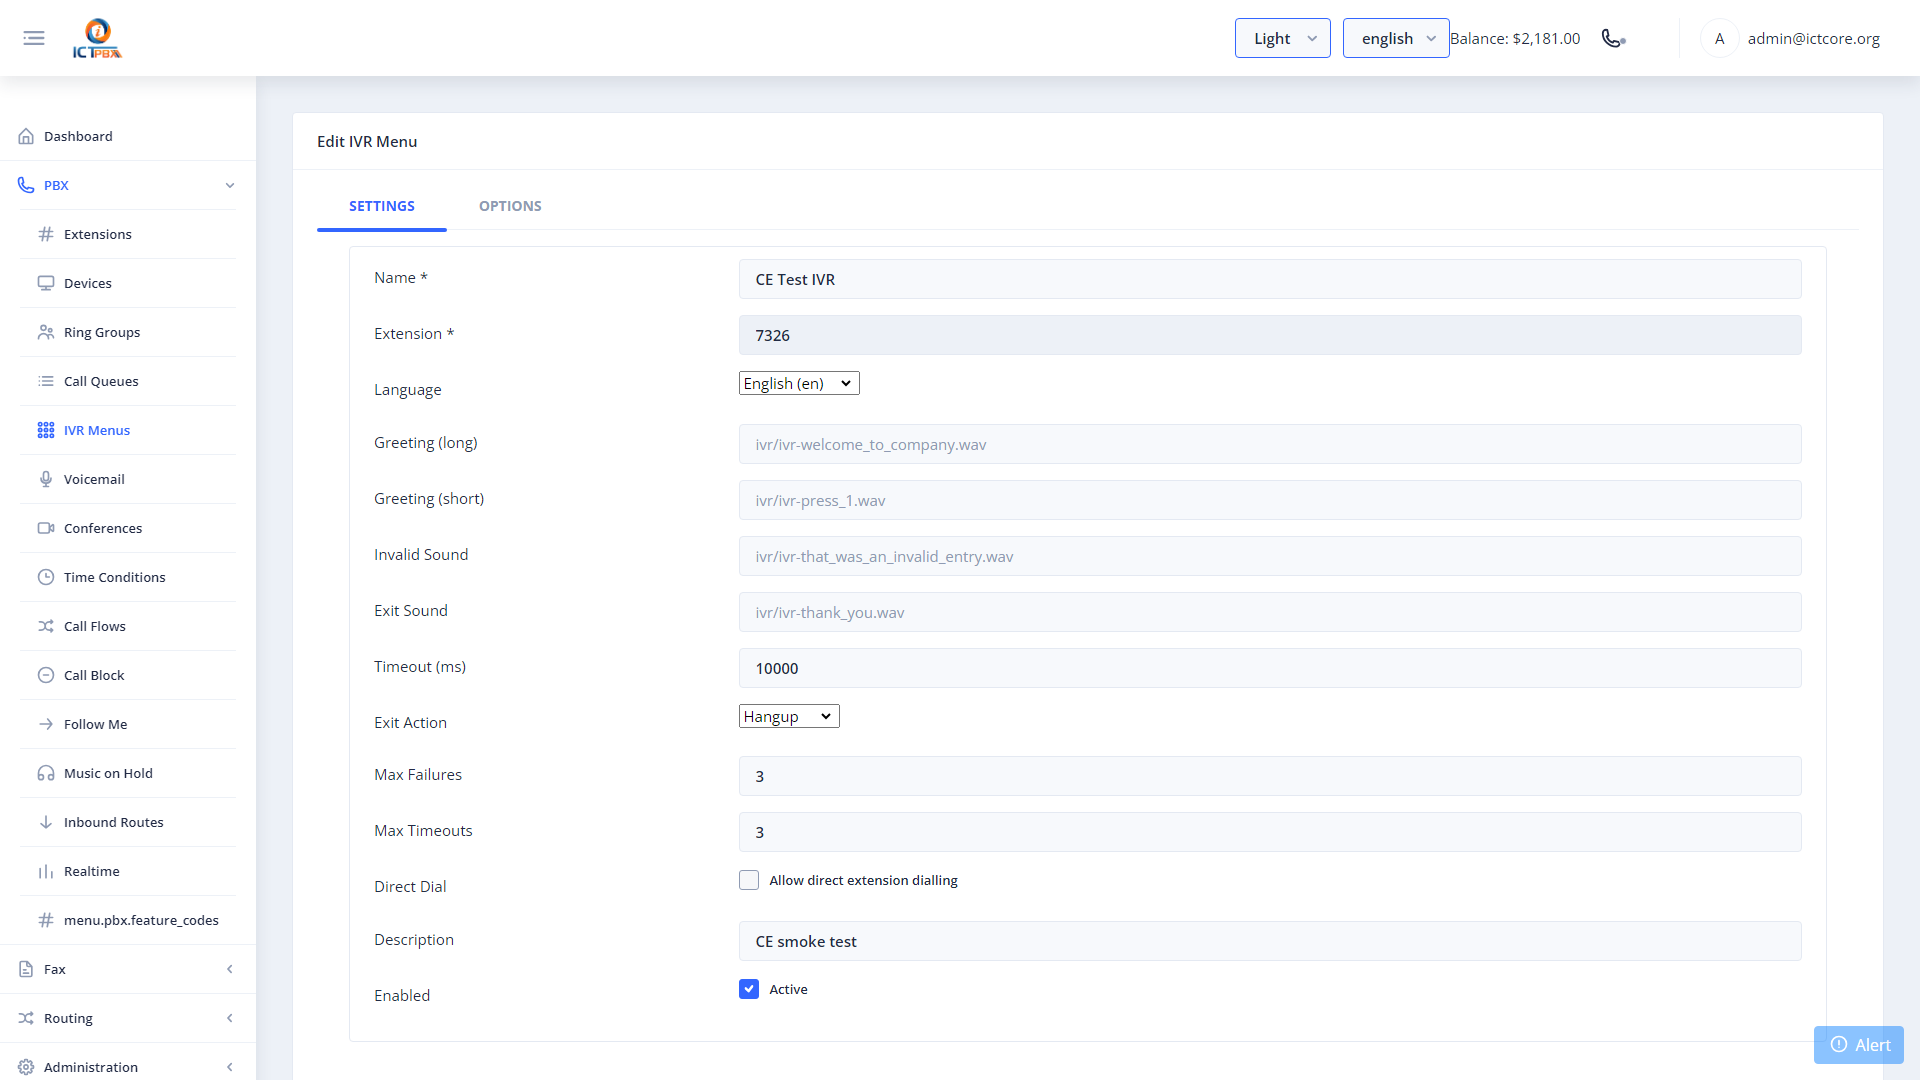
8. IVR Menus (Auto-Attendant)
Navigate to PBX → IVR Menus from the sidebar.
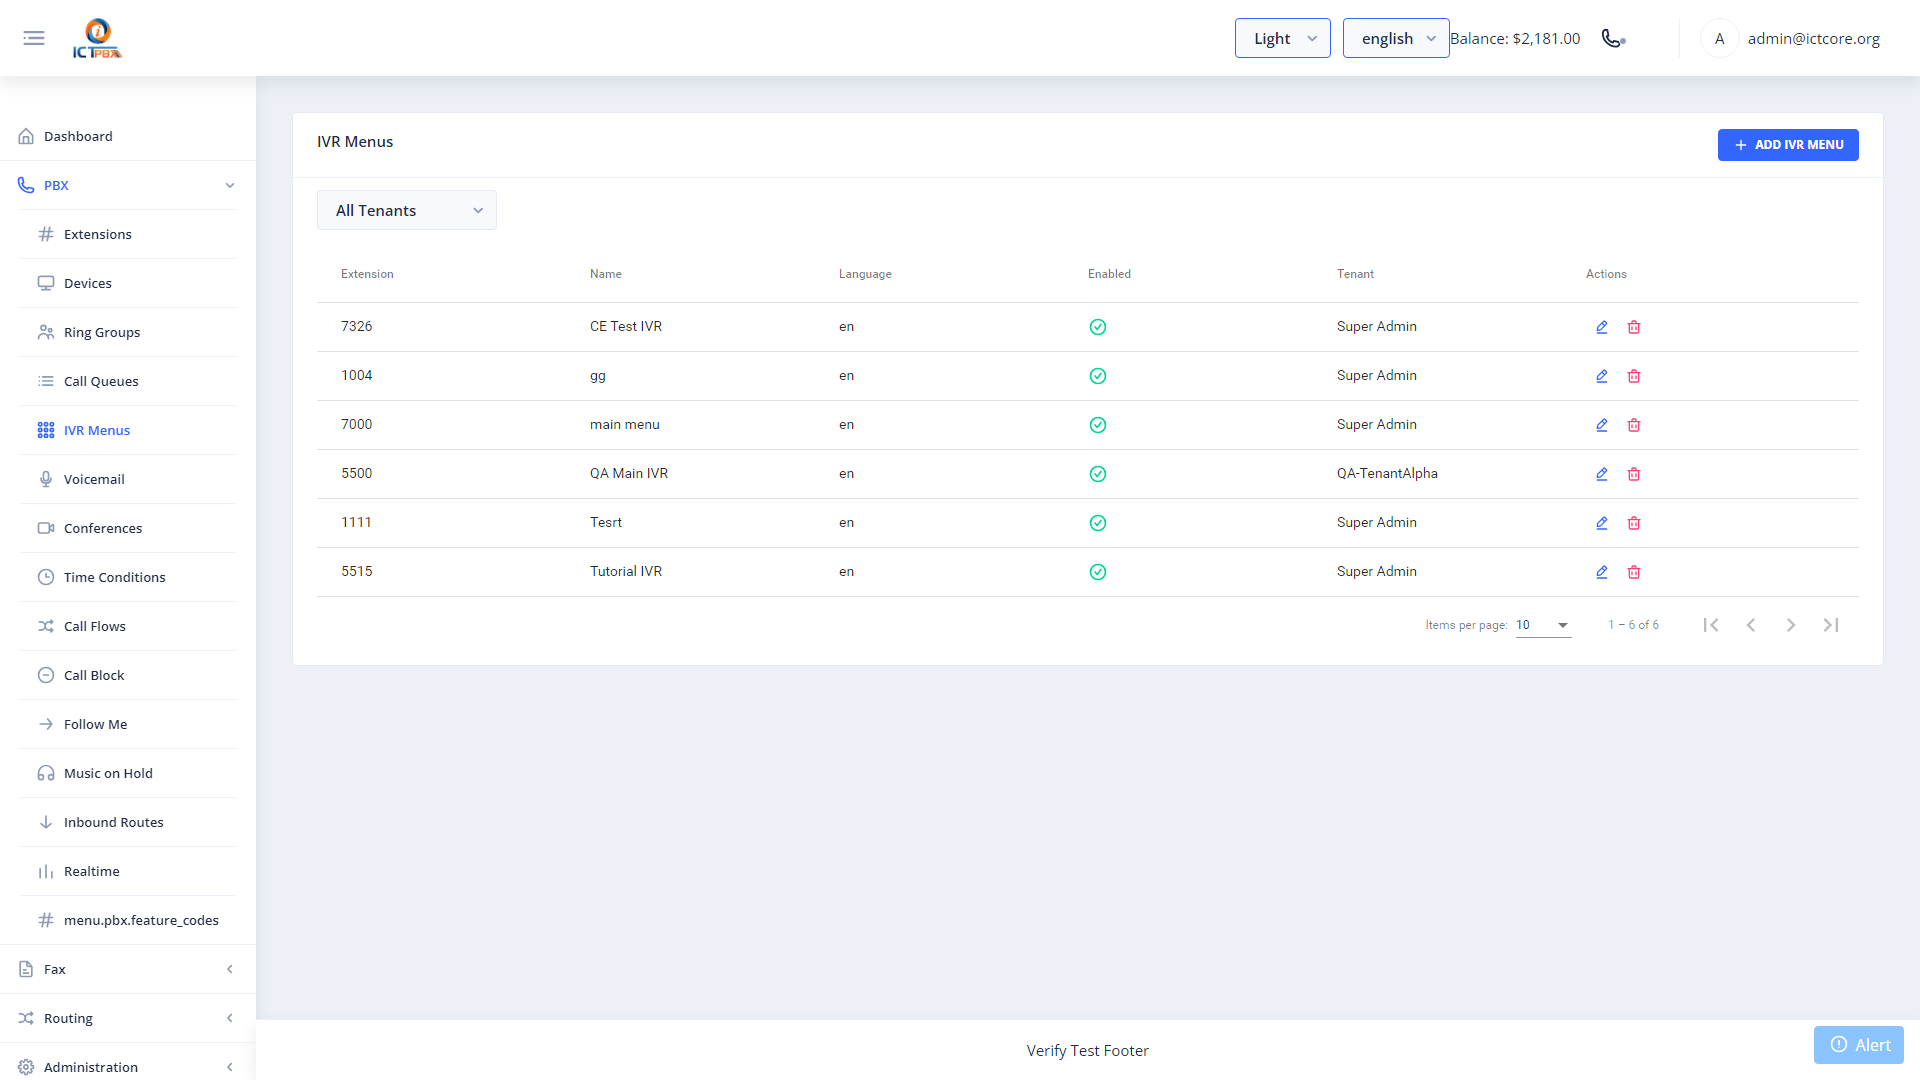
IVR Menus present callers with a dial-by-digit menu — “Press 1 for Sales, Press 2 for Support…”
8.1 Creating an IVR Menu
- Click New.
- Enter the IVR Name and Extension.
- Upload or select a Greeting audio file.
- Set Timeout and Exit Action (what happens if the caller presses nothing).
- Click Save.
8.2 Adding IVR Options
Click the Options tab inside the IVR form.
- Click Add Option.
- Set the Digit the caller presses (0–9, \*, #).
- Set the Destination Type and Destination (extension, ring group, queue, external number, voicemail, etc.).
- Click Save.
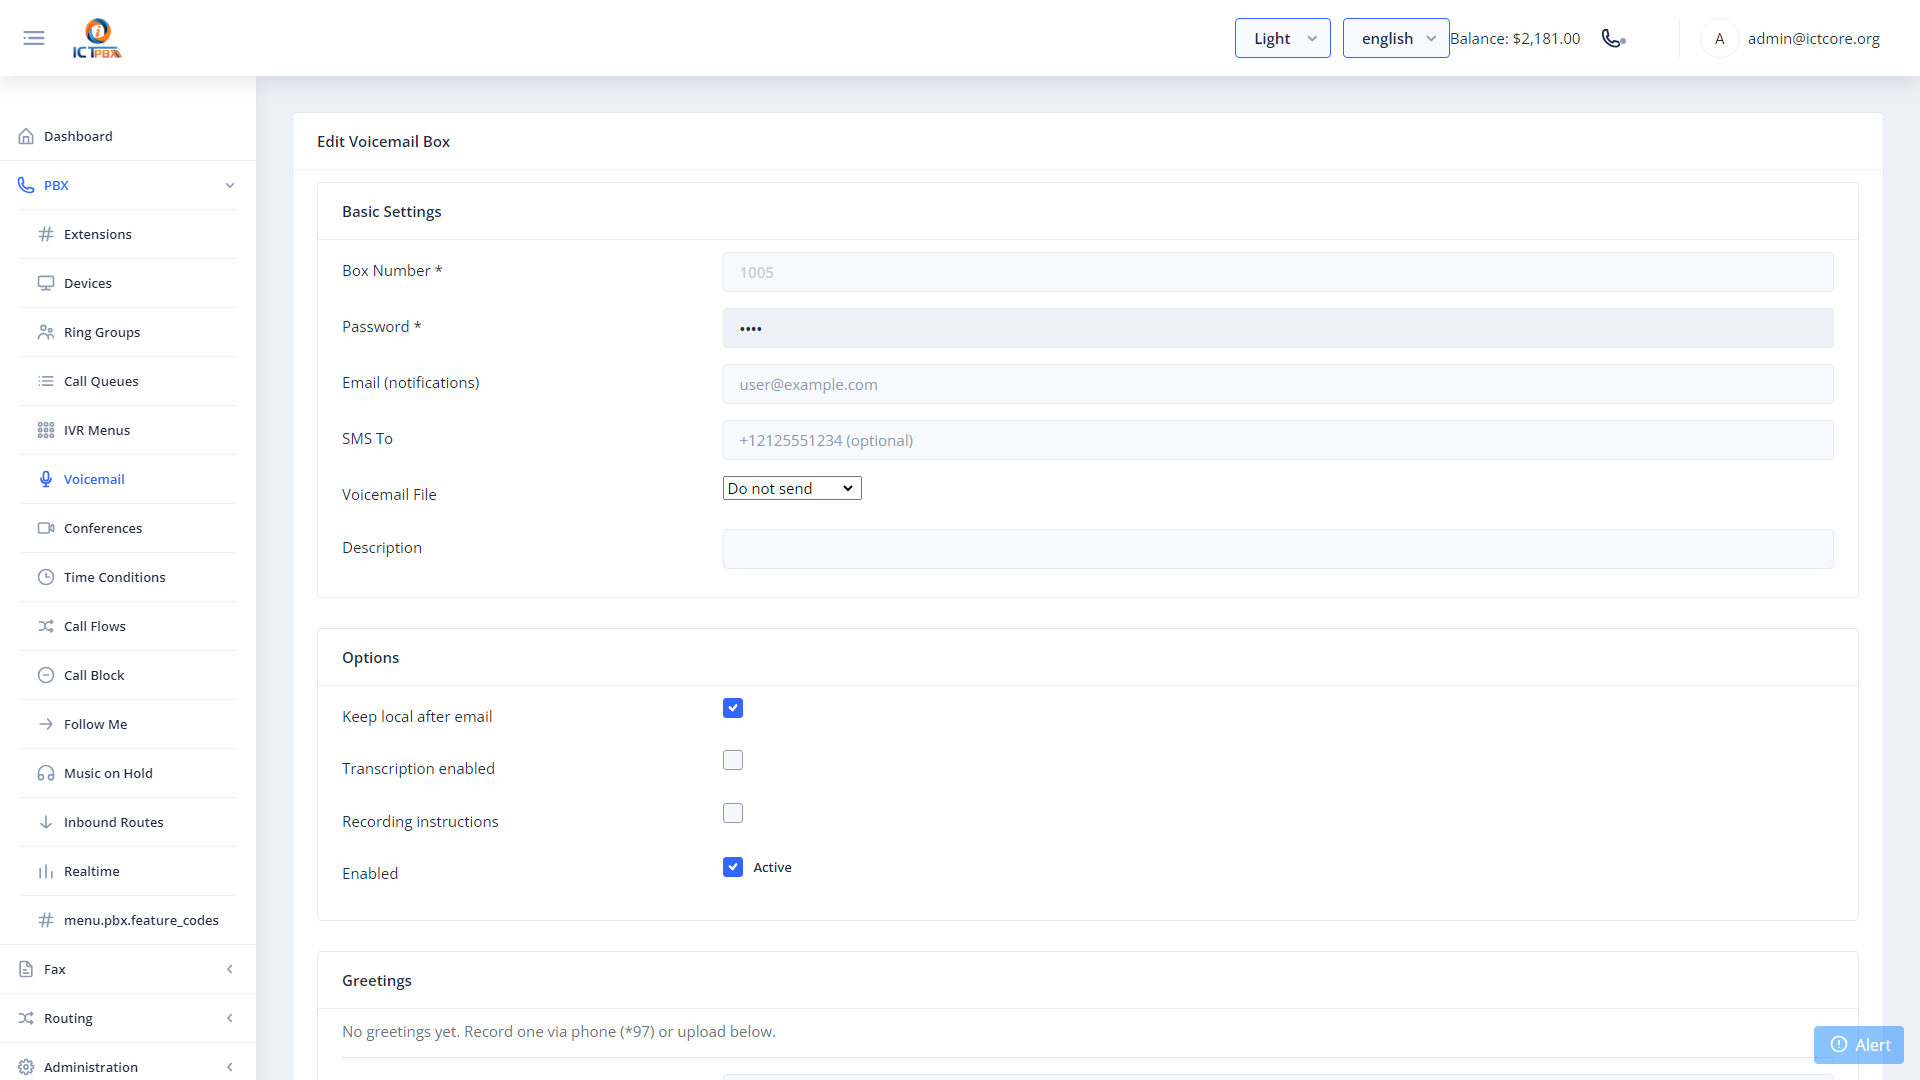
9. Voicemail
Navigate to PBX → Voicemail from the sidebar.

Voicemail boxes receive messages when an extension is unavailable. Messages can be delivered by email as MP3 attachments.
9.1 Creating a Voicemail Box
- Click New.
- Select the Extension to attach the voicemail to.
- Set the PIN for telephone retrieval.
- Enter the Email Address for email-to-voicemail delivery.
- Configure greeting preferences.
- Click Save.
10. Conference Rooms
Navigate to PBX → Conference Rooms from the sidebar.
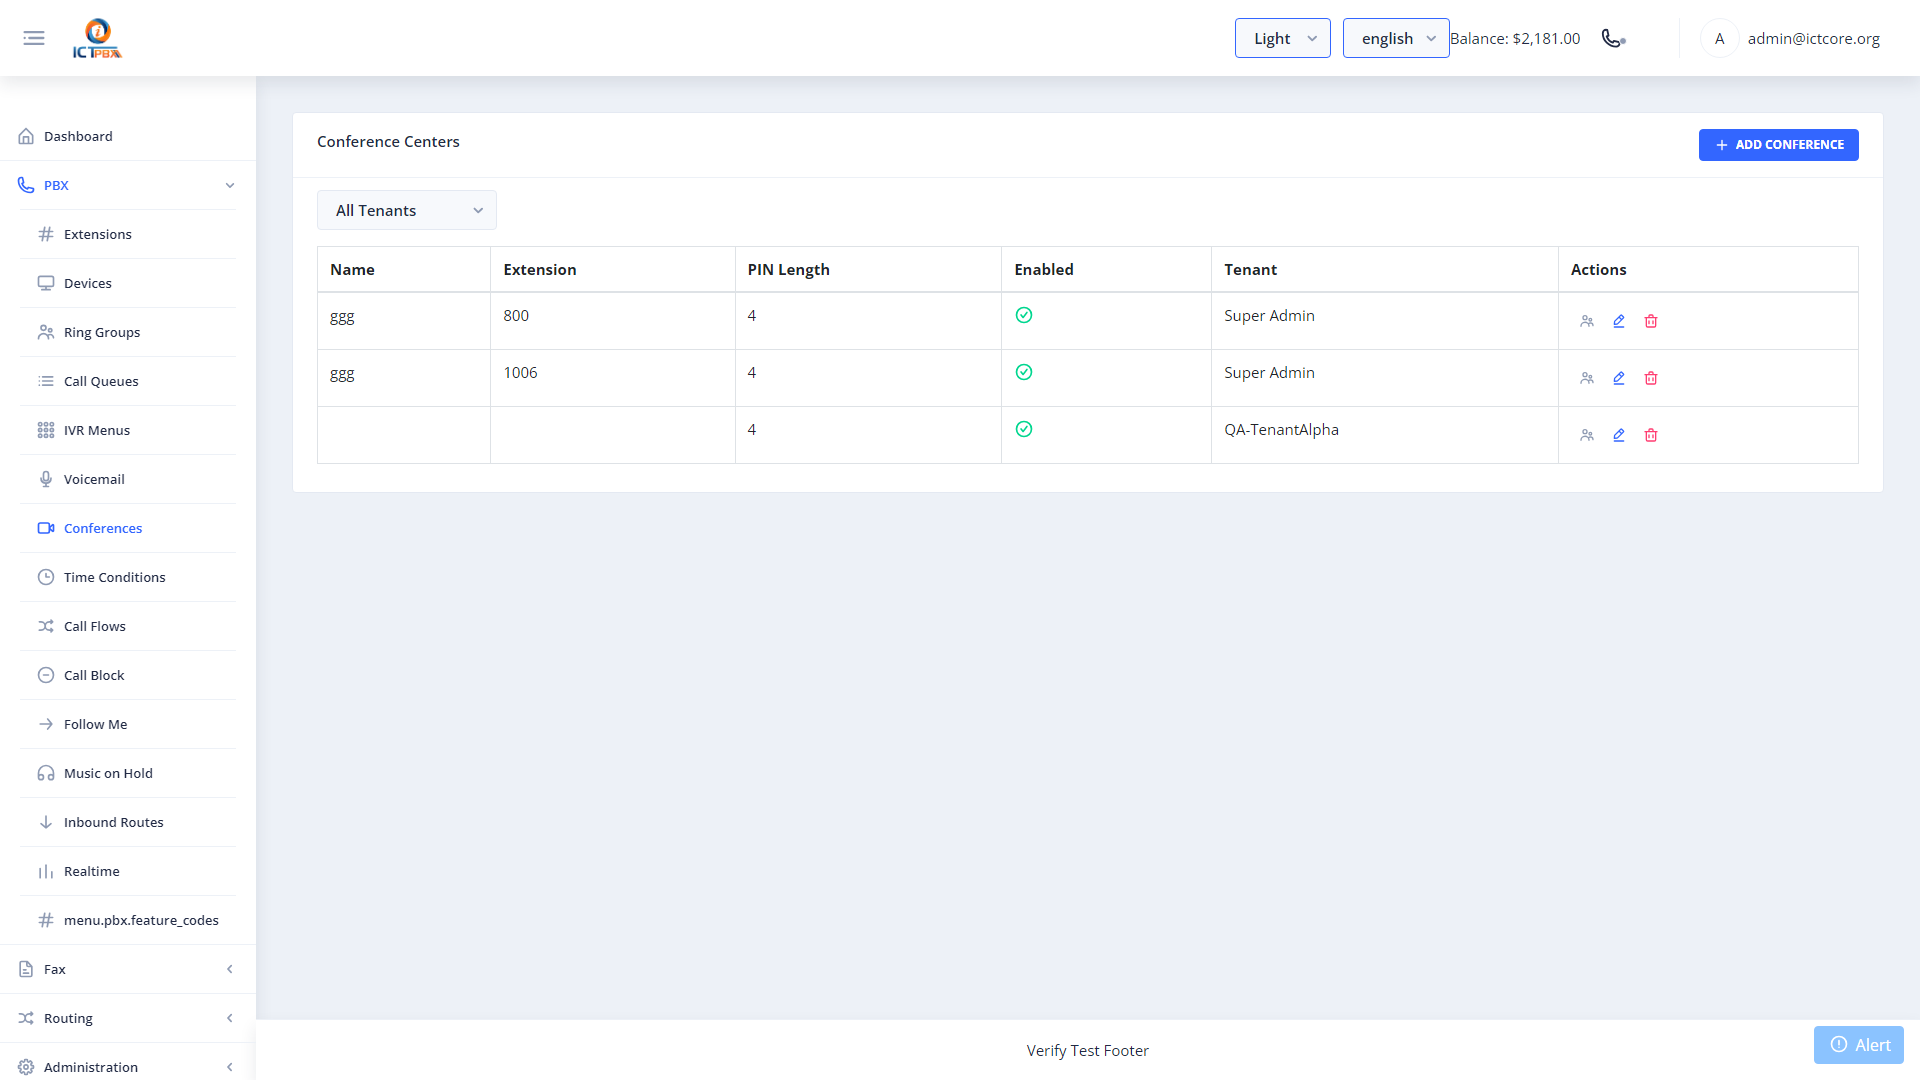
Conference Rooms allow multiple internal and external participants to join an audio conference simultaneously.
10.1 Creating a Conference Room
- Click New.
- Enter the Conference Name and Extension (the number participants dial).
- Set a PIN (optional but recommended).
- Configure moderator PIN and recording options.
- Click Save.
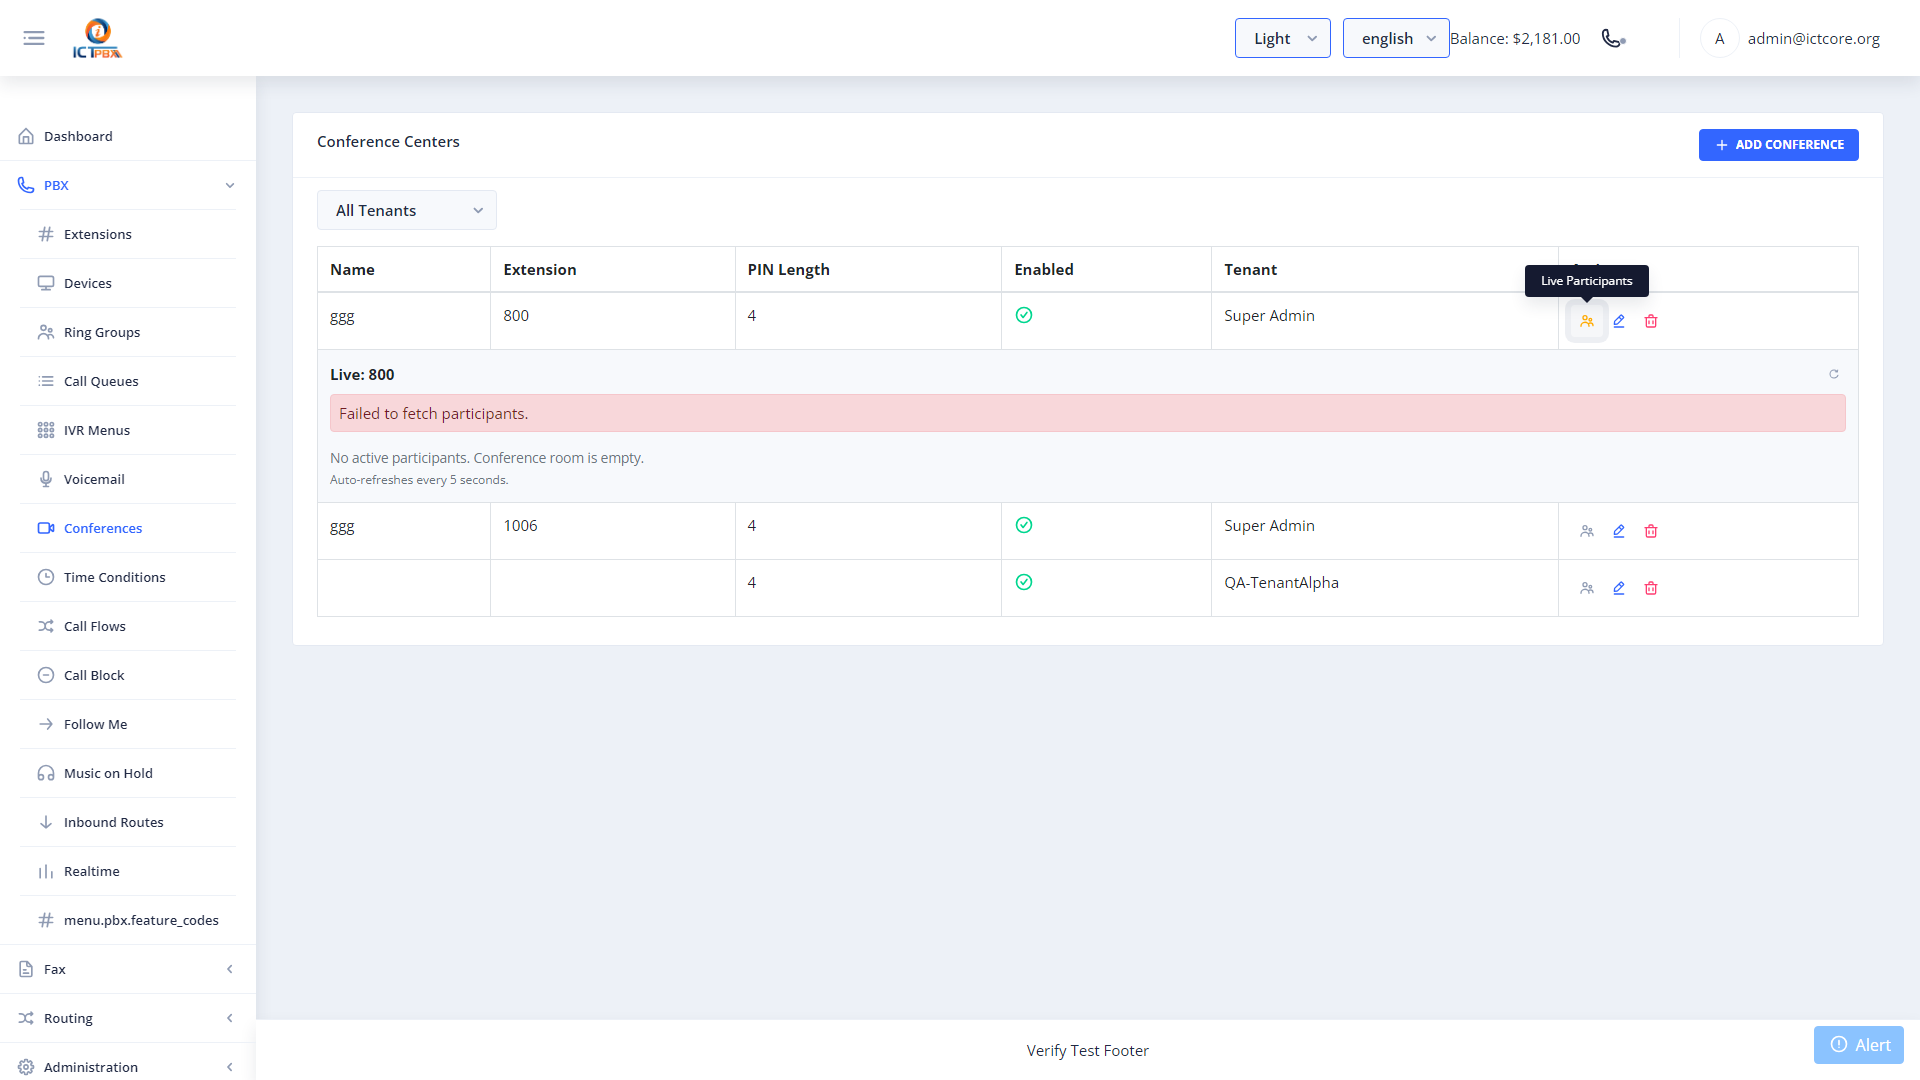
Participants dial the conference extension from their extension or from an IVR menu option.
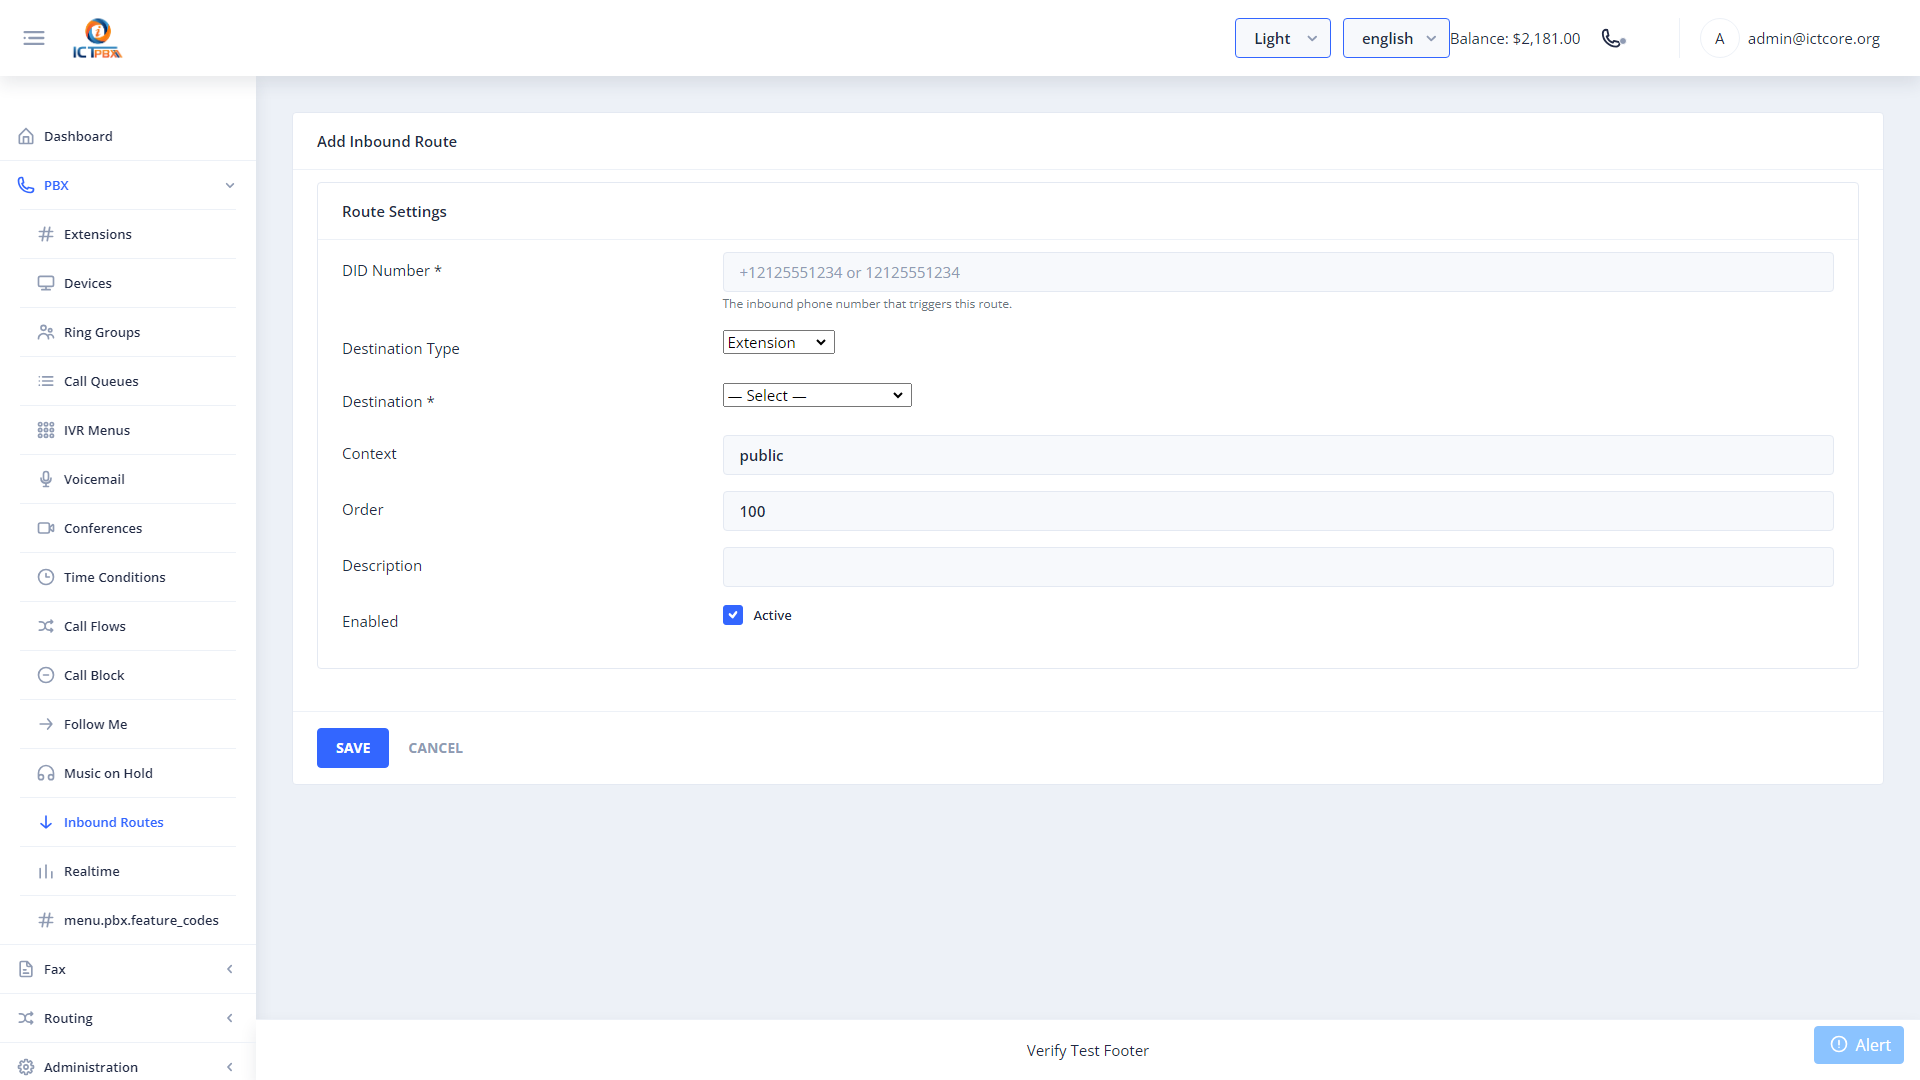
11. Inbound Routes
Navigate to PBX → Inbound Routes from the sidebar.

Inbound Routes define how incoming calls on each DID phone number are routed — to an extension, ring group, IVR menu, voicemail, or time-condition-based flow.
11.1 Creating an Inbound Route
- Click New.
- Select the DID (phone number) to route.
- Choose the Destination Type — Extension, Ring Group, IVR Menu, Voicemail, Call Flow, etc.
- Select the specific Destination.
- Click Save.
12. Call Flows (Business Hours Routing)
Navigate to PBX → Call Flows from the sidebar.
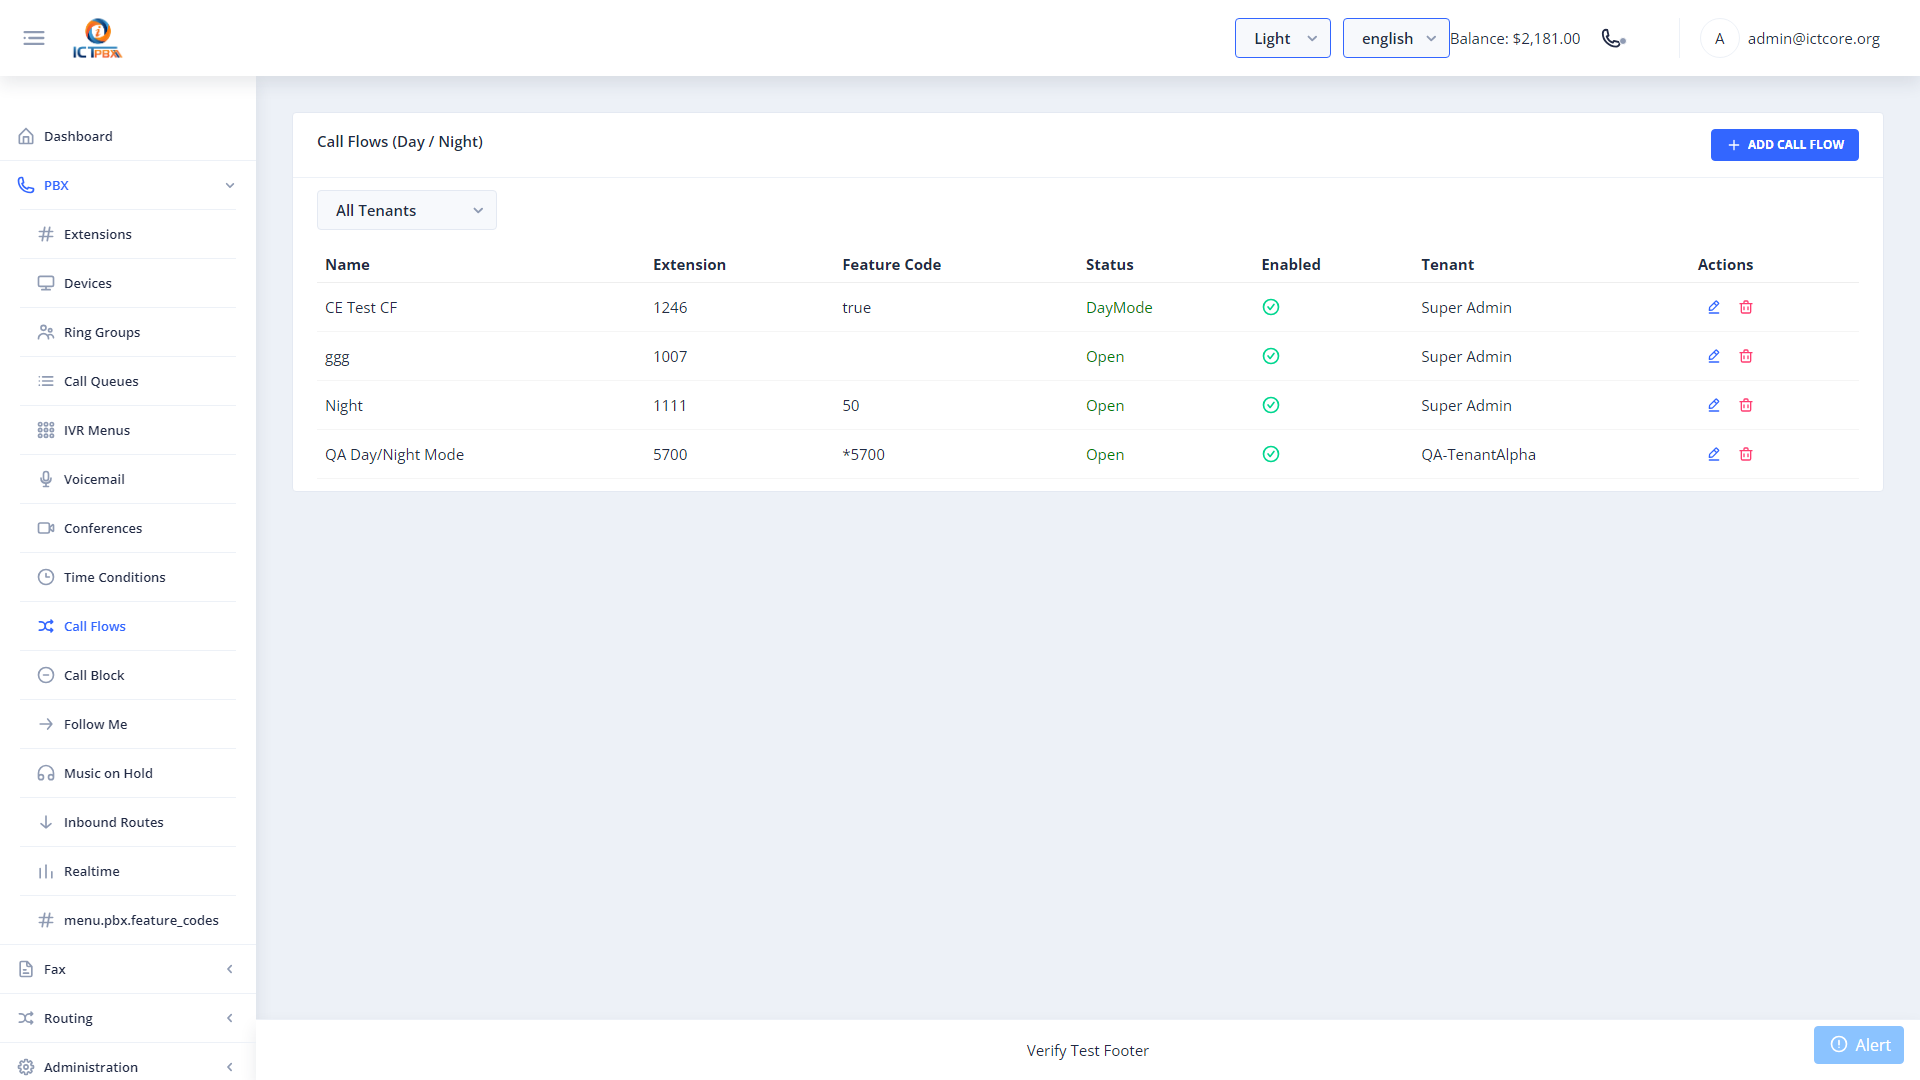
Call Flows route inbound calls differently depending on the time of day — for example, to the auto-attendant during business hours and to voicemail after hours.
12.1 Creating a Call Flow
- Click New.
- Enter a Flow Name.
- Set the Main Destination — where calls go during active hours.
- Set the Alternative Destination — where calls go outside active hours.
- Select the Time Condition schedule to use.
- Click Save.
Associate a Time Condition schedule with the Call Flow so the system switches routes automatically.
12.2 Time Conditions
Navigate to PBX → Time Conditions to define named time schedules.

Create schedules for your business hours, holiday hours, etc. Each time condition has day-of-week and time-of-day rules.
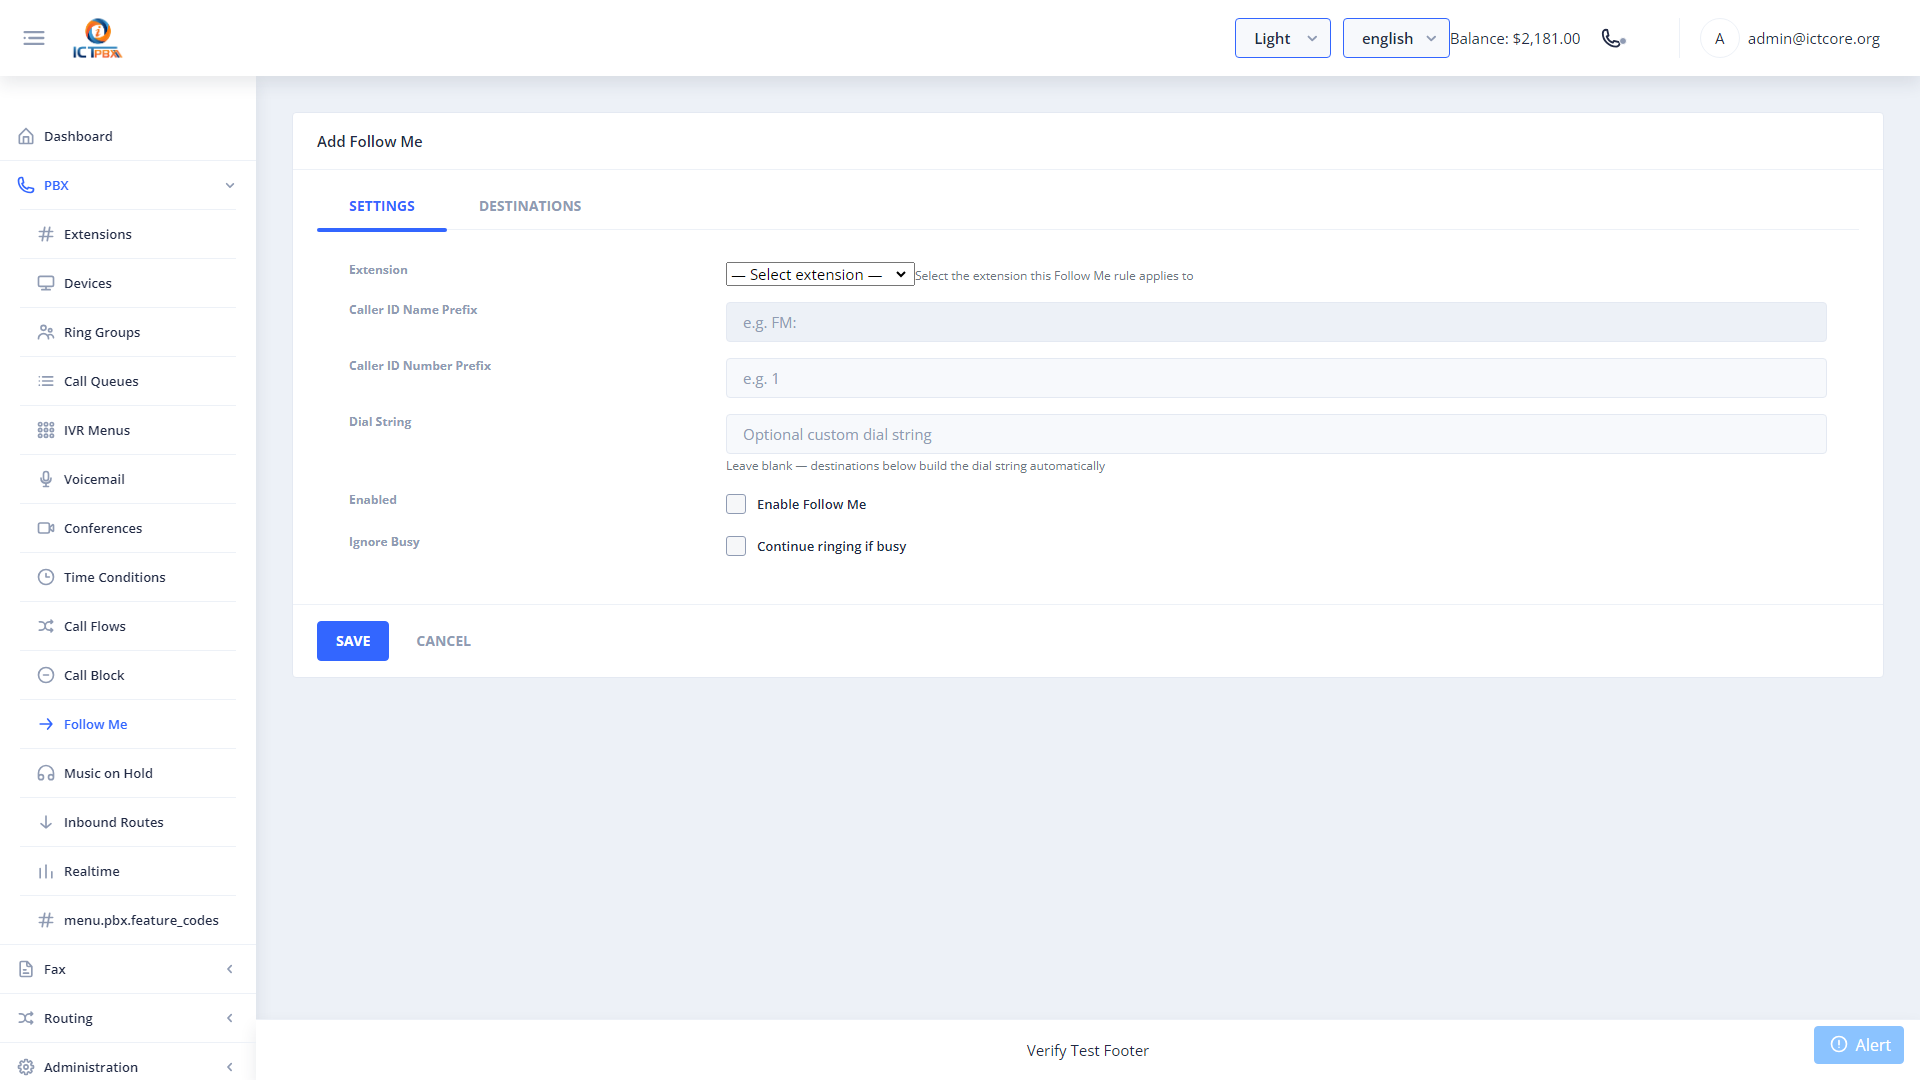
13. Follow Me (Call Forwarding)
Navigate to PBX → Follow Me from the sidebar.
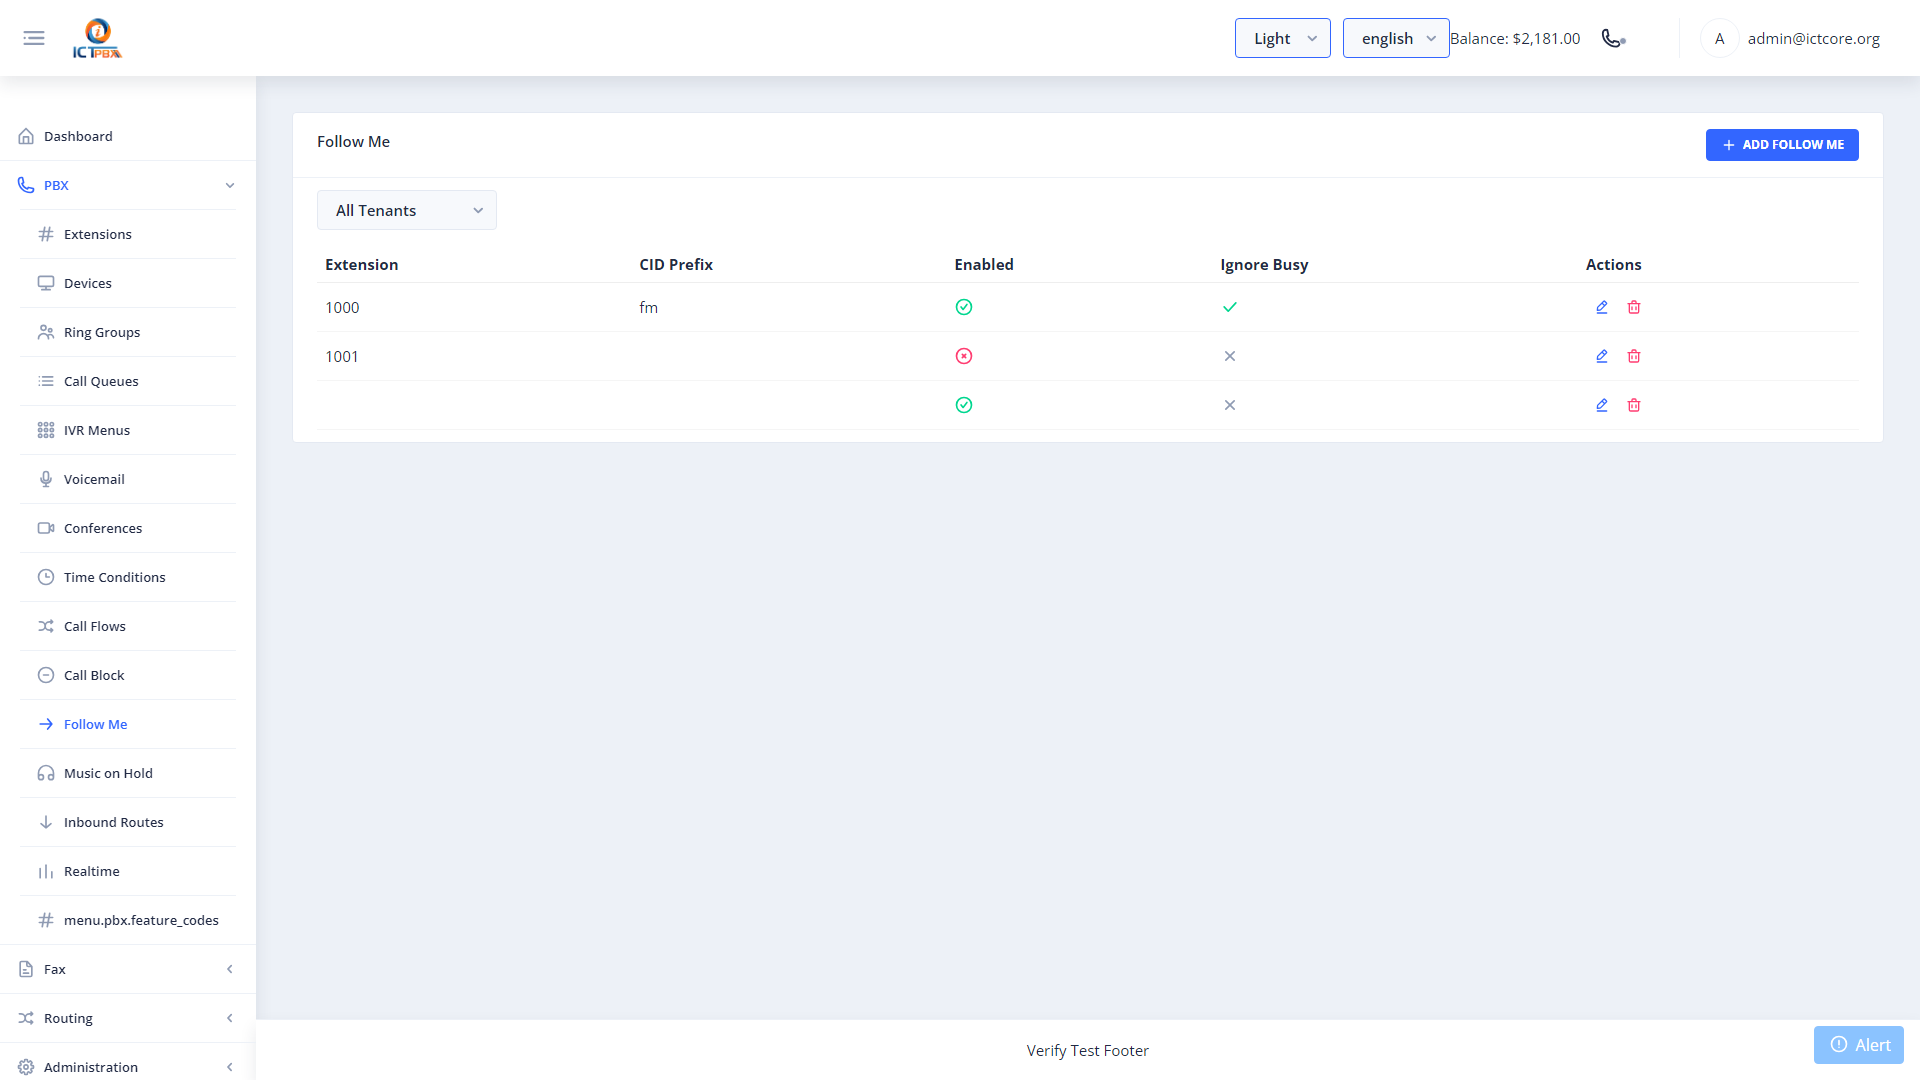
Follow Me lets you configure cascaded call forwarding for any extension under your tenant — ring a mobile after 15 seconds of no answer on the desk phone, for example.
13.1 Creating a Follow Me Rule
- Click New.
- Select the Extension to apply forwarding to.
- Tick Enable Follow Me.
- Click Add Destination and enter the forwarding number.
- Set Delay (seconds before this leg starts ringing) and Timeout (seconds to ring before trying the next).
- Click Save.
14. Call Block
Navigate to PBX → Call Block from the sidebar.
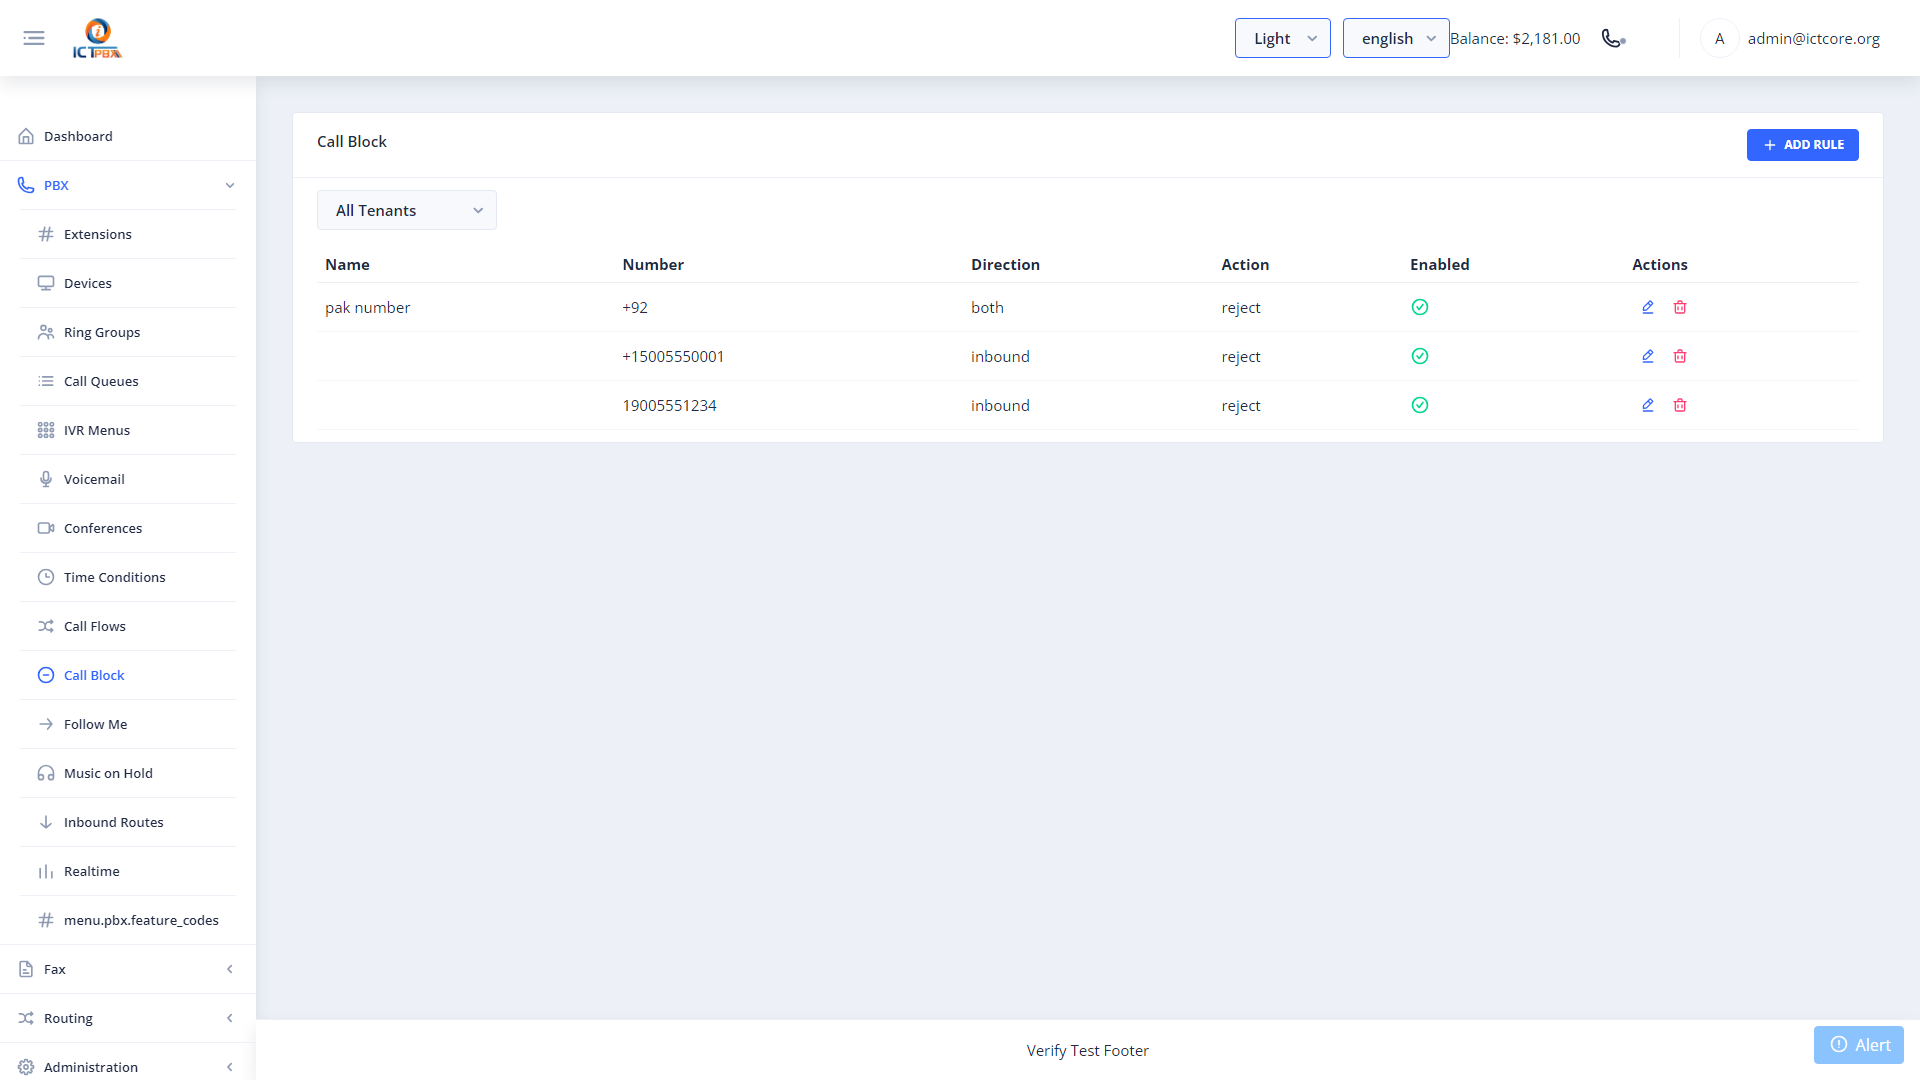
Call Block allows you to block specific callers from reaching any extension in your tenant. Blocked callers hear a busy tone or a rejection message.
- Click New.
- Enter the caller number to block (full E.164 format recommended, e.g.
+12125550000). - Click Save.
15. Music on Hold
Navigate to PBX → Music on Hold from the sidebar.
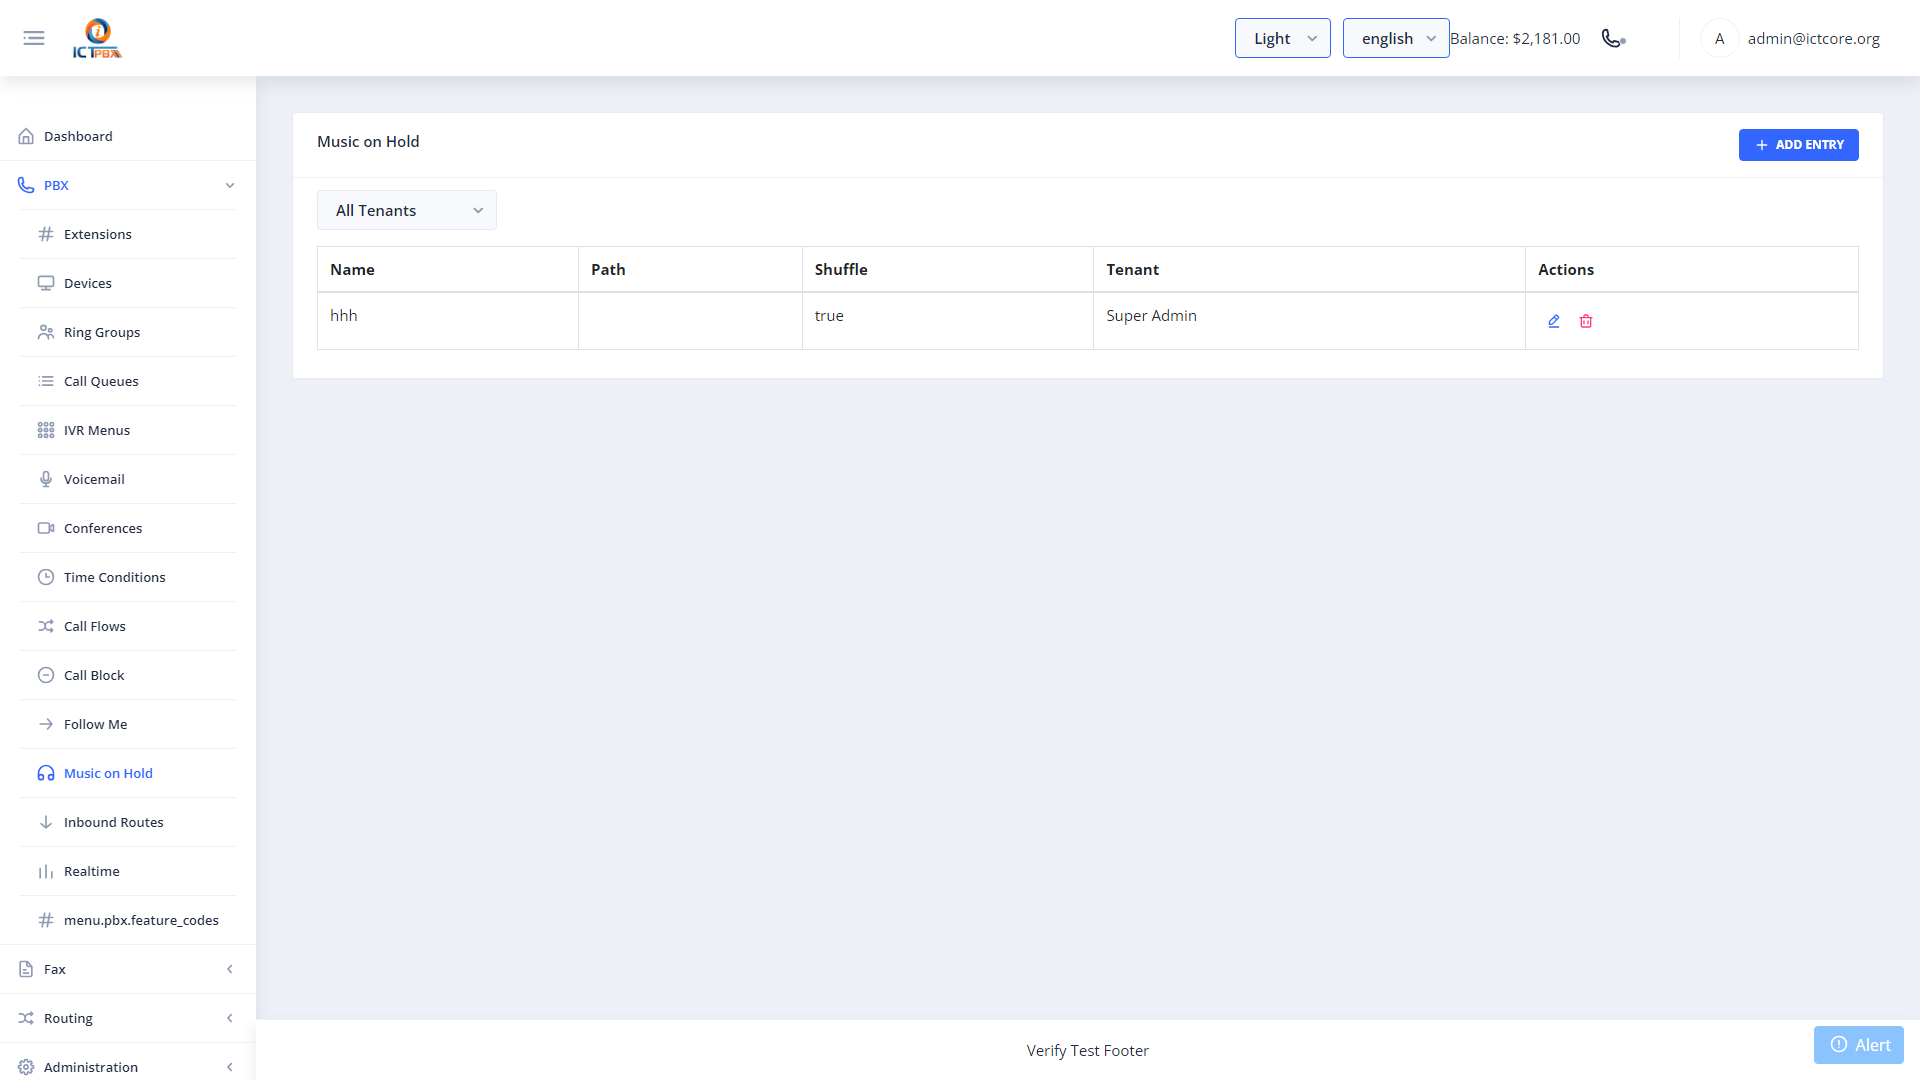
Upload audio files to play to callers who are on hold or waiting in a queue.
- Click New.
- Enter a Name for the MOH category.
- Upload an audio file (MP3 or WAV).
- Click Save.
Assign the MOH category to your queues or ring groups in their respective configuration forms.
16. Gateways (SIP Trunks)
Navigate to PBX → Gateways from the sidebar.
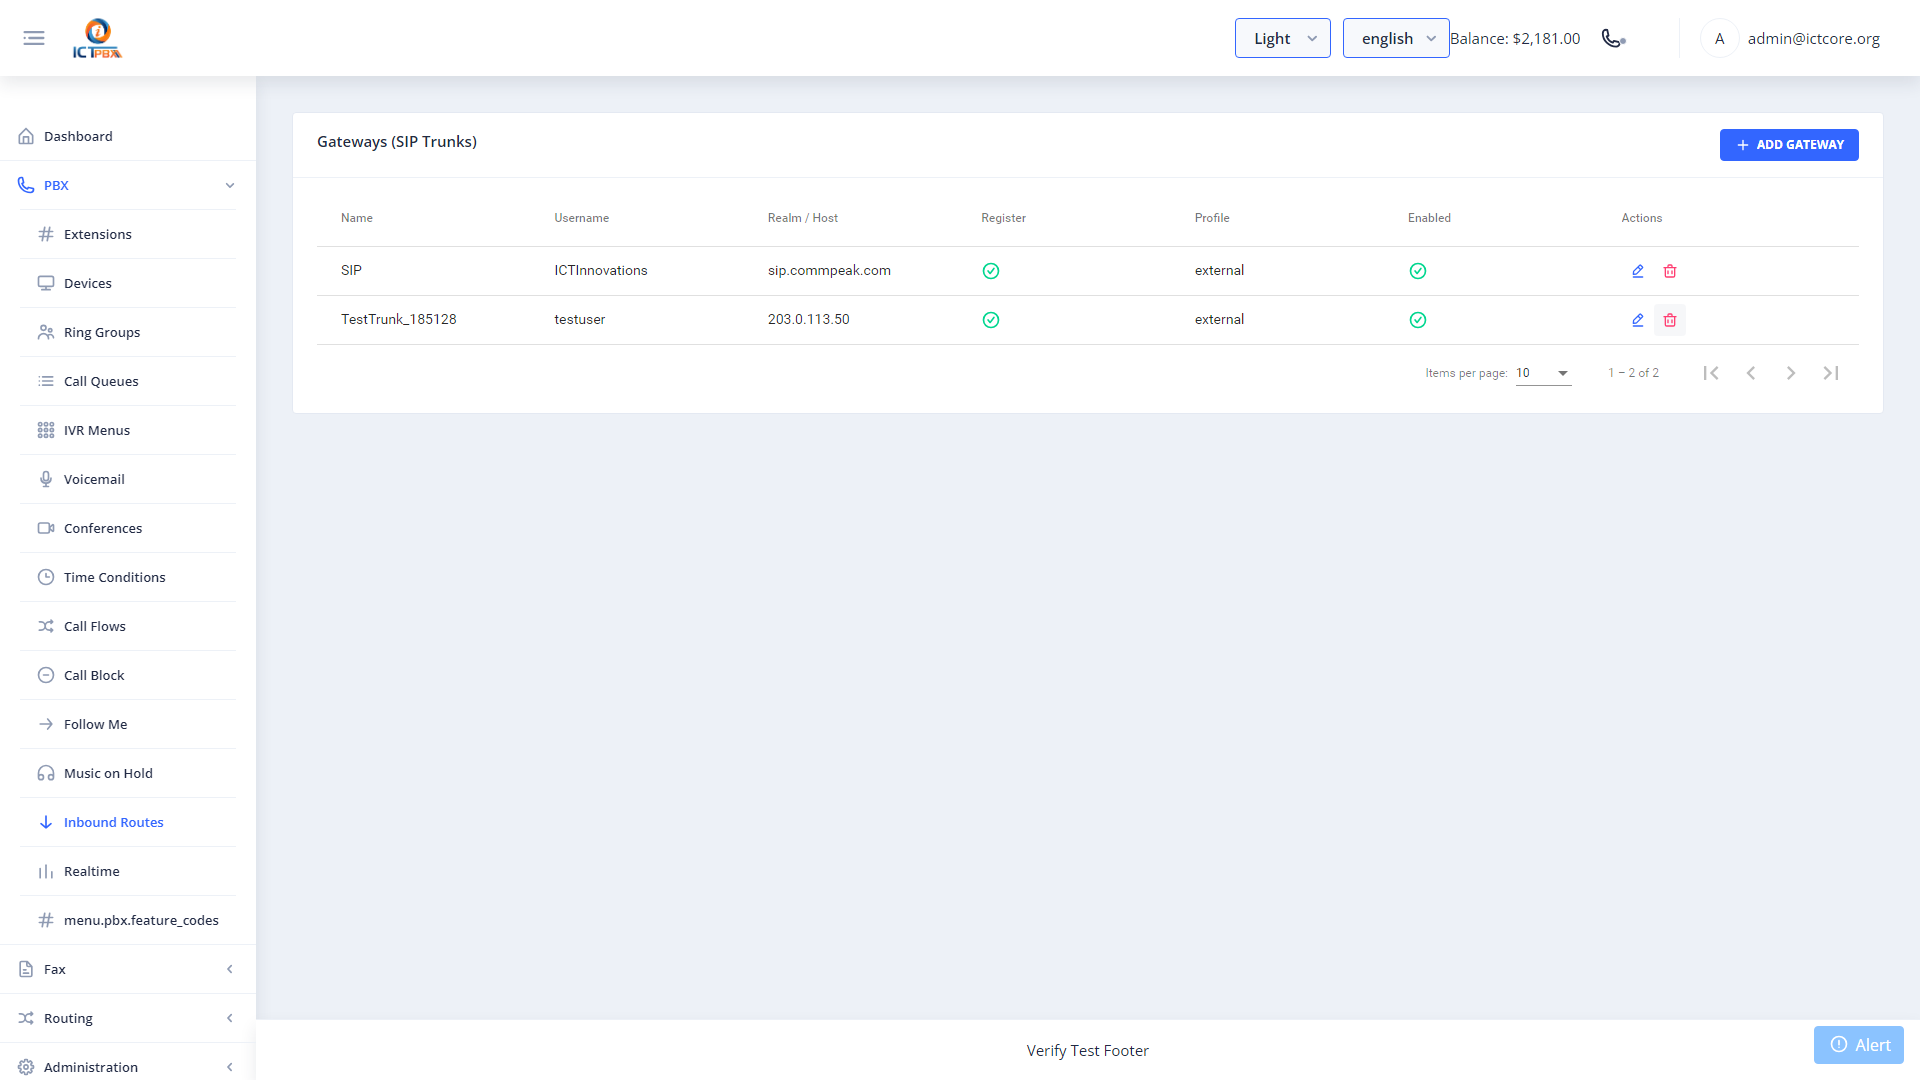
Gateways represent outbound SIP trunks used to make PSTN (external) calls. These are typically configured by the service provider. As Tenant Admin you can view your assigned gateways.
17. DID Numbers
Navigate to My DIDs from the sidebar.
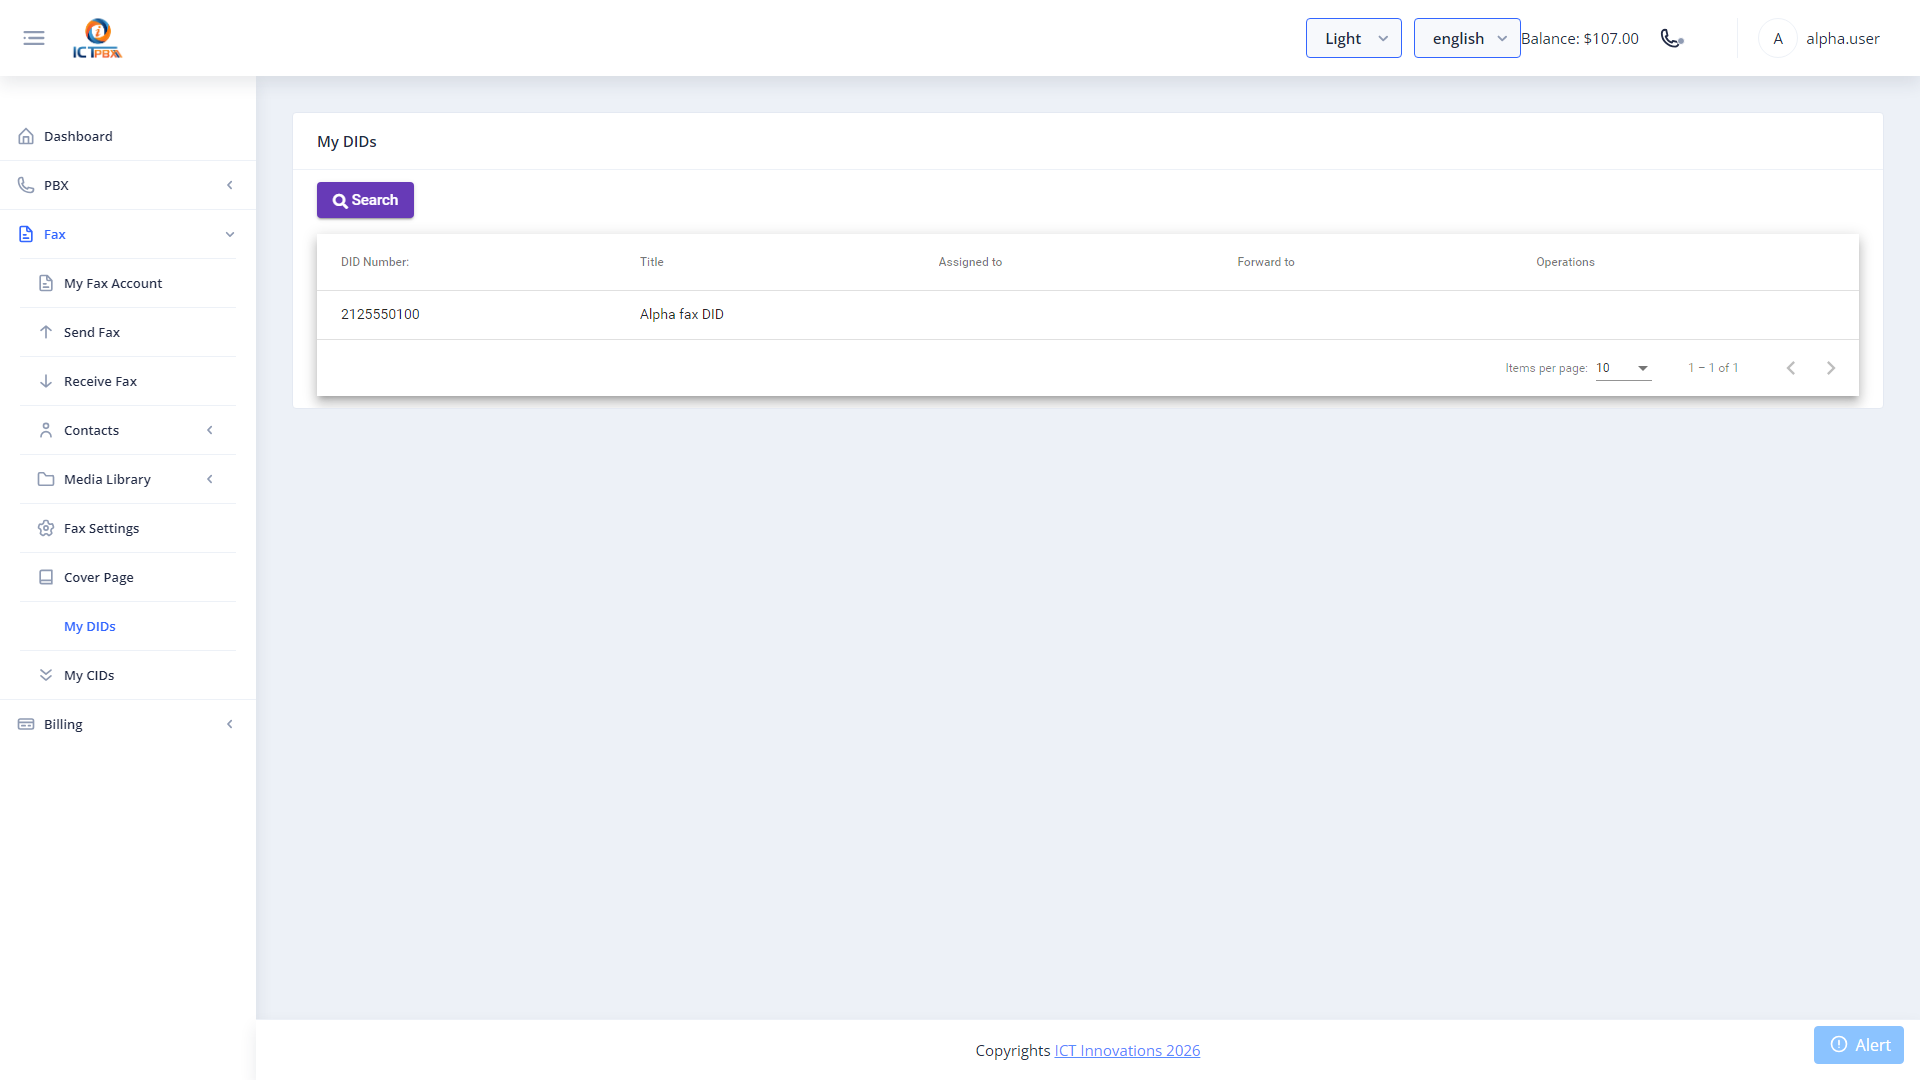
This view shows all phone numbers assigned to your organisation. For each number you can:
- View the current routing destination.
- Click Assign to assign the DID to a specific extension or fax account.
- Click Forward to update the inbound routing destination.
Contact your service provider to purchase or release DID numbers — provisioning DIDs requires system administrator access.
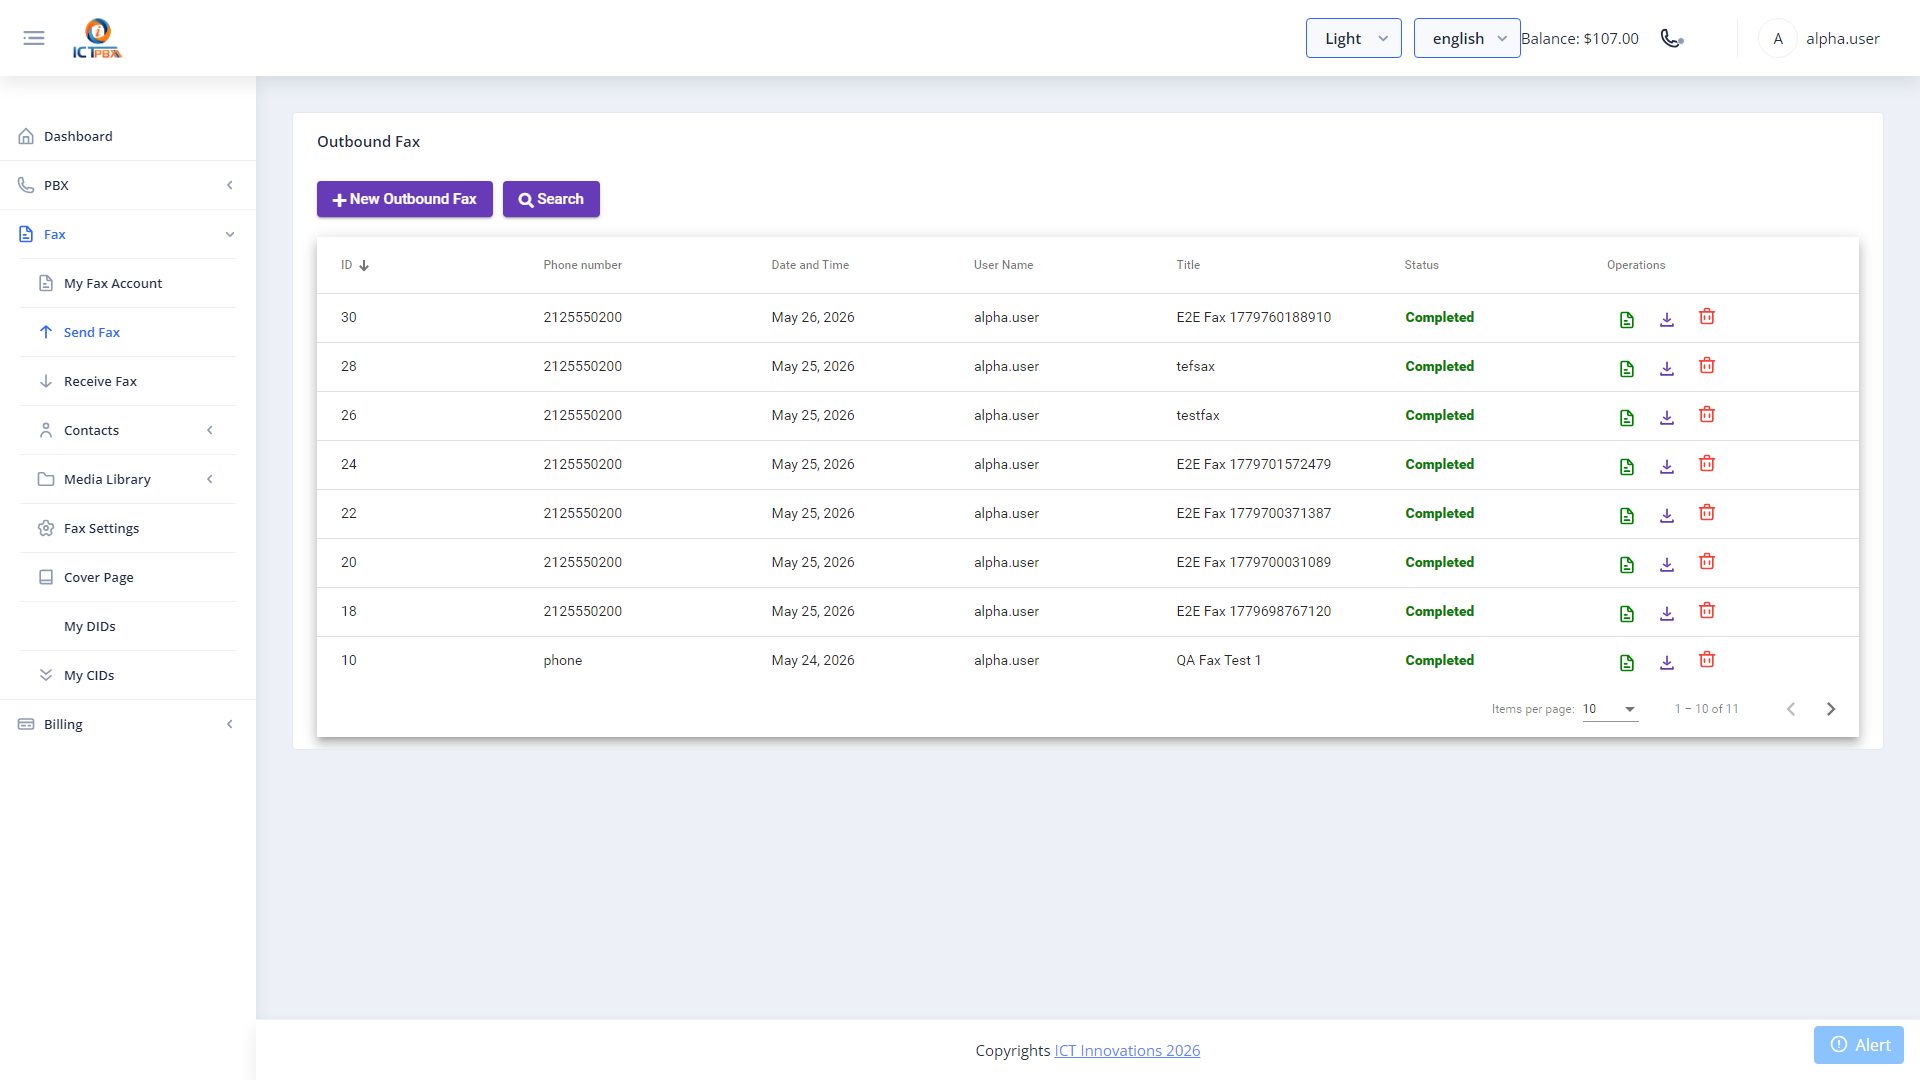
18. Fax — Sending
Navigate to Fax → Send Fax from the sidebar.

- Enter the recipient’s fax number (include country code for international, e.g.
+12125550100). - Select a Cover Page template (optional).
- Upload the PDF document.
- Click Send Fax.
Monitor the outbound fax queue — statuses include: Queued, Sending, Sent, Failed.
18A. Bulk Fax Campaigns
Bulk fax lets you send one document to a whole list of recipients in a single run. You pick a fax document, point it at a contact group, and the platform dials each number for you, retrying failures and tracking delivery as it goes.
Navigate to Fax › Bulk Fax.
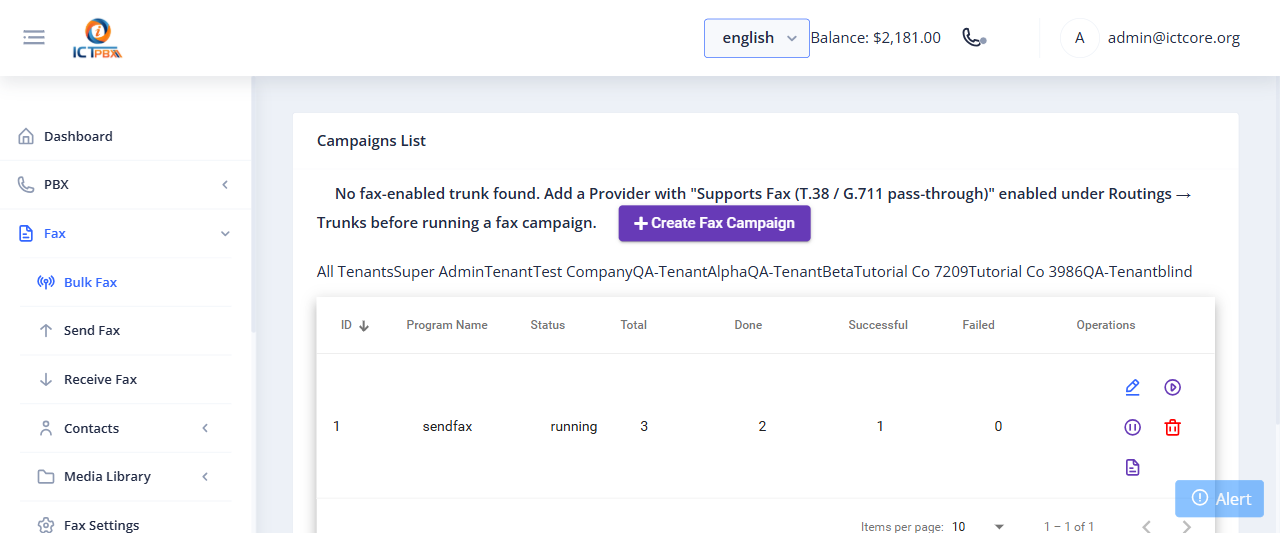
The campaign list shows the Program Name, current Status, and live counters for Total, Done, Successful, and Failed recipients. The action buttons on each row let you view the detail report, pause, resume, or stop a running campaign.
18A.1 Creating a Campaign
- Click Create Fax Campaign.
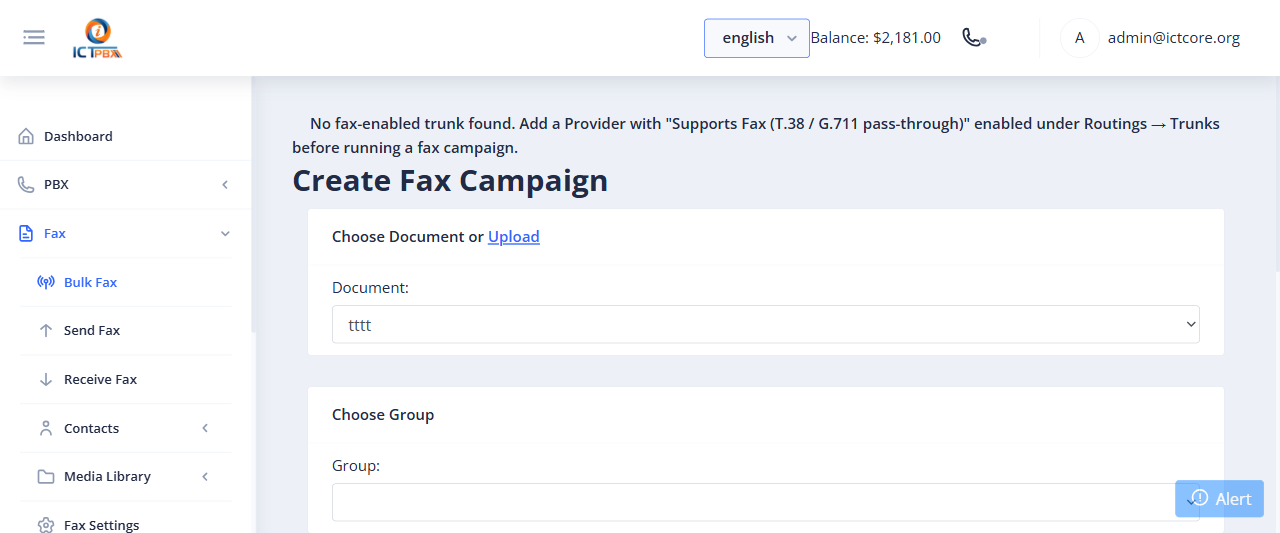
- Click Submit. The campaign starts and its progress updates on the list.
18B. Fax Contacts, Groups & DNC
Contacts are the address book behind your faxes. Build groups of recipients, import them in bulk from a CSV, and keep a do-not-contact list so you never fax a number that has opted out.
18B.1 Contacts
Navigate to Fax › Contacts › Contacts.
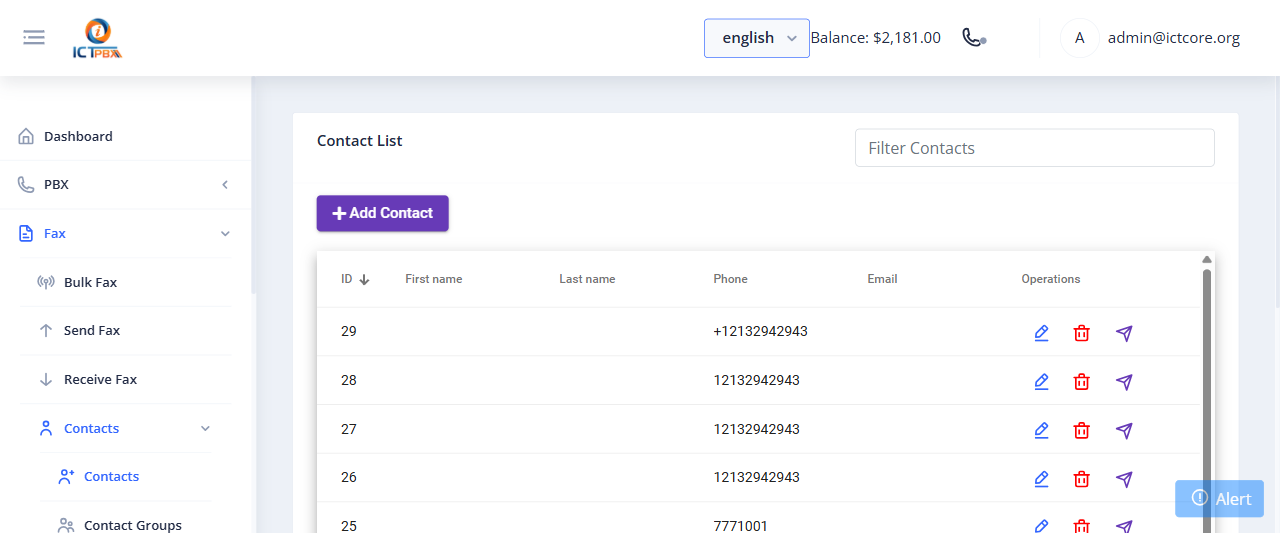
The contact list shows every saved recipient with their name, phone, and email. Use Add Contact to create one, or the filter box to find an existing entry. Each row has edit and delete actions.
18B.2 Contact Groups
Navigate to Fax › Contacts › Contact Groups.
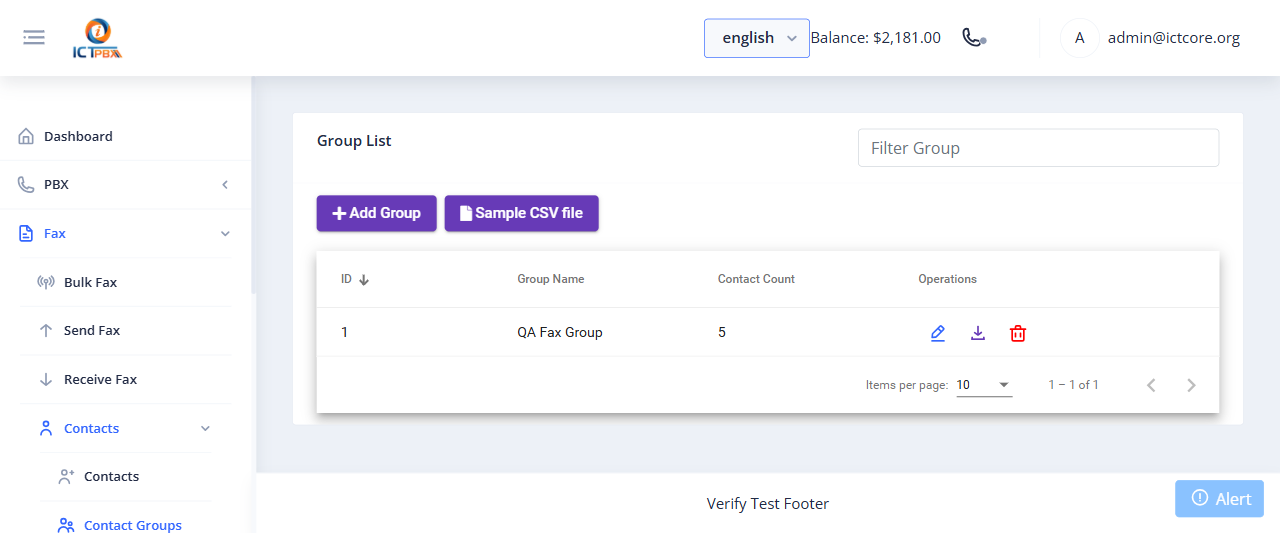
Groups bundle contacts together so a bulk fax can target them in one shot. The list shows each group name and its contact count. Click Add Group to create one. To load many recipients at once, download the Sample CSV file, fill it in, and import it.
18B.3 Contact DNC
Navigate to Fax › Contacts › Contact DNC.
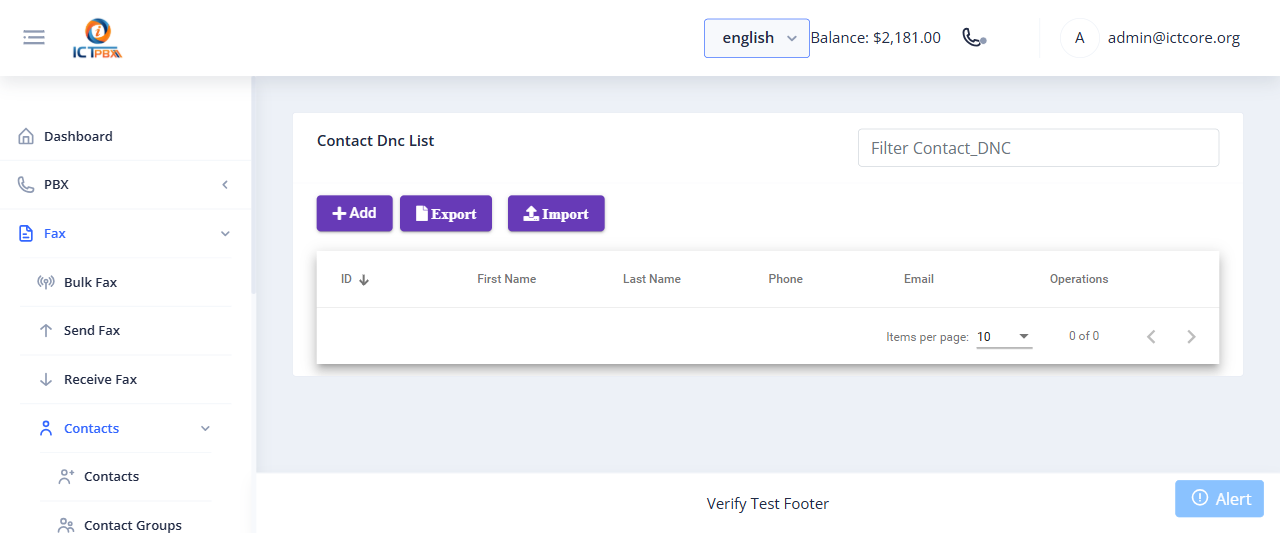
The Do Not Contact list holds numbers that must be excluded from fax campaigns. Add entries with Add, use Import to upload a suppression list, and Export to download the current one. Numbers on this list are skipped when a campaign runs.
19. Fax — Received Faxes
Navigate to Fax → Inbound Fax to see all faxes received on your tenant’s fax extensions.
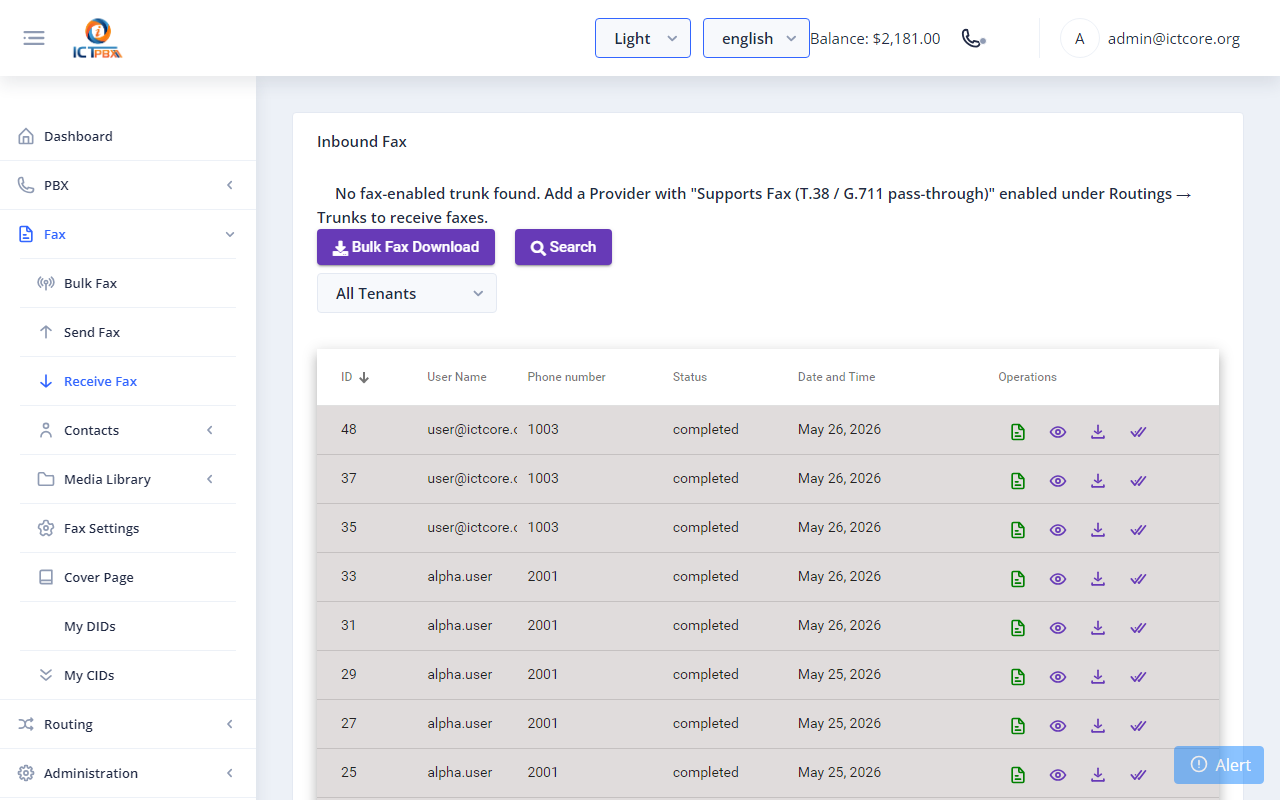
The admin view shows all received faxes across all fax extensions in your tenant. Click the download icon to download any fax as a PDF.
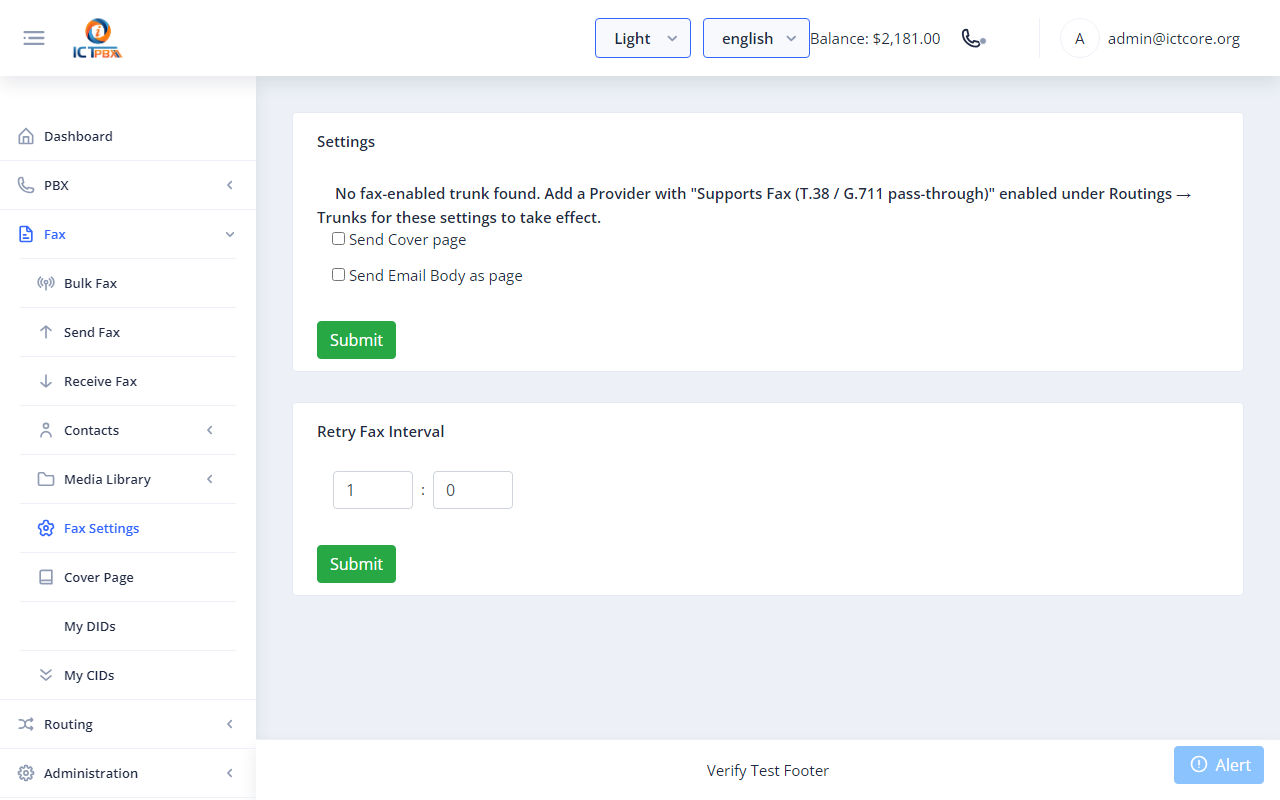
20. Fax Settings & Cover Pages
Navigate to Fax → Fax Settings to configure your tenant’s fax caller ID, station header, and other transmission parameters.
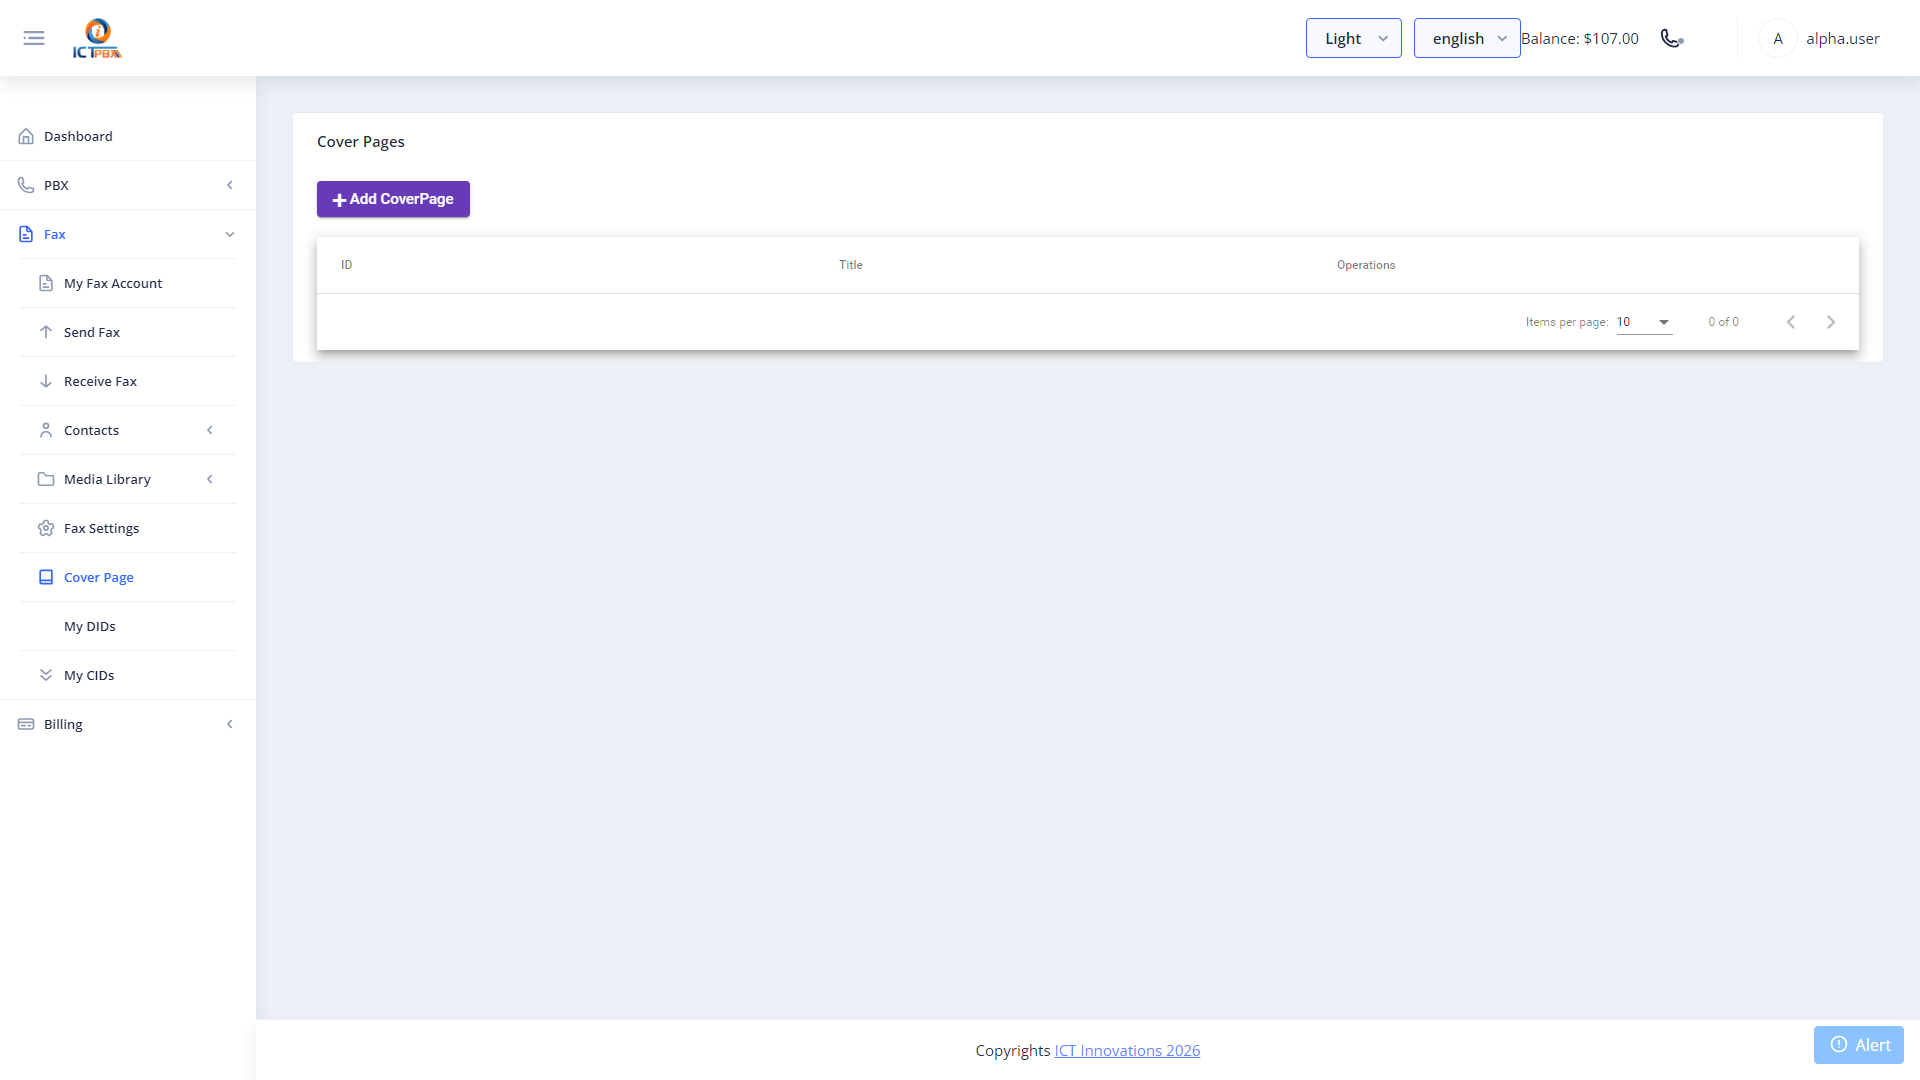
Navigate to Fax → Cover Pages to manage reusable cover page templates.
21. Realtime Monitor
Navigate to Realtime from the sidebar.
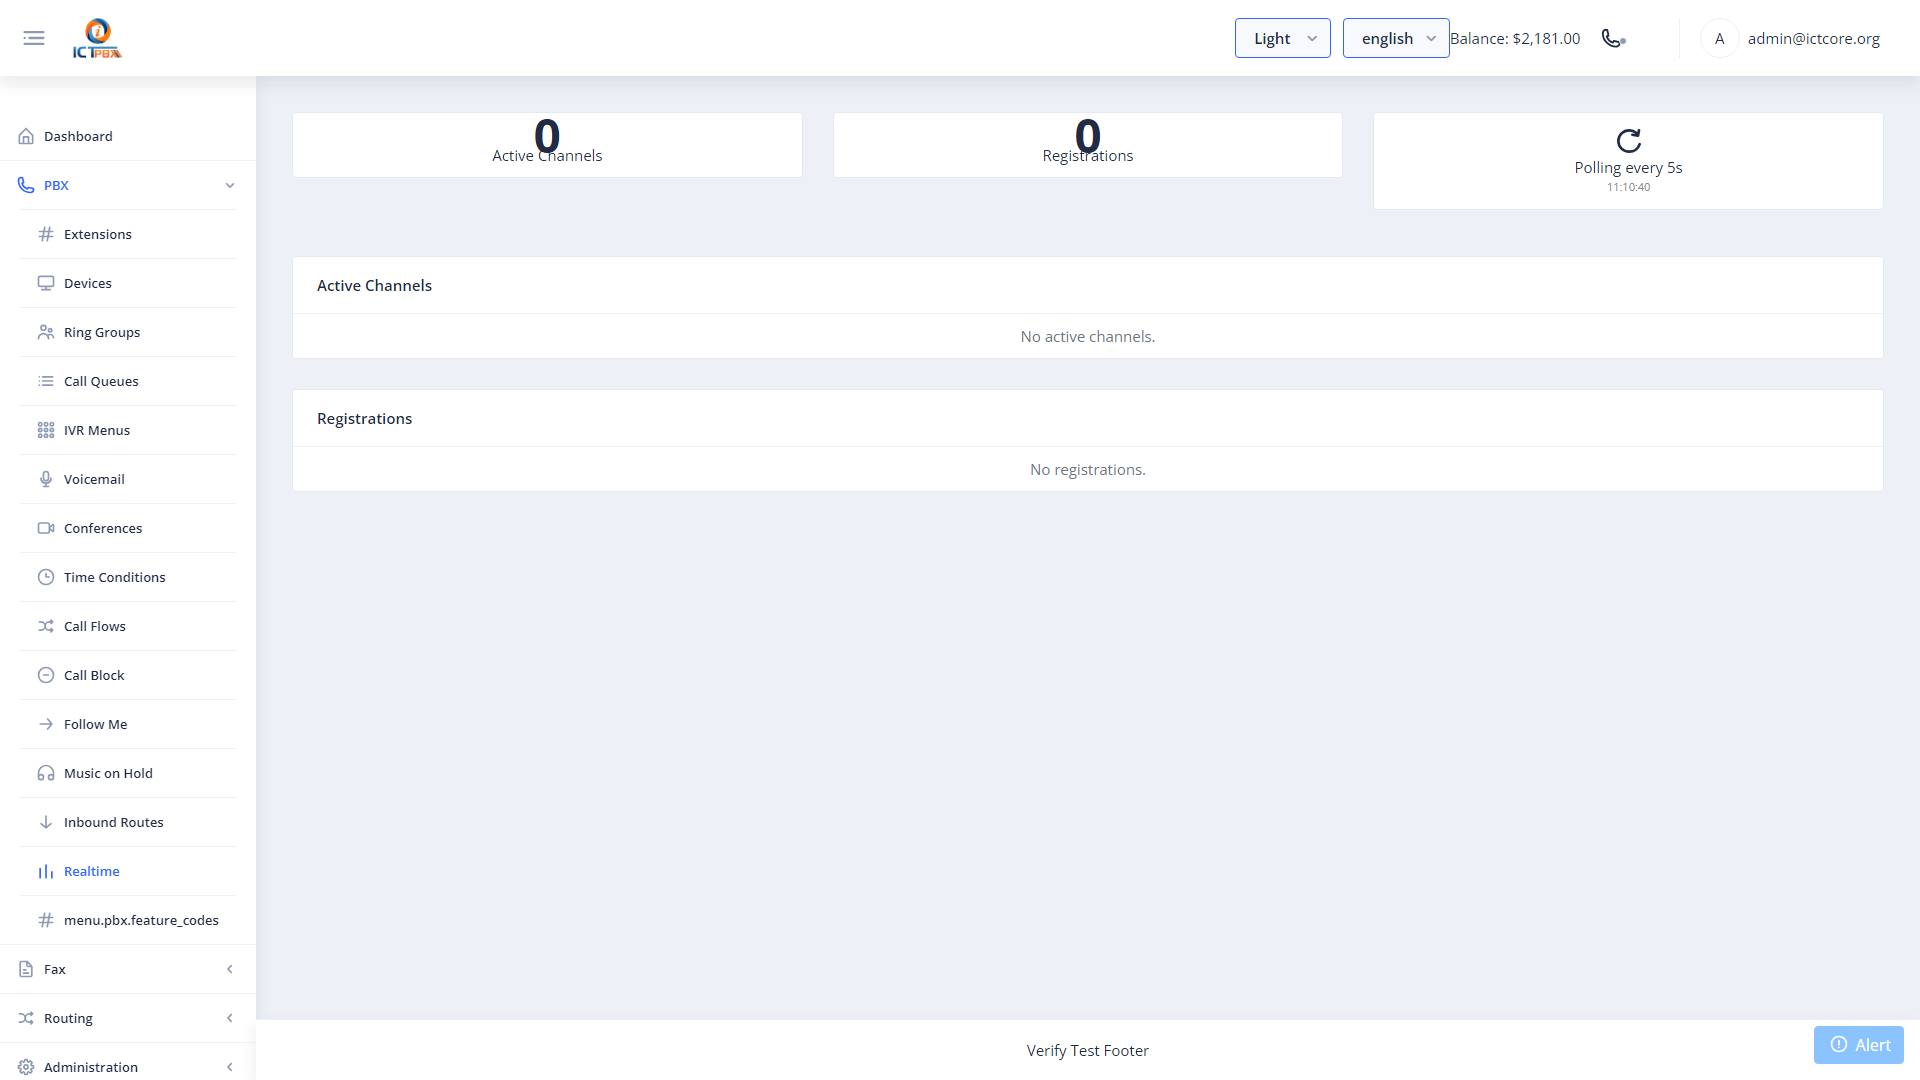
The Realtime Monitor shows all currently active calls across your tenant’s extensions. Each active channel shows:
- Channel UUID — unique call identifier.
- Caller ID and Destination.
- Call Duration.
- Call State — Active, On Hold, In Queue, etc.
Available actions on each channel:
The page auto-refreshes every few seconds.
22. Feature Codes
Navigate to PBX → Feature Codes for a quick reference of dial codes available to your users.
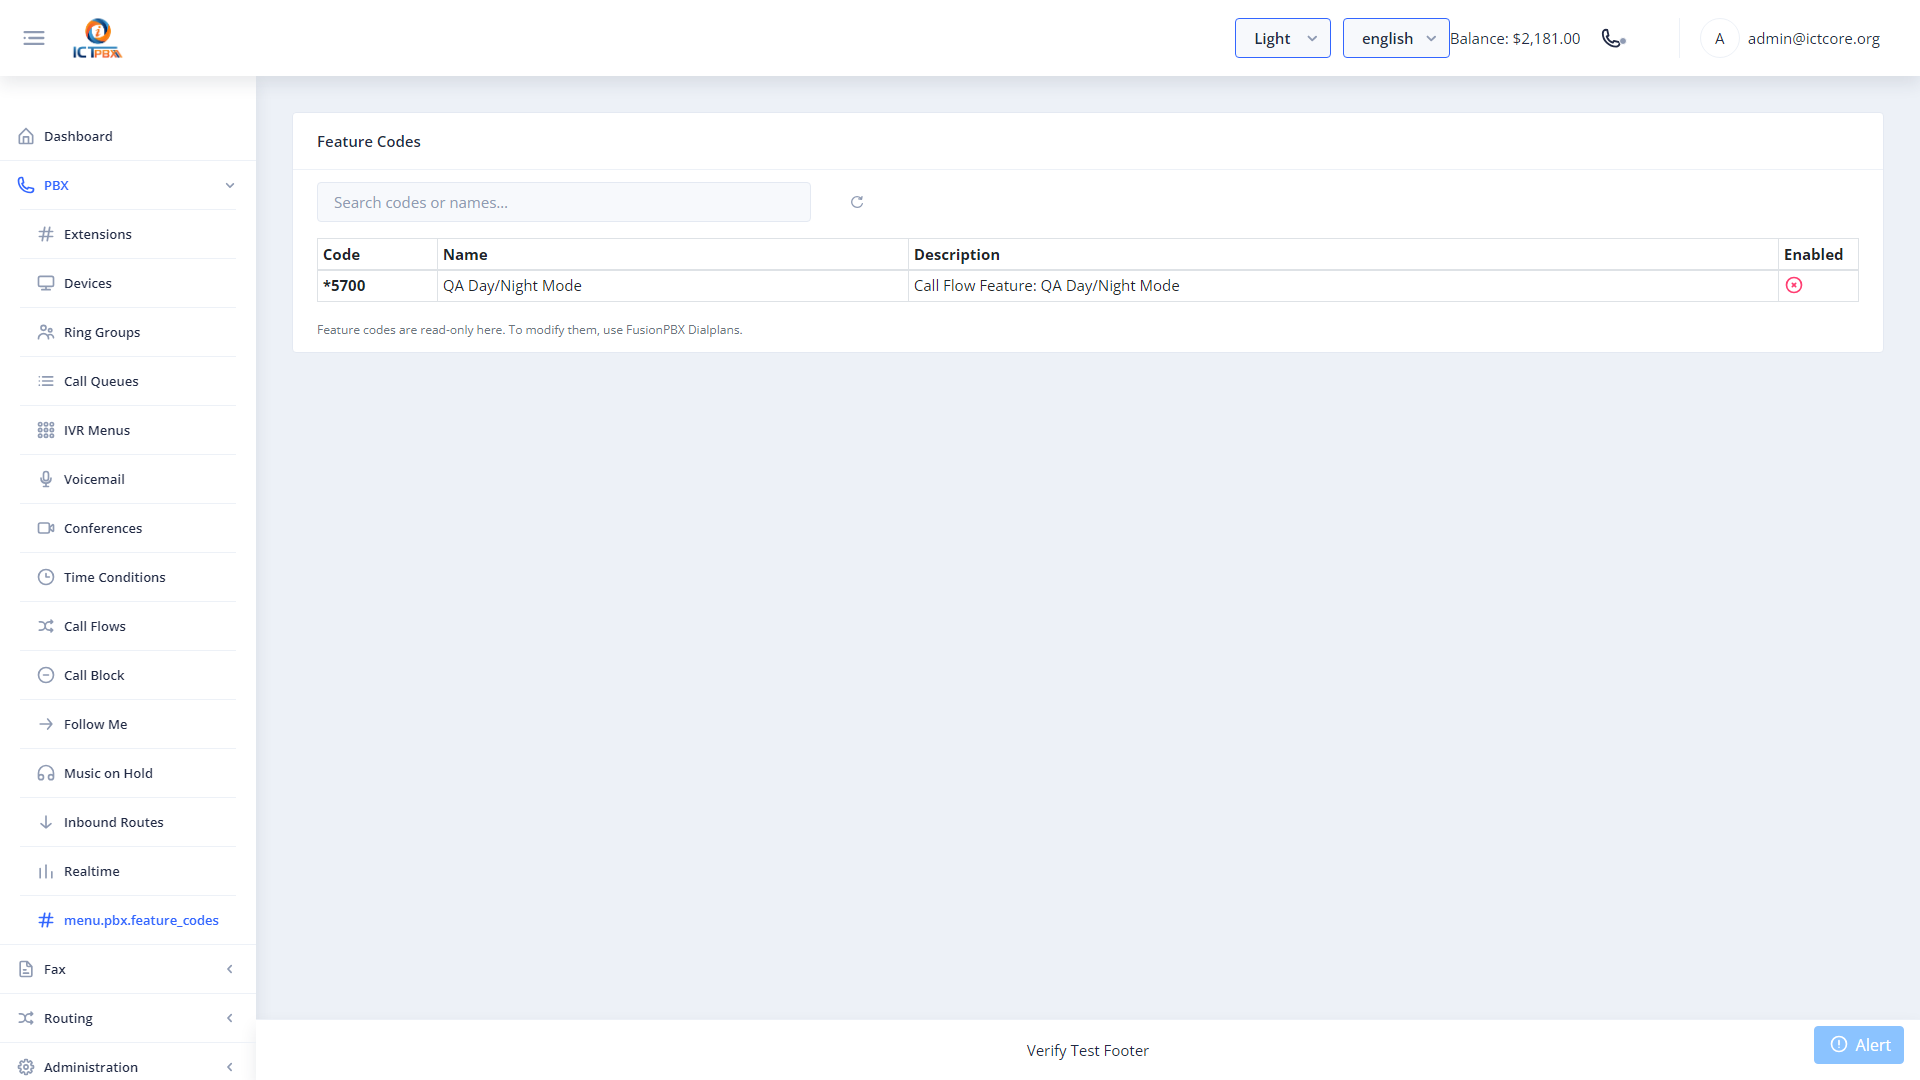
Common feature codes your users can dial from any extension:
Share these with your team — they work from any registered extension or the built-in softphone.
23. Billing Quota
Navigate to Billing → Billing Quota to view your organisation’s current usage against its service plan limits.
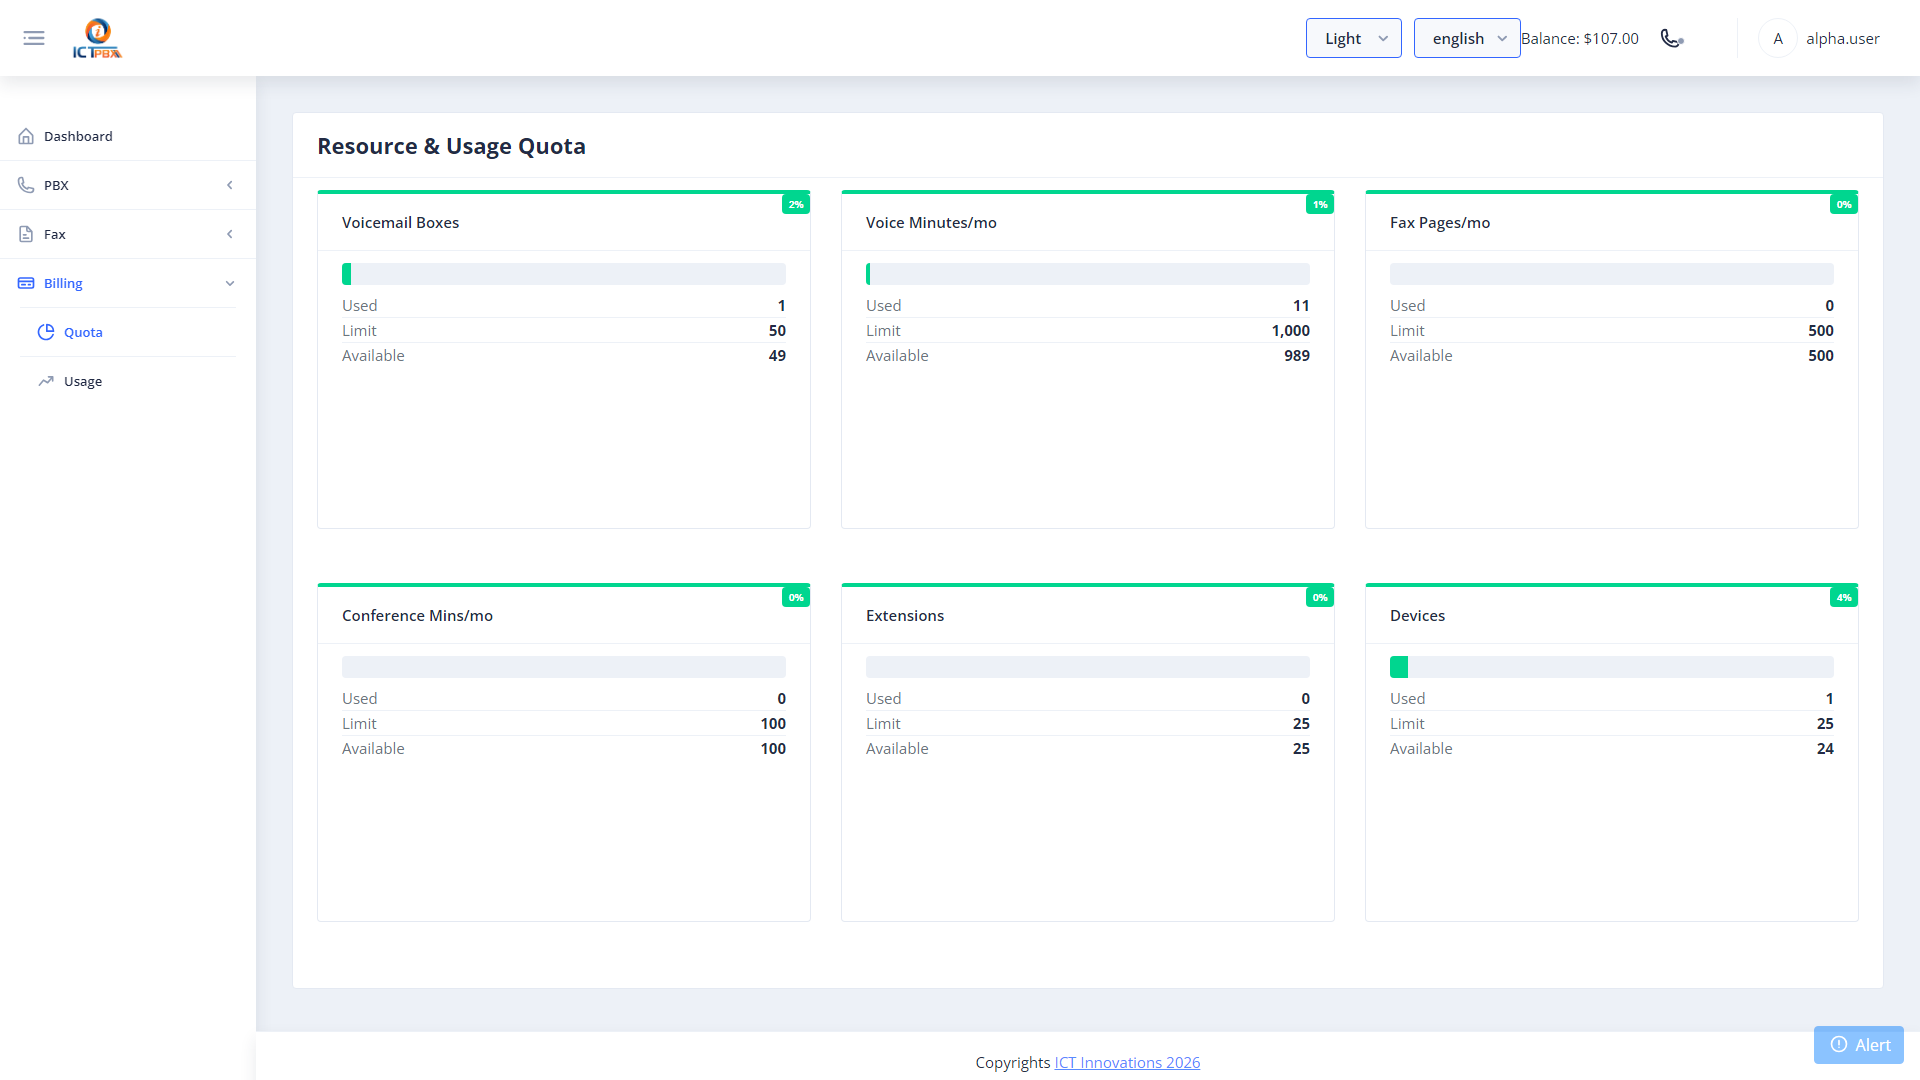
The quota page shows:
If any card approaches its limit, contact your service provider to upgrade your subscription package.
24. Billing Usage
Navigate to Billing → Billing Usage for an itemised breakdown of minutes and fax pages consumed.
The usage page itemises call durations and fax page counts aggregated by day, allowing you to identify peak usage periods and monitor against your plan limits.
25. Reports — CDR
Navigate to Reports → CDR to view a complete log of all calls made and received across your tenant.
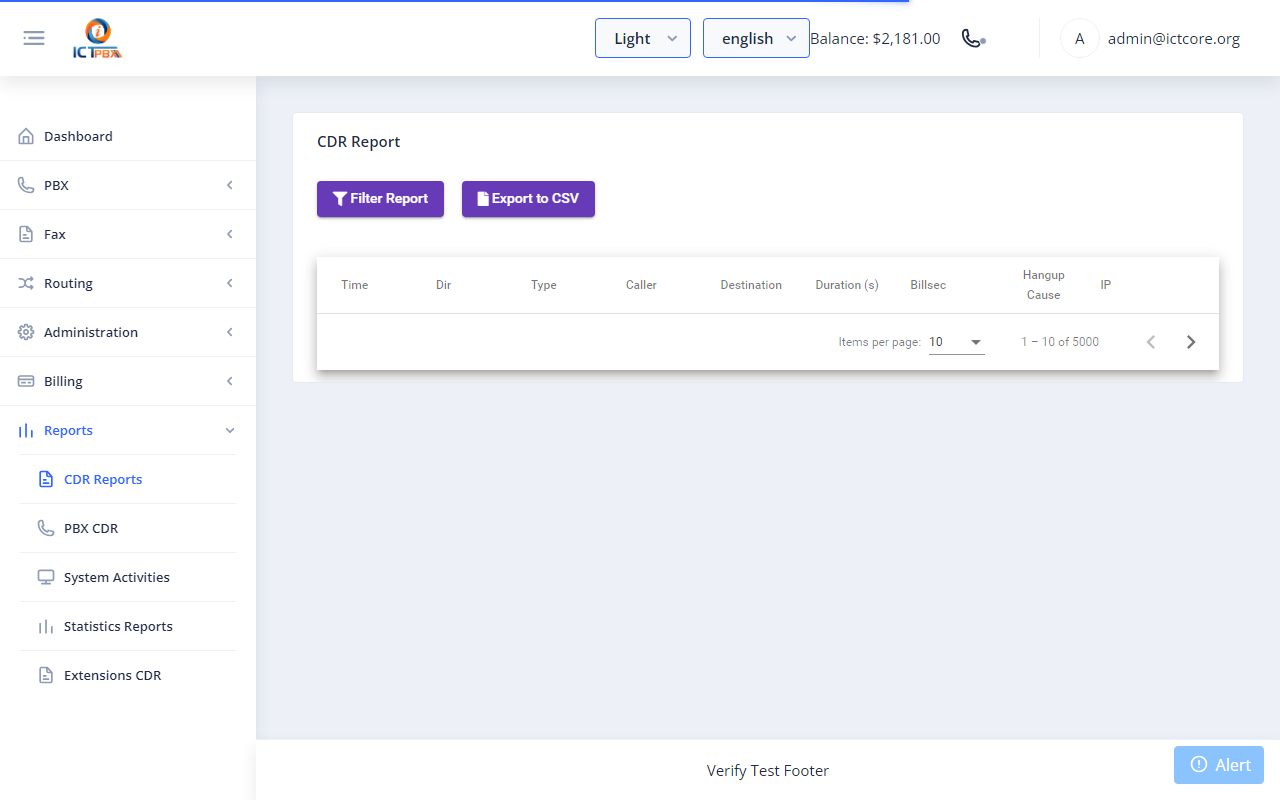
Each CDR row shows caller, destination, date/time, duration, direction, and status. Use the date filter to narrow results to a specific period.
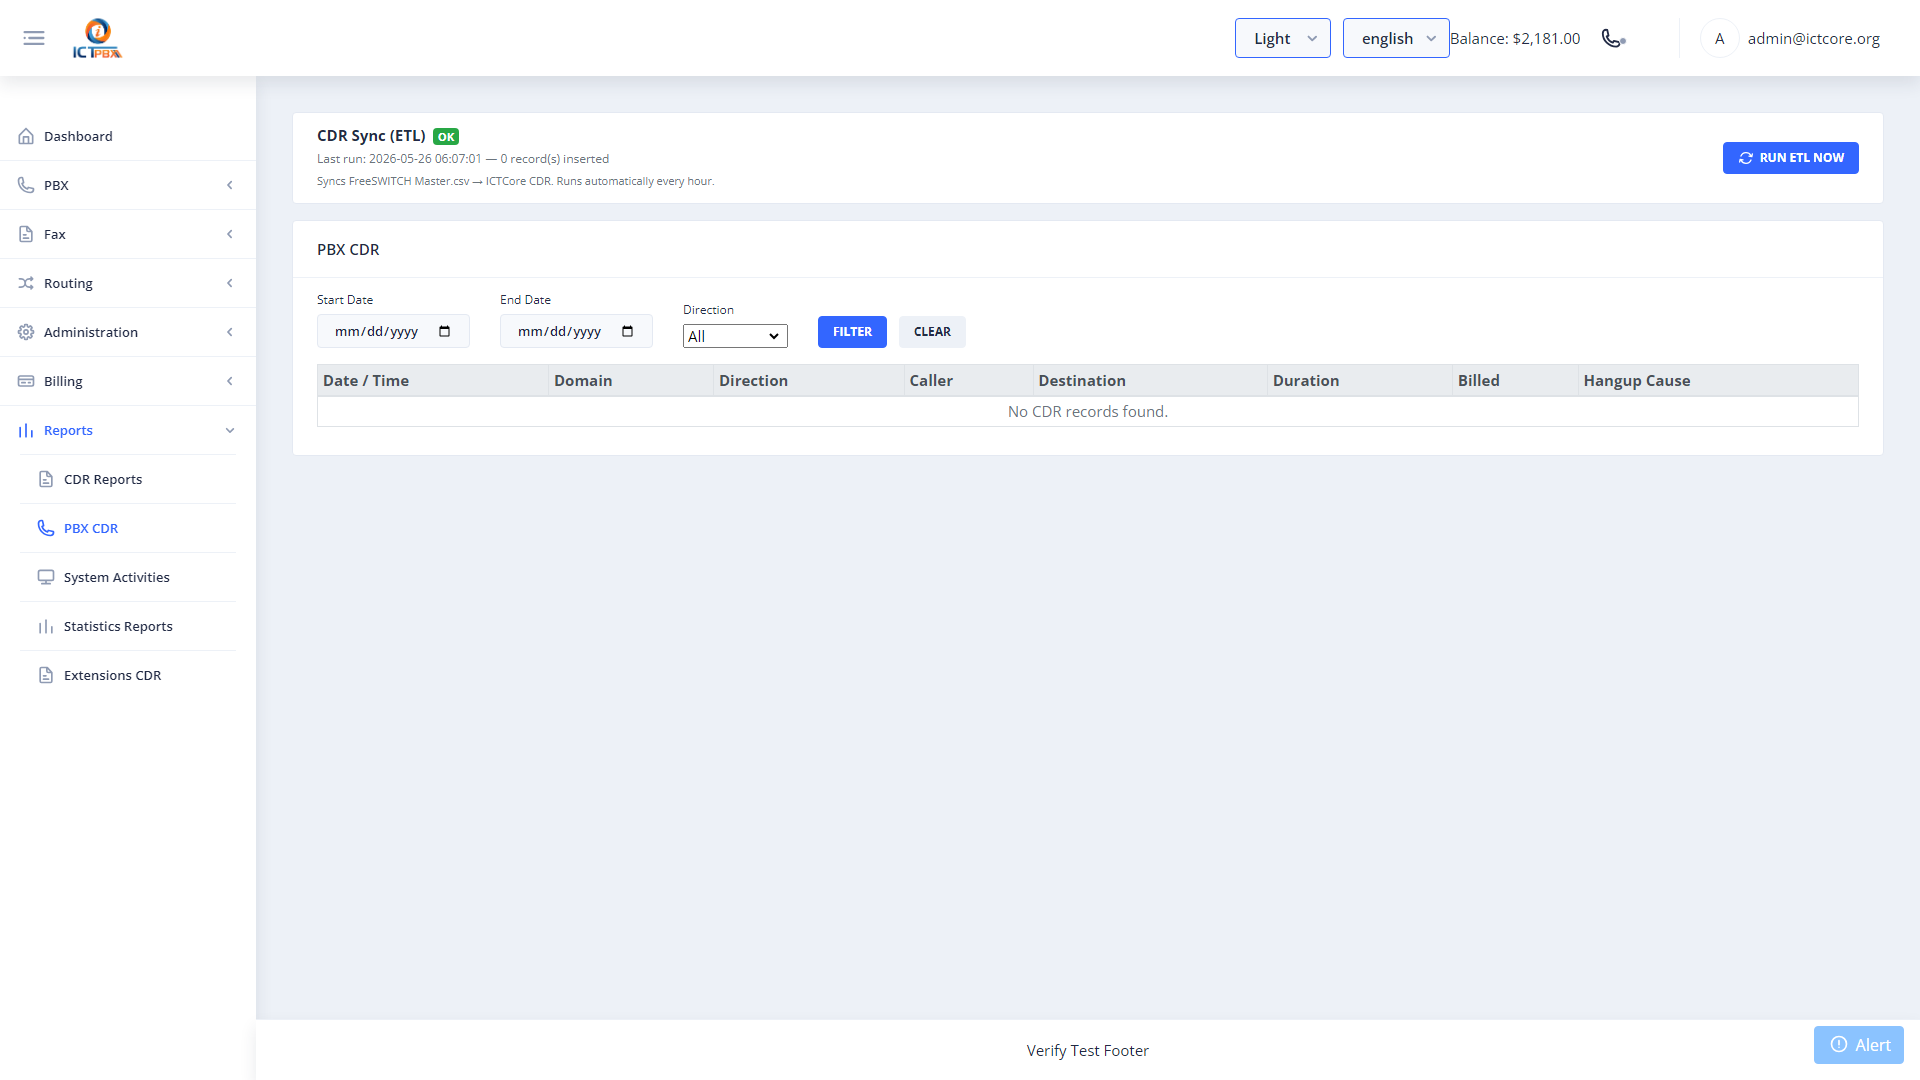
25.1 PBX CDR
Navigate to Reports → PBX CDR for raw FreeSWITCH-level records including codec, hangup cause, and SIP call ID.
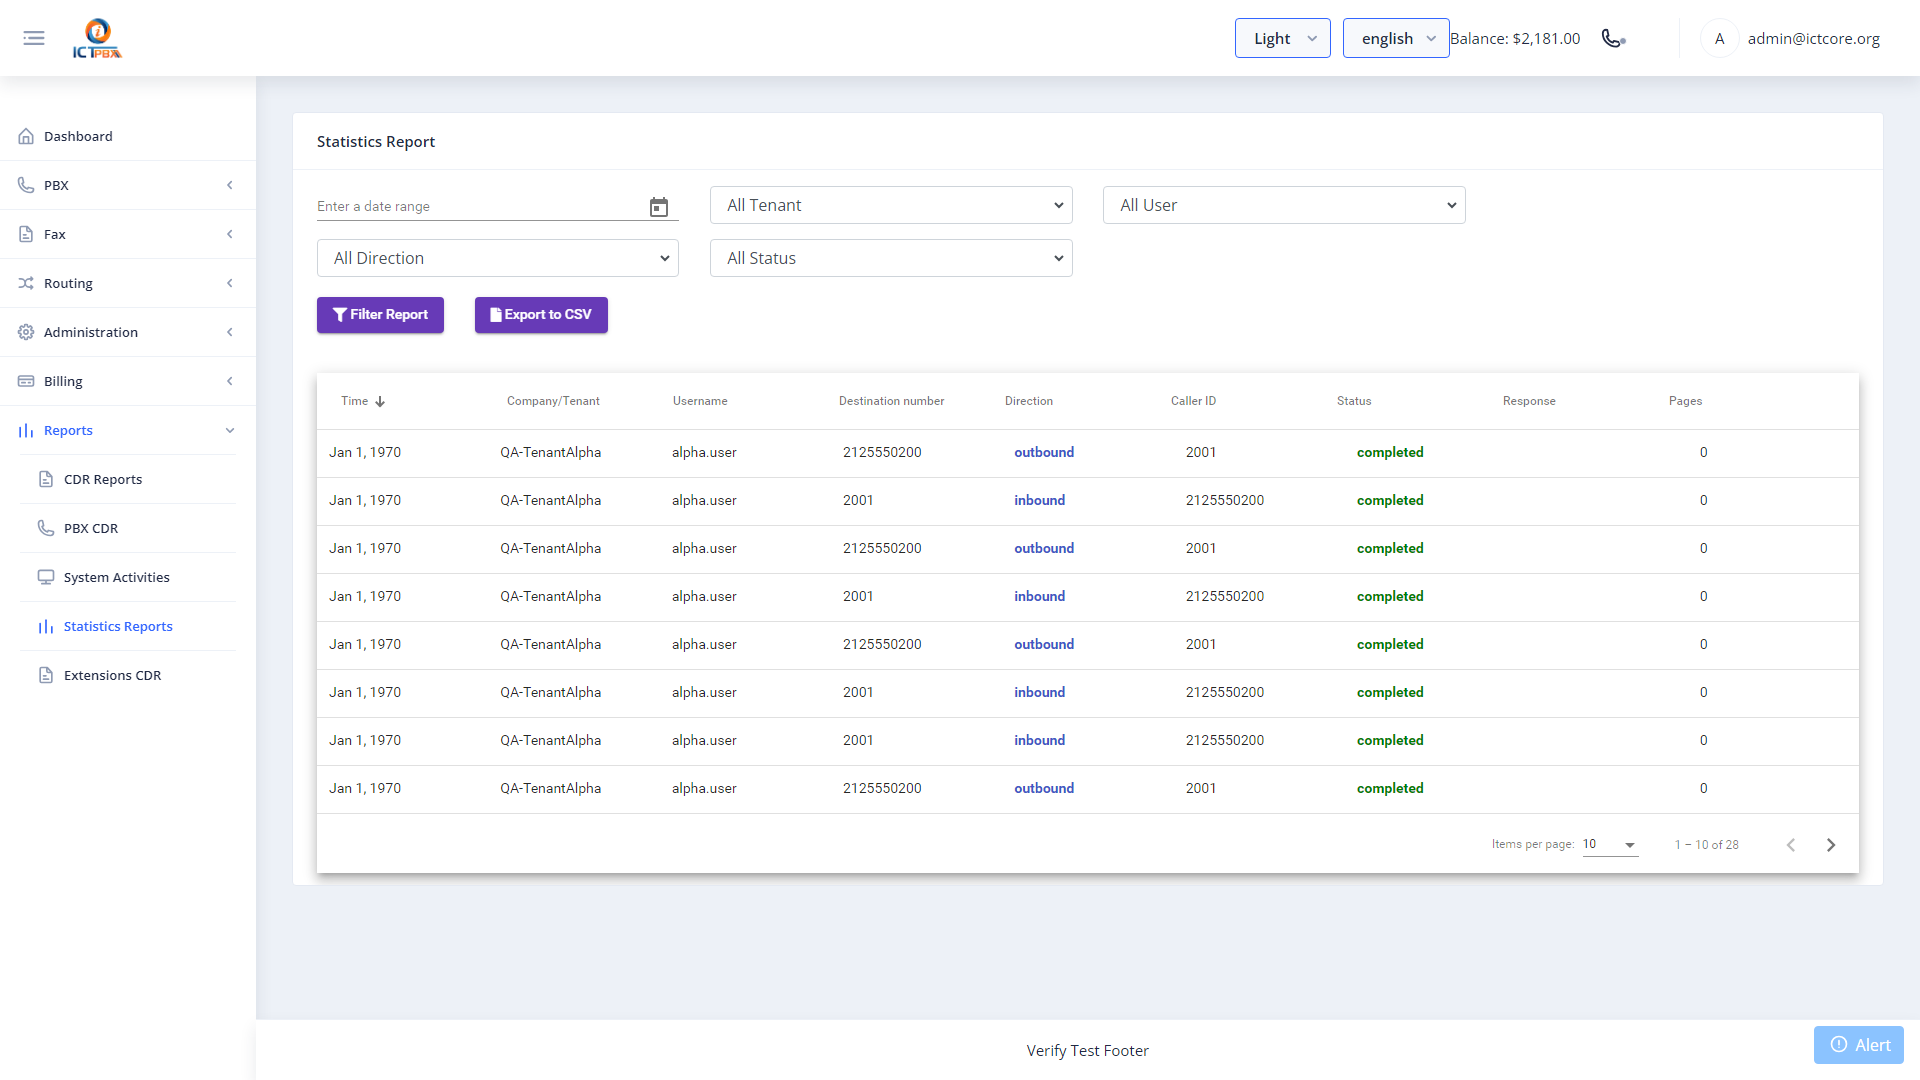
25.2 Statistics
Navigate to Reports → Statistics for a graphical summary of call volume over a selected period.
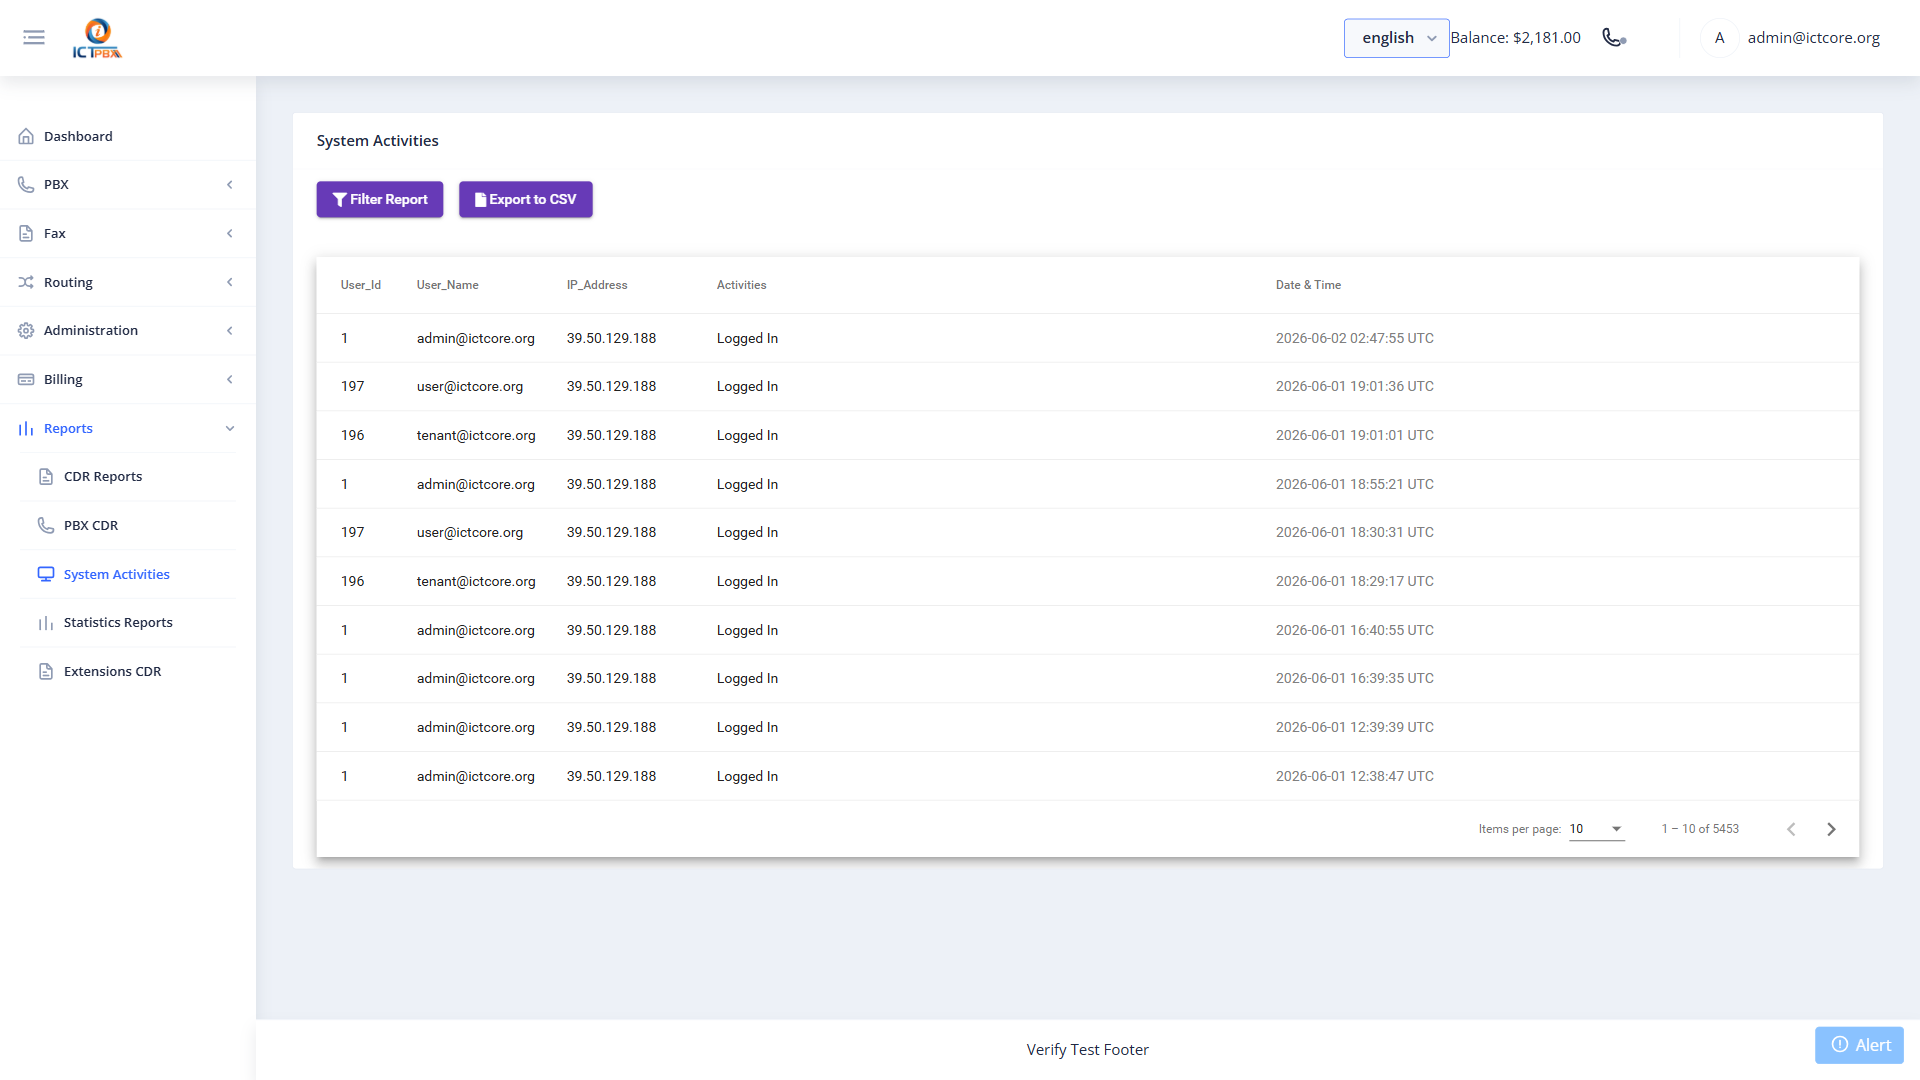
25.3 Activities Log
Navigate to Reports → Activities for an audit trail of configuration changes made by users in your tenant.
26. My Account
Navigate to My Account from the sidebar to manage your own personal settings.
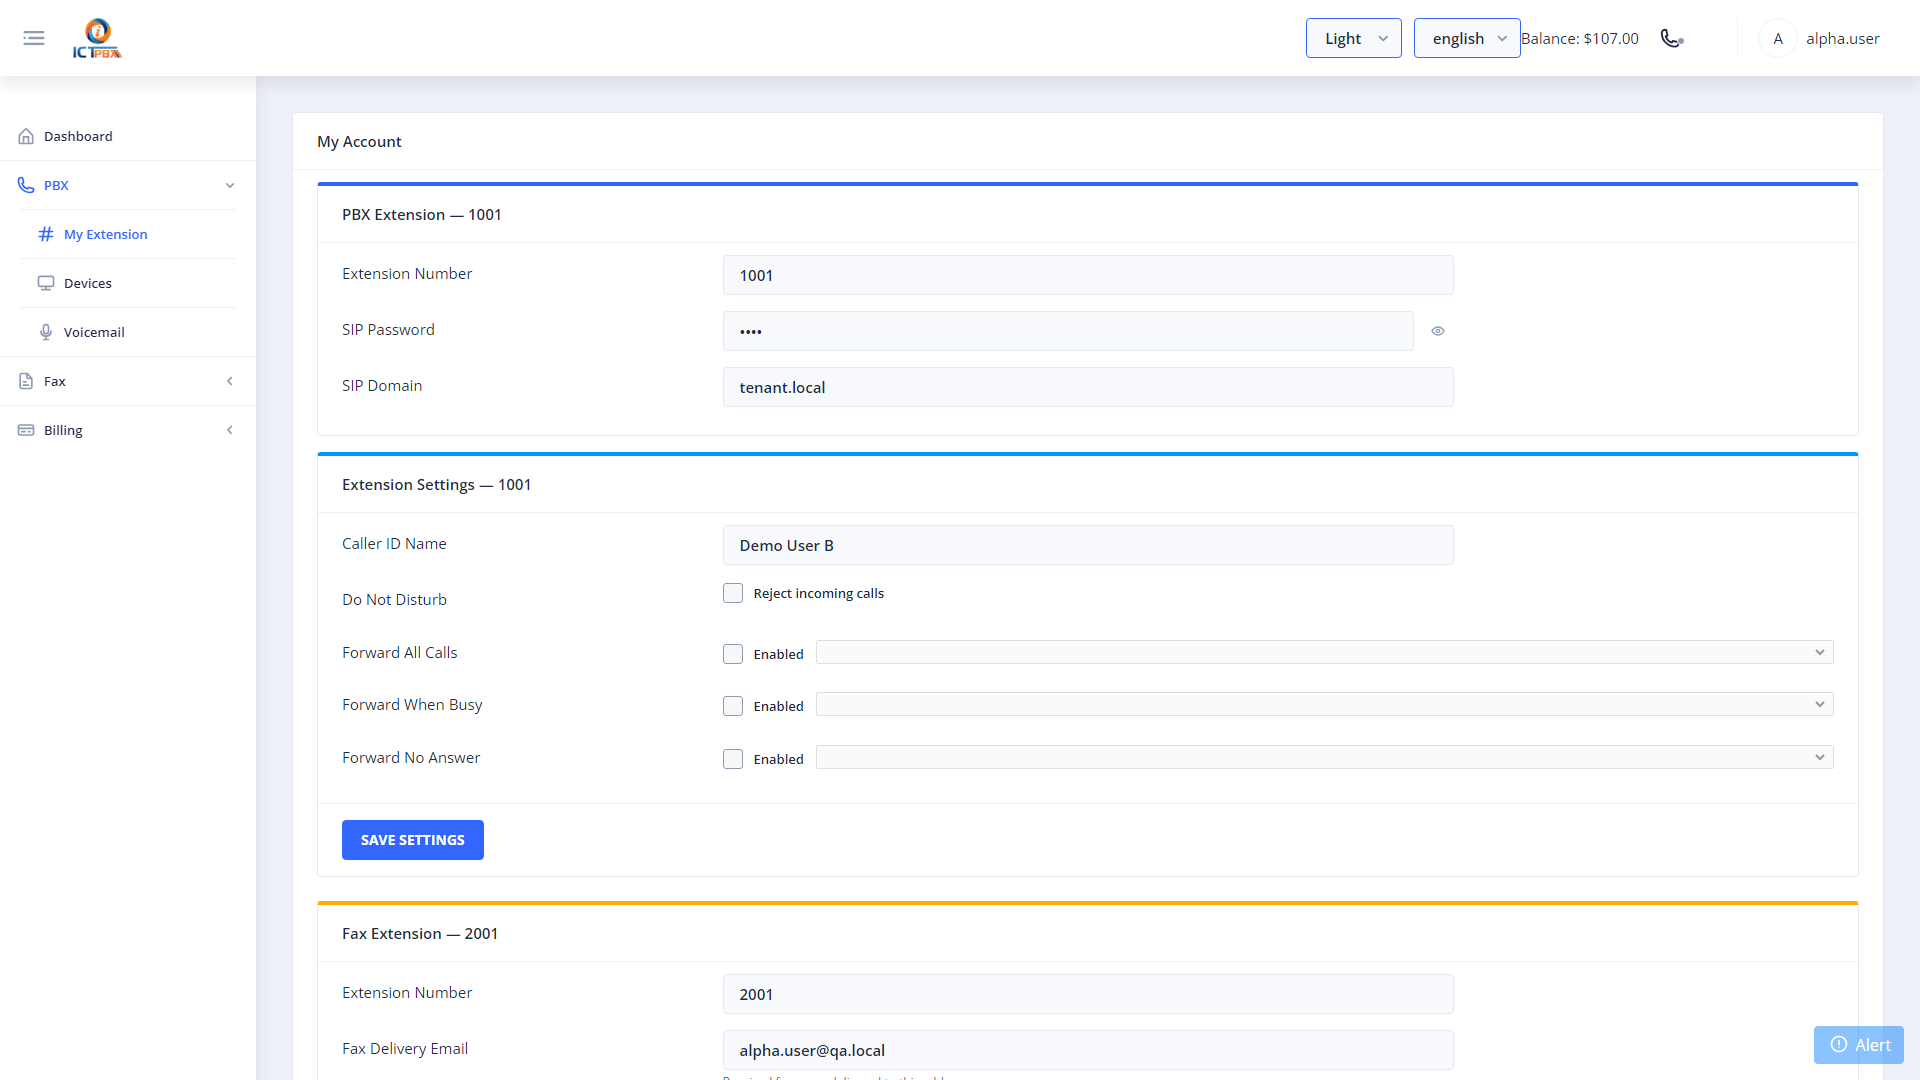
26.1 SIP Credentials
Your SIP credentials are displayed in the Voice Extension card:
26.2 Do Not Disturb (DND)
Scroll to Extension Settings. Tick Reject Incoming Calls (DND) to reject all inbound calls to your extension temporarily. Click Save Extension Settings to apply.
26.3 Fax Delivery Email
Scroll to the Fax card. Enter the email address where inbound faxes for your personal fax extension should be delivered as PDF attachments. Click Save.
27. WebRTC Softphone
The built-in softphone is available from any page — click the phone icon (☎) in the top-right header.

First-time setup
- Click the Settings tab.
- Enter your SIP Extension, SIP Password, SIP Domain, and WebSocket Server (from My Account).
- Click Save.
The status indicator turns green when registered.
Making a call
- Click the Dialer tab.
- Type the destination.
- Click the green call button.
In-call controls
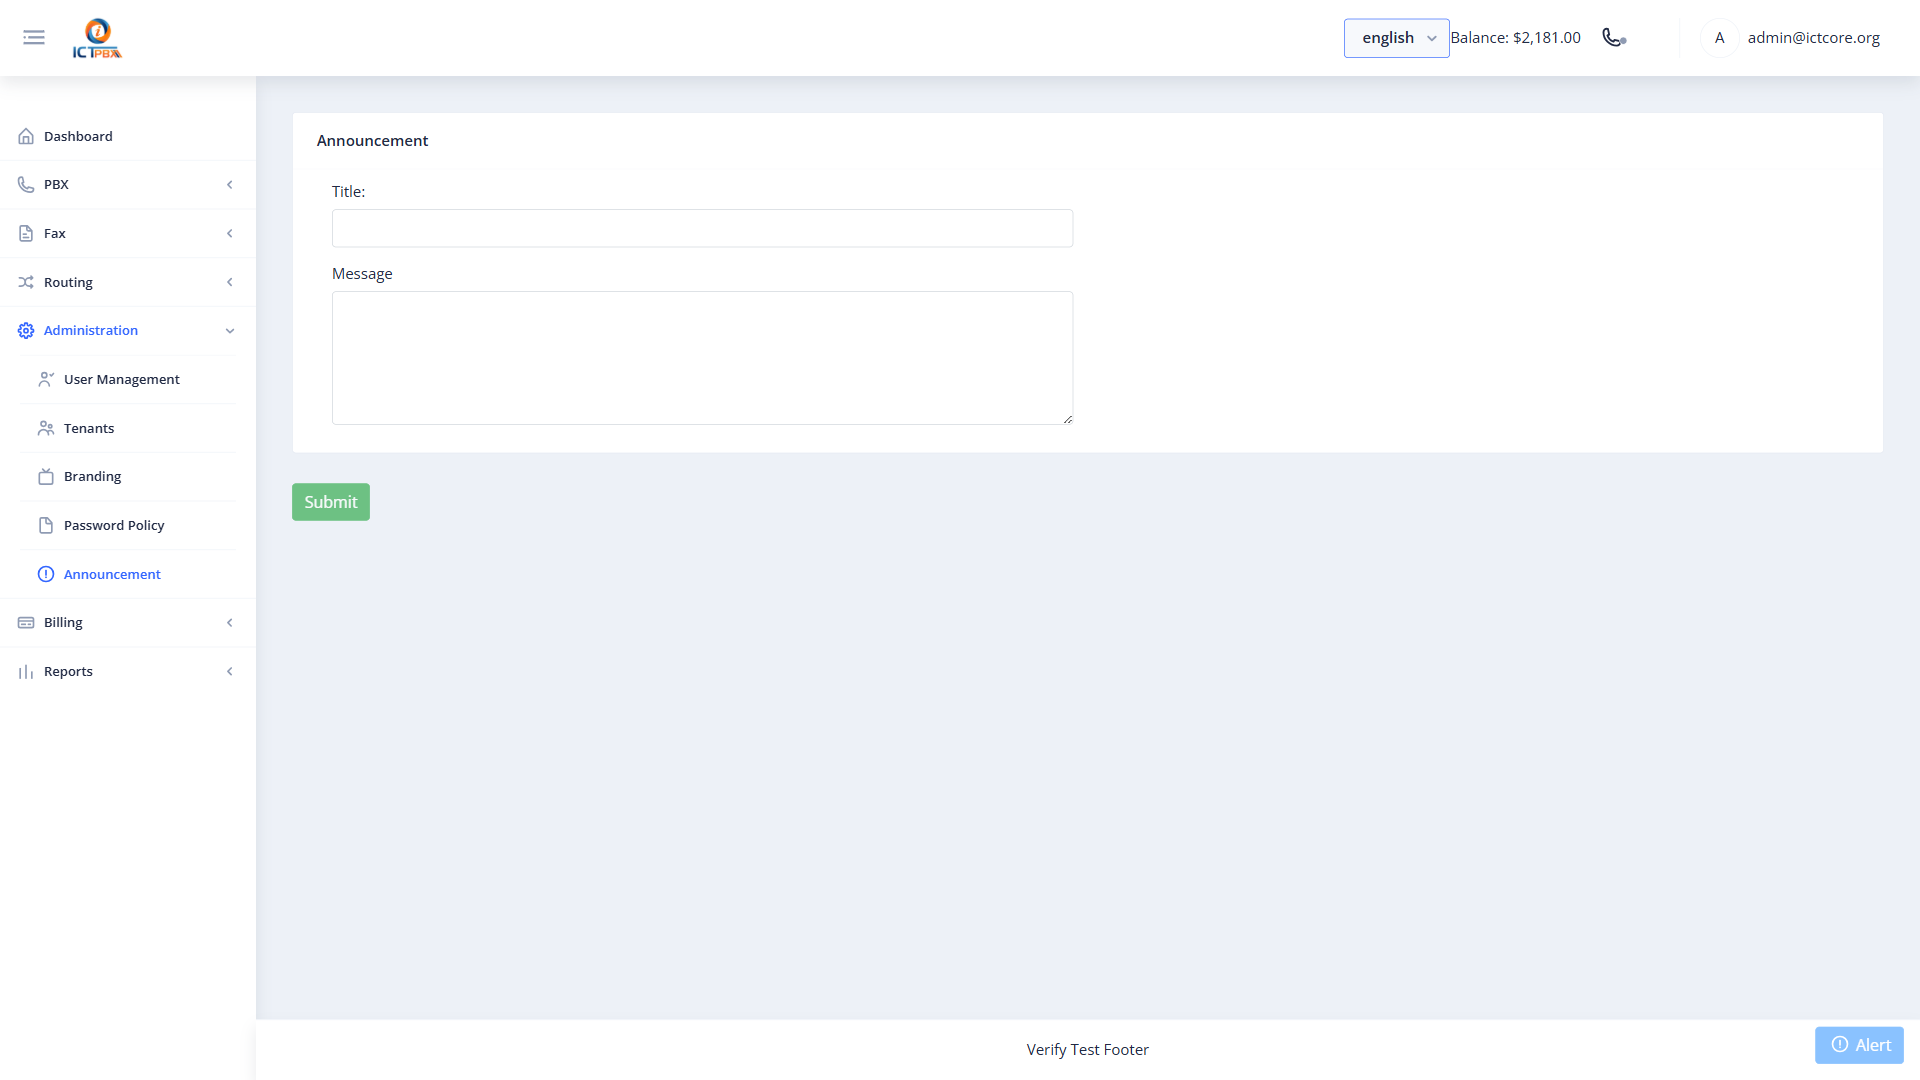
28. Announcements
Navigate to Administration → Announcements from the sidebar (if enabled by your service provider) to post broadcast messages visible to all users in your tenant portal.
Tips & Best Practices
Extensions and devices:
- Assign one device per extension for best call quality. Multiple devices sharing one extension is supported but can cause ring-all behaviour.
- Set strong SIP passwords — weak passwords expose your tenant to toll fraud.
Queues and ring groups:
- Use Ring Groups for small teams where all members should ring simultaneously.
- Use Call Queues for larger support teams where you need call prioritisation, wait announcements, and agent-tier management.
Call flows:
- Always create Time Condition schedules before creating Call Flows — a Call Flow without a Time Condition defaults to always using the main destination.
Fax:
- Ensure each fax extension has a dedicated DID assigned — outbound fax caller ID is derived from the DID linked to the fax account.
- Always send faxes as PDF files.
Realtime:
- Use the Realtime Monitor during peak hours to spot abandoned calls in queues early.
Security:
- Regularly review the Activities Log to detect unexpected configuration changes.
- Disable or delete unused extensions to reduce the attack surface.
- Enforce strong passwords for all user accounts.
ICTPBX Service Provider Edition — Tenant Administrator Guide Platform: demo.ictpbx.com