
1. Logging In
Navigate to your ICTPBX URL (e.g. https://demo.ictpbx.com). Enter your credentials and click Sign In.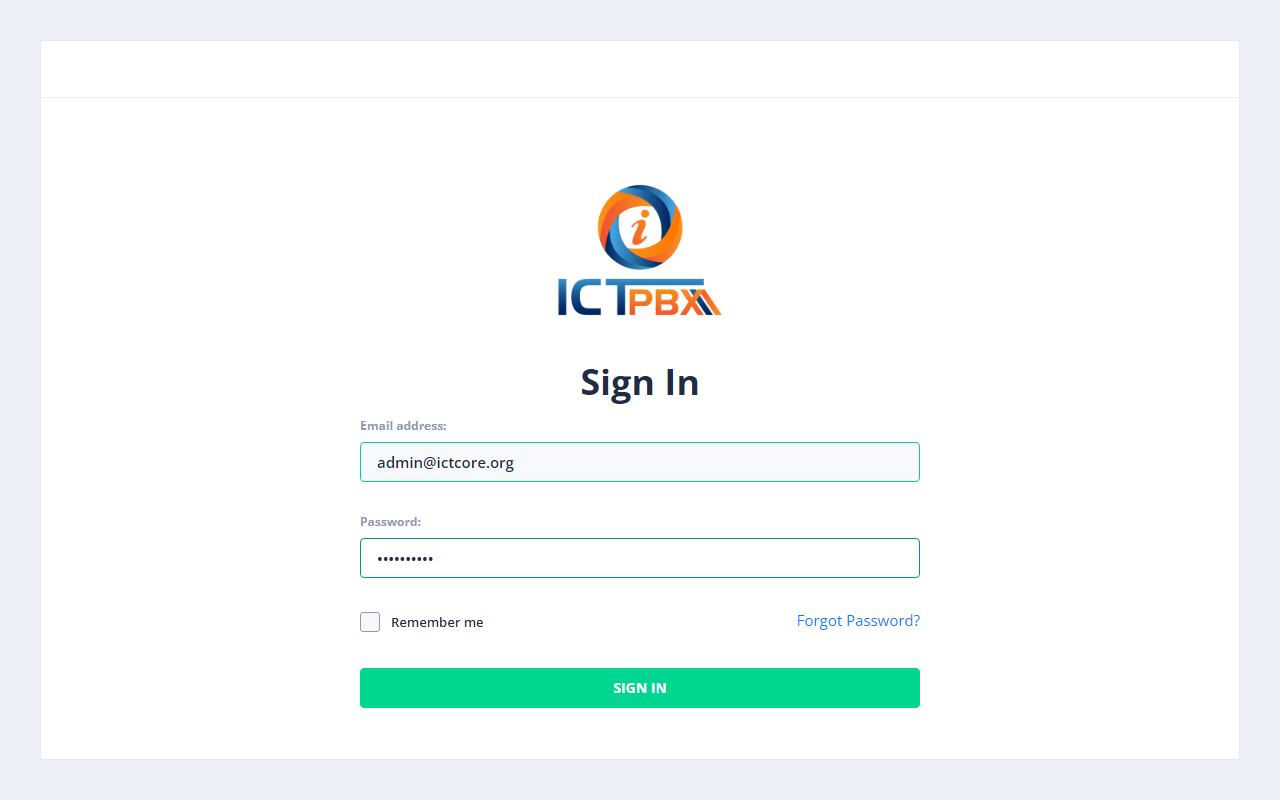
Fig 1-1 - Login pageDemo environment - use these accounts to explore the system:
| Role | Username | Password | Access level |
|---|---|---|---|
| Admin | admin@ictcore.org | helloAdmin | Full access - all menus, all tenants |
| Tenant Admin | tenant@ictcore.org | helloTenant | Own tenant: PBX, fax, users, billing quota |
| End User | user@ictcore.org | helloUser | Softphone, fax send/receive, my quota |

Fig 1-2 - Dashboard - admin view showing stat cards and full sidebar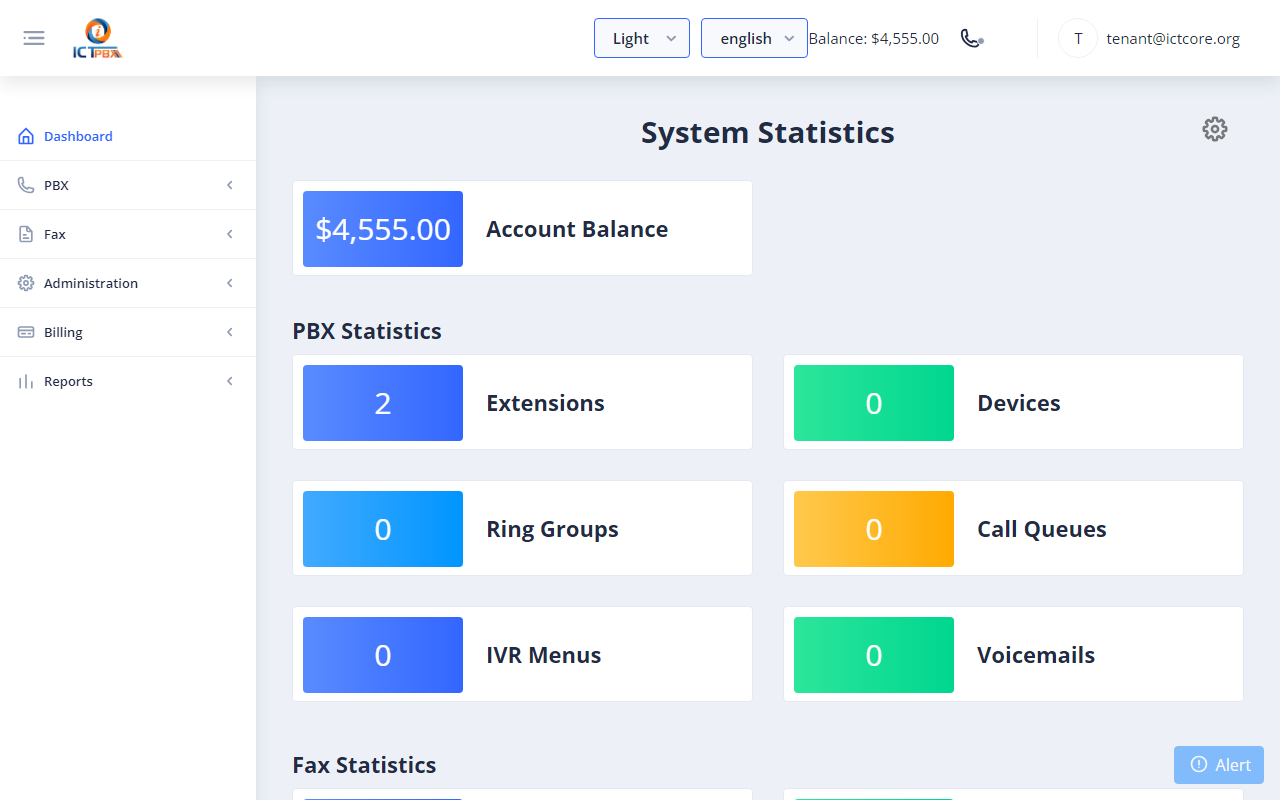
Fig 1-3 - Dashboard - tenant view (filtered sidebar, own stats only)
2. Multi-Tenant Management
ICTPBX is fully multi-tenant. Each tenant is an independent organisation with its own users, extensions, DIDs, fax accounts, and billing quota. Tenants cannot see each other's data.2a. Creating a Tenant
Note: Admin only.Go to Administration → Tenants → Add Tenant.| Field | Description |
|---|---|
| Company | Organisation name shown in reports and billing |
| Primary contact email | |
| Daily Limit | Maximum fax/call transactions per day (−1 = unlimited) |
| Monthly Limit | Maximum fax/call transactions per month (−1 = unlimited) |
| Permissions | Comma-separated capability tokens granted to this tenant (see below) |
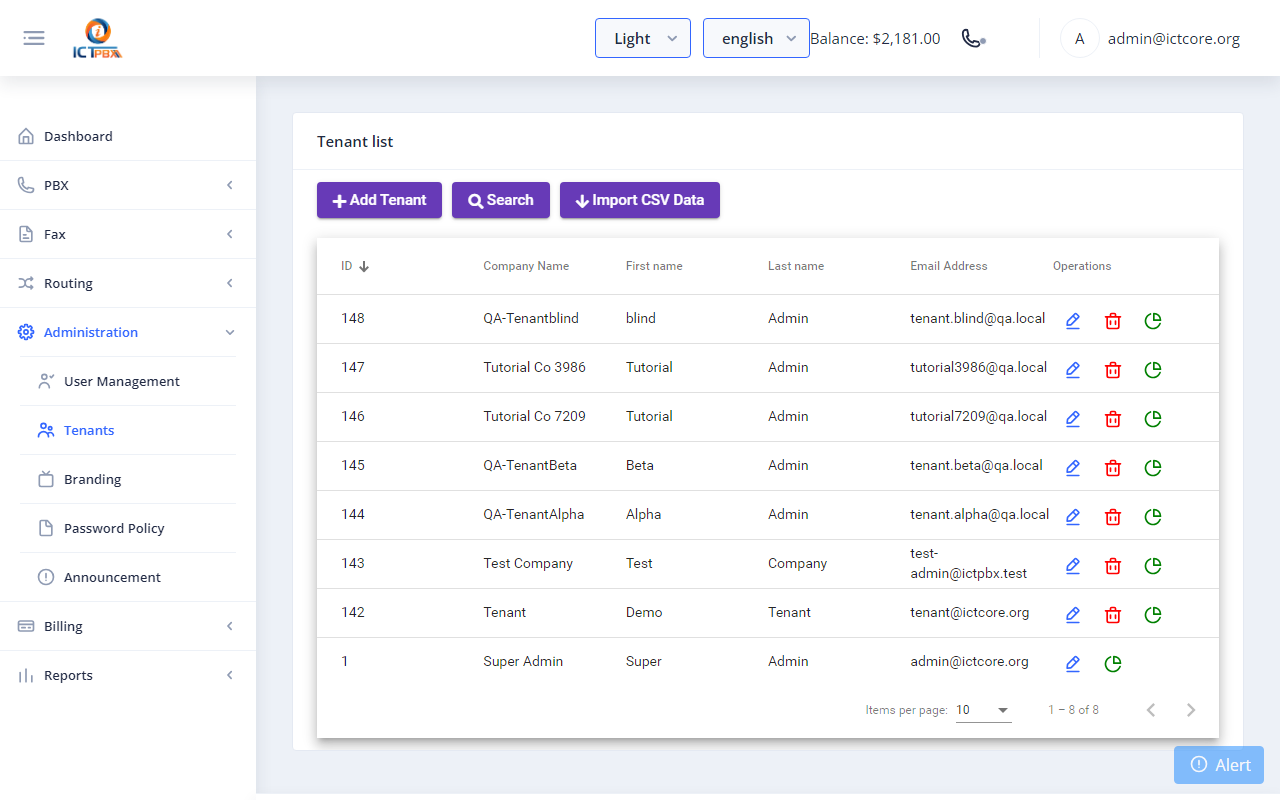
Fig 2-1 - Tenants list - each row shows company, limits, and assigned usage
2b. Tenant Permissions
Permissions control which features a tenant's users can access. They are set on the tenant and cascade down - a user can only be granted permissions their tenant already holds.| Permission token | Unlocks |
|---|---|
| send_fax | Fax → Send Fax, Bulk Fax |
| receive_fax | Fax → Receive Fax, My DIDs |
| fax_setting | Fax → Fax Settings |
| contacts | Fax → Contacts, Contact Groups, DNC |
| fpbx_extension | PBX → Extensions (foundation for all PBX features) |
| devices | PBX → Devices |
| ring_groups | PBX → Ring Groups |
| call_queues | PBX → Call Queues |
| ivr_menus | PBX → IVR Menus |
| voicemails | PBX → Voicemail |
| conferences | PBX → Conferences |
| follow_me | PBX → Follow Me |
| inbound_routes | PBX → Inbound Routes |
| realtime | PBX → Realtime Monitor |
2c. Creating Users Under a Tenant
Go to Administration → User Management → Add User.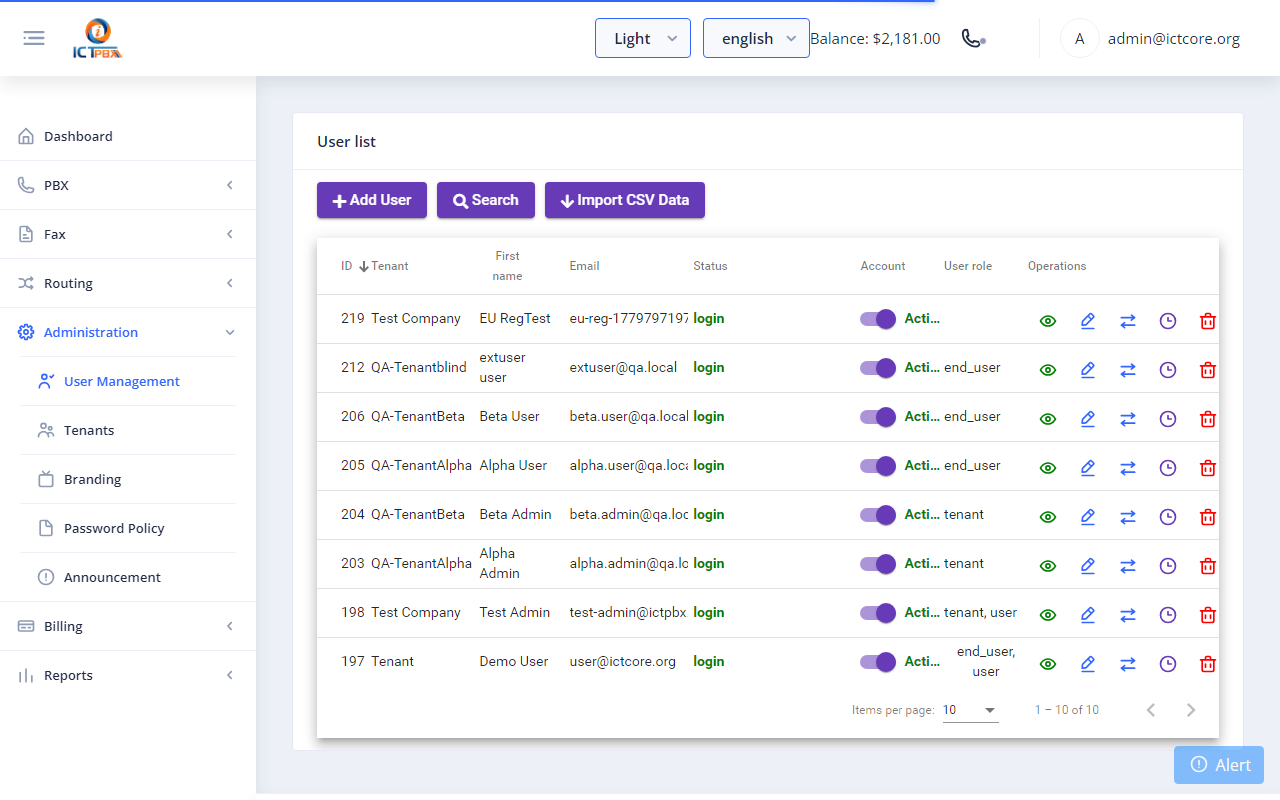
Fig 2-3 - User list showing role badges and tenant column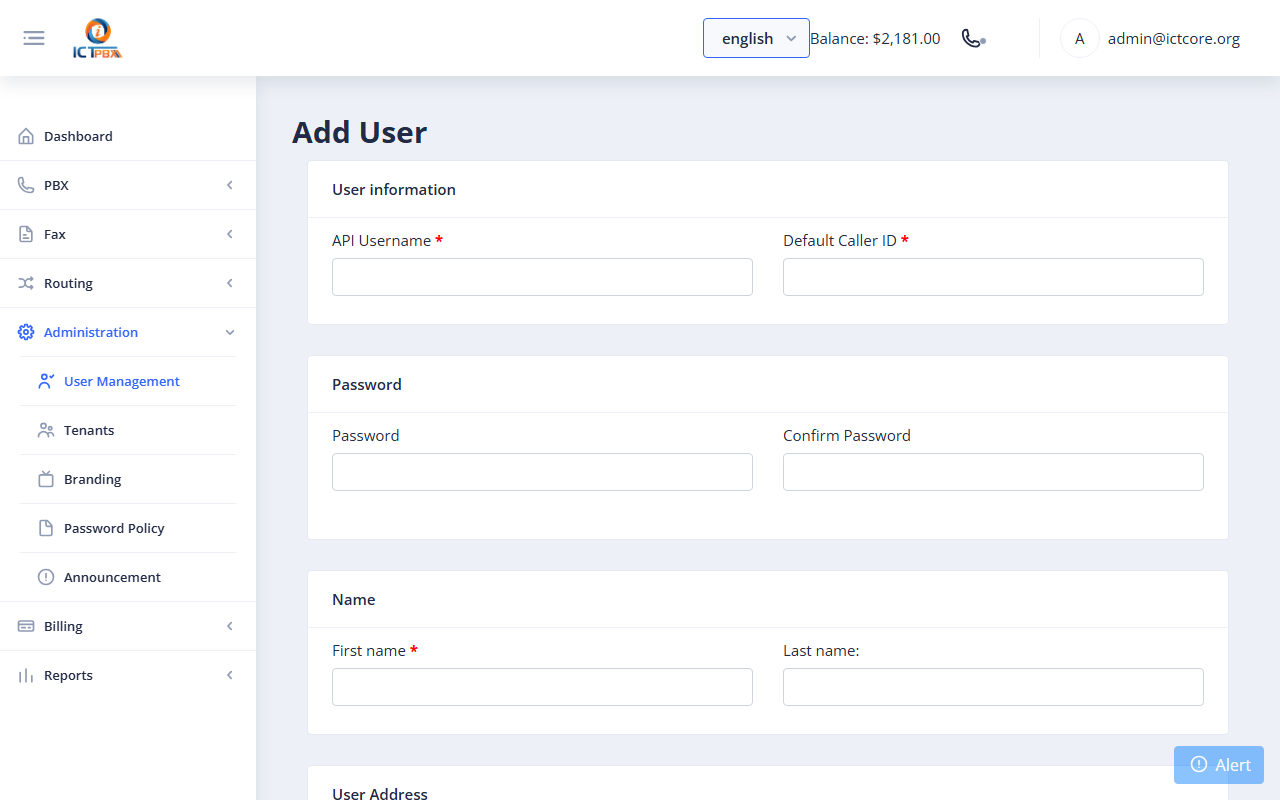
Fig 2-4 - Add User form - top section (name, password, contact)
Fig 2-5 - Role and Tenant selection sectionRole rules:
- Tenant Admin (role=3) - manages PBX and users within one tenant. Super Admin tenant is excluded from the tenant dropdown when this role is selected.
- User (role=1) - standard user; auto-selected when Tenant Admin is ticked.
- End User (role=4) - restricted to softphone + fax; cannot manage PBX objects.
Fig 2-6 - Permission checkboxes - grouped by Fax, PBX, and ContactsPermission inheritance:
- The permission checkboxes shown are filtered to only what the tenant already holds.
- Granting a child permission auto-enables its parent (e.g. ticking Devices auto-ticks Extensions).
- Unticking a parent auto-clears all dependent children.
2d. PBX Resource Allocation
When PBX permissions are granted to a user, the admin also sets numeric slot limits - how many of each PBX object that user's tenant quota allows them to create.| Resource | Permission required | What it controls |
|---|---|---|
| Extensions | fpbx_extension | Max SIP extensions this user's quota covers |
| Devices | devices | Max SIP devices |
| Ring Groups | ring_groups | Max ring groups |
| Call Queues | call_queues | Max call queues |
| IVR Menus | ivr_menus | Max IVR menus |
| Voicemail Boxes | voicemails | Max voicemail boxes |
| Conferences | conferences | Max conference rooms |
| Music on Hold | music_on_hold | Max MOH entries |
3. Setting Up a SIP Trunk (Provider)
Note: Admin only.A Trunk connects your system to the PSTN via a SIP carrier for outbound calls and inbound DID delivery.Go to Routing → Trunks → Add Provider.| Field | Example | Notes |
|---|---|---|
| Name | MyCarrier | Friendly label |
| Host | sip.mycarrier.com | SIP proxy / registrar from carrier |
| Username | 15551234567 | SIP auth username |
| Password | (SIP password) | |
| Caller ID | +15551234567 | Outbound caller ID presented to PSTN |
| Active | Yes |

Fig 3-1 - Trunks list - Status column shows REGED when registered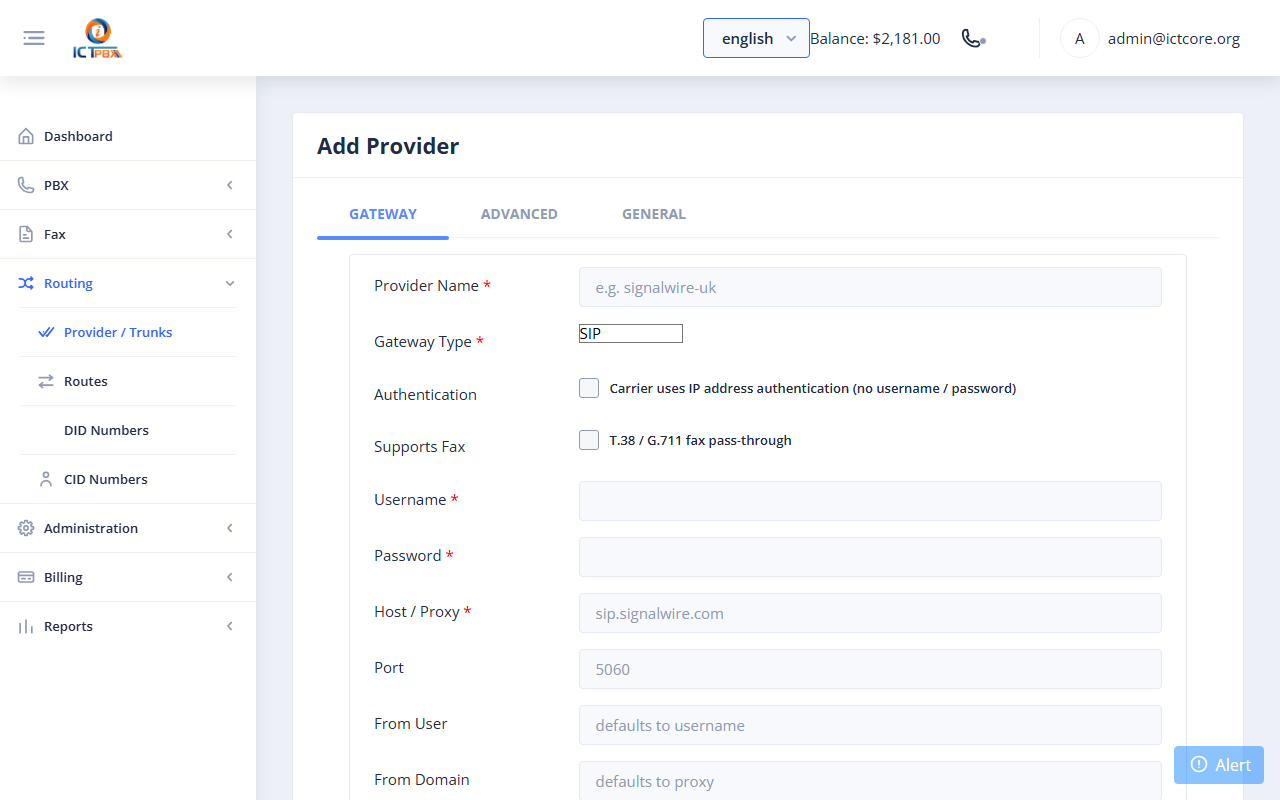
Fig 3-2 - Add Provider form
Outbound Route
Go to Routing → Routes → Add Route. Select the service (fax/voice), provider, and destination pattern.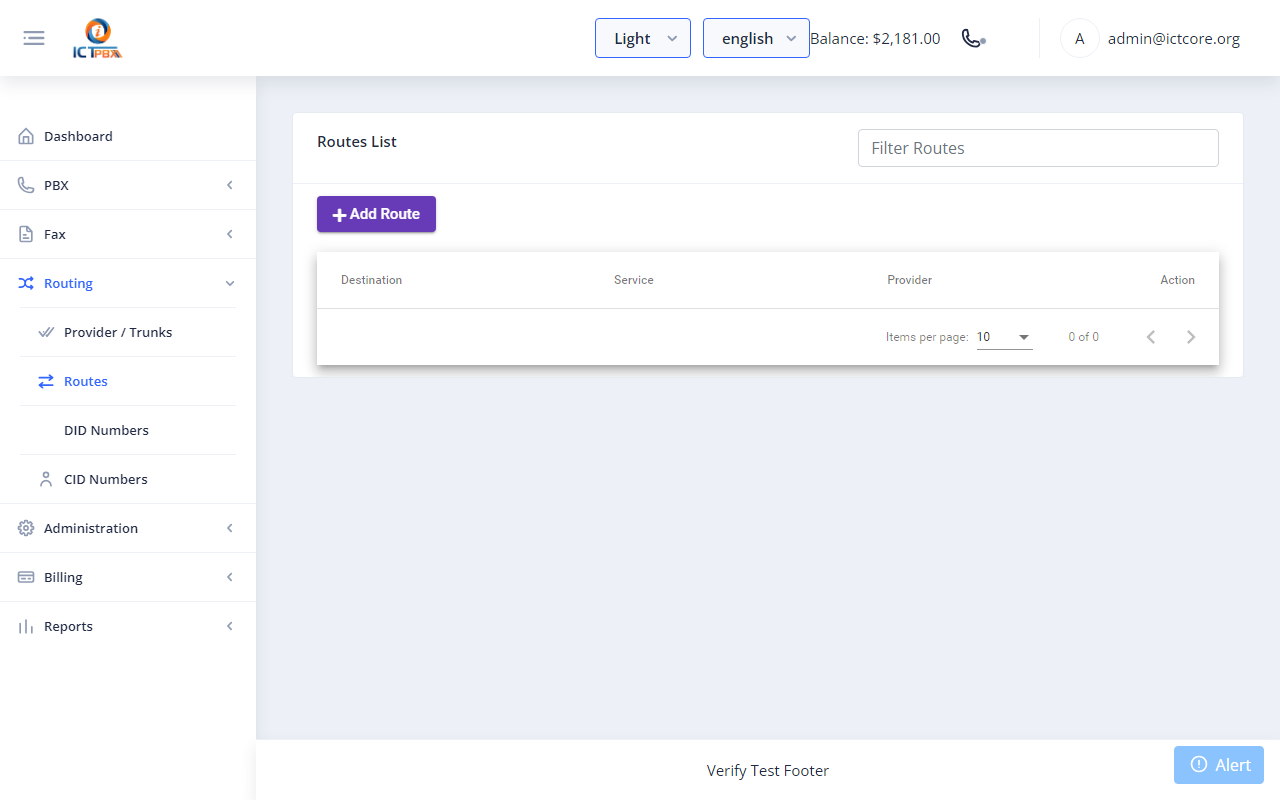
Fig 3-3 - Routes list with delete action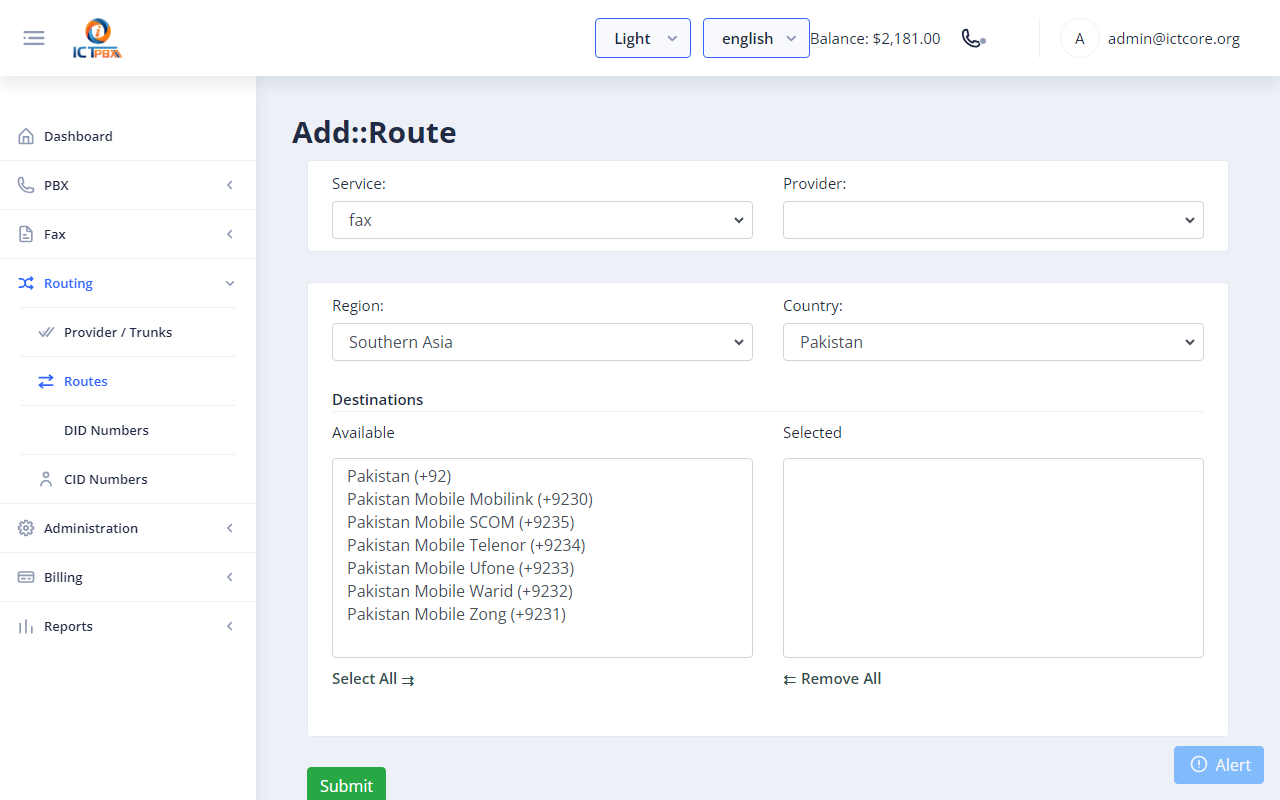
Fig 3-4 - Add Route - destination pickerVerify trunk registration at PBX → Realtime. The gateway row should show REGED.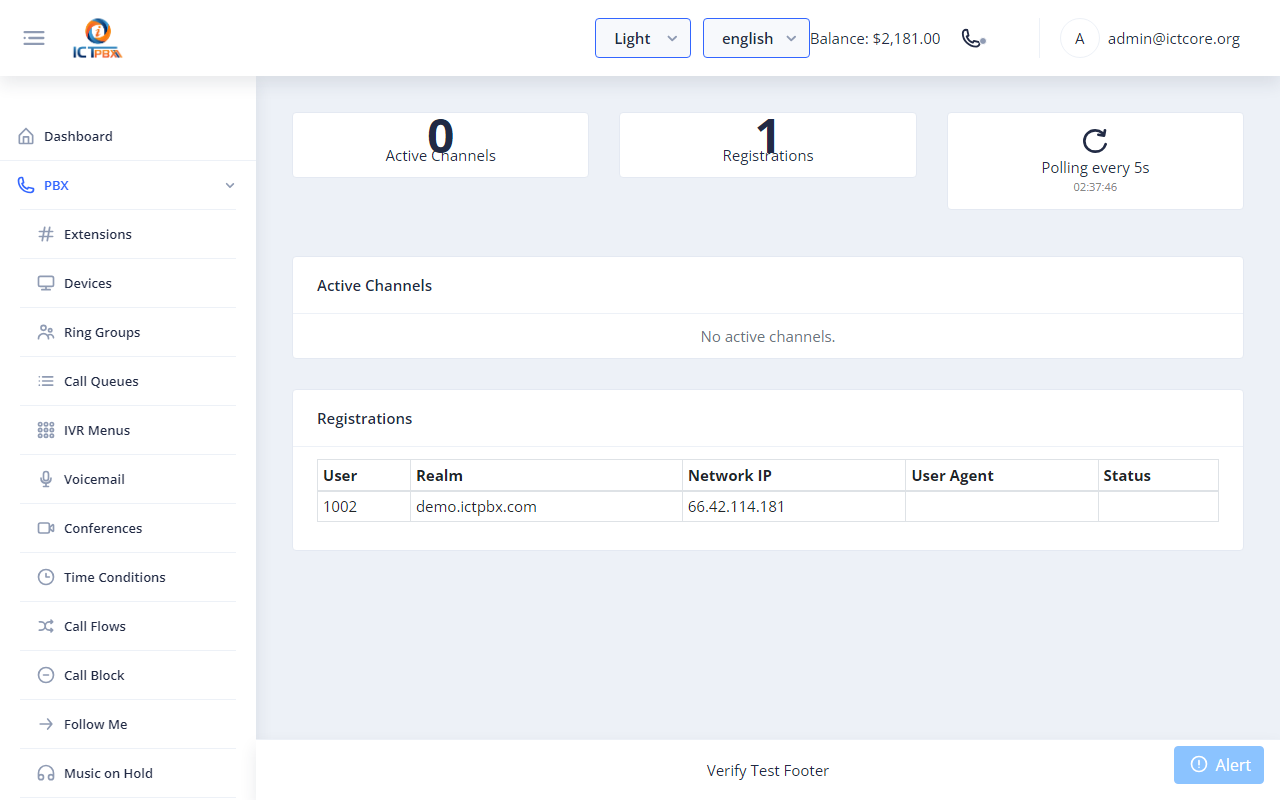
Fig 3-5 - Realtime page - Gateways tab showing REGED status
4. Adding a DID Number
Note: Admin only. Obtain the number from your SIP carrier first.Go to Routing → DID Numbers → Add DID.| Field | Example |
|---|---|
| DID Number | +12125550199 |
| Provider | MyCarrier |
| Tenant | Acme Corp |
| Description | Main Office Line |
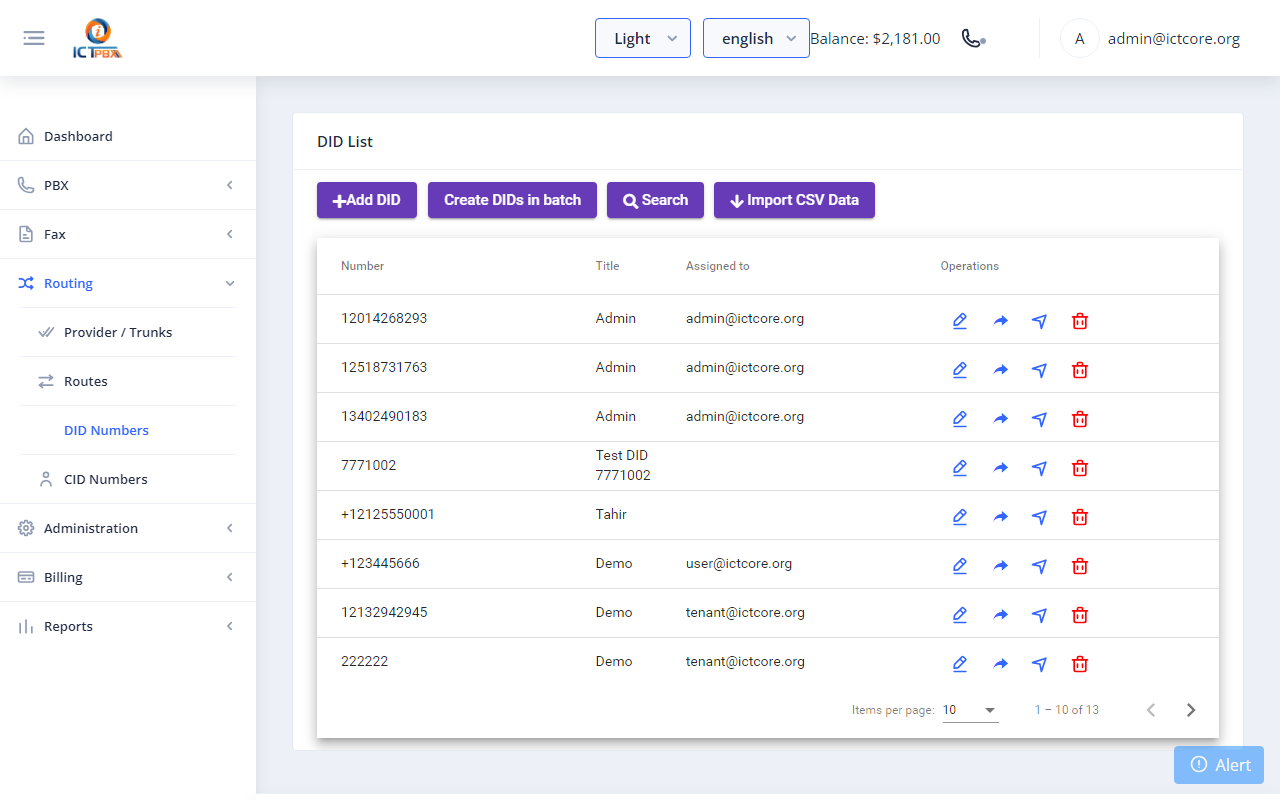
Fig 4-1 - DID Numbers list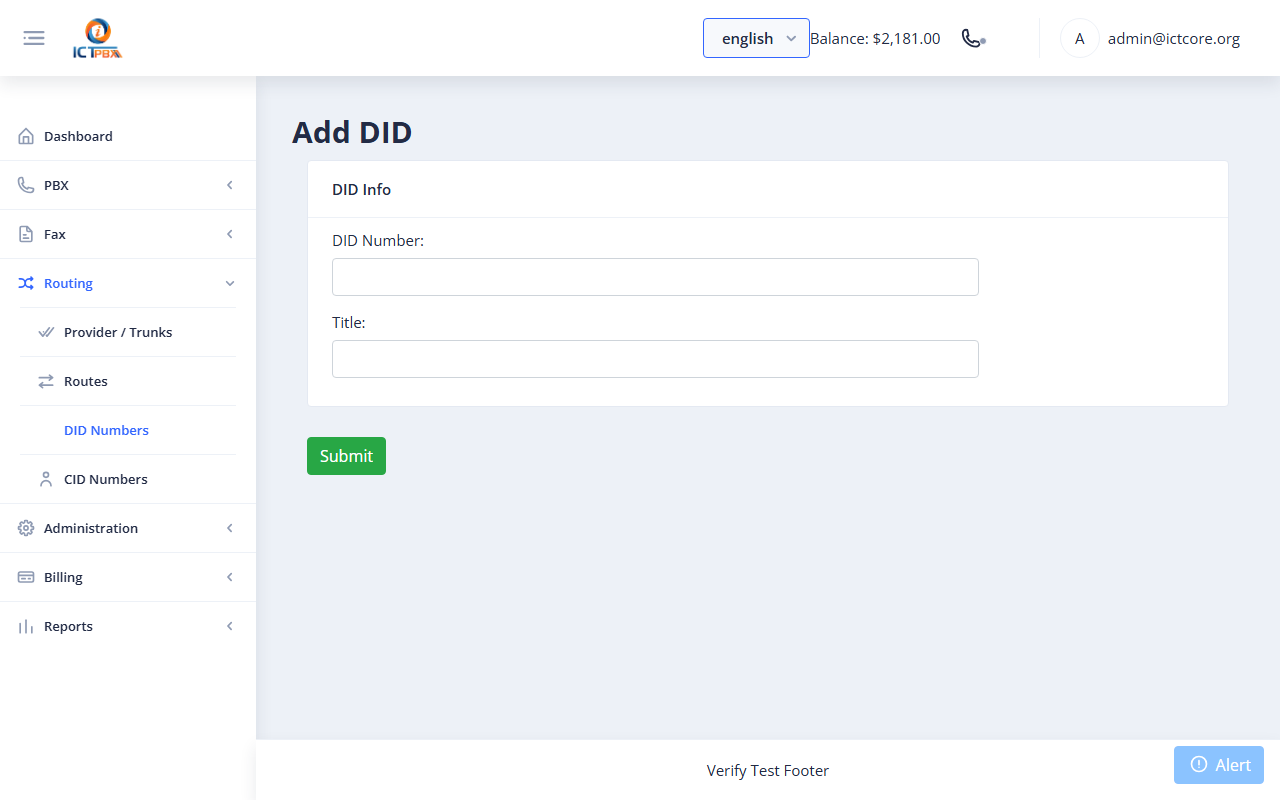
Fig 4-2 - Add DID formAfter saving, the DID is registered but not yet routed. Set the destination in Section 8 (Inbound Routes).
5. Creating Extensions
An extension is a 4-6 digit SIP endpoint. Go to PBX → Extensions → Add Extension.| Field | Notes |
|---|---|
| Extension | 4-6 digits, unique within the tenant domain |
| Display Name | Shown as caller ID on inbound calls |
| Password | SIP registration password used by the phone/softphone |
| Type | Voice (default) or Fax |
| Voicemail | Enable to attach a voicemail box to this extension |
| Voicemail PIN | Numeric PIN for voicemail retrieval (*98) |
| Assign To User | Links the extension to a user account for My Account access |
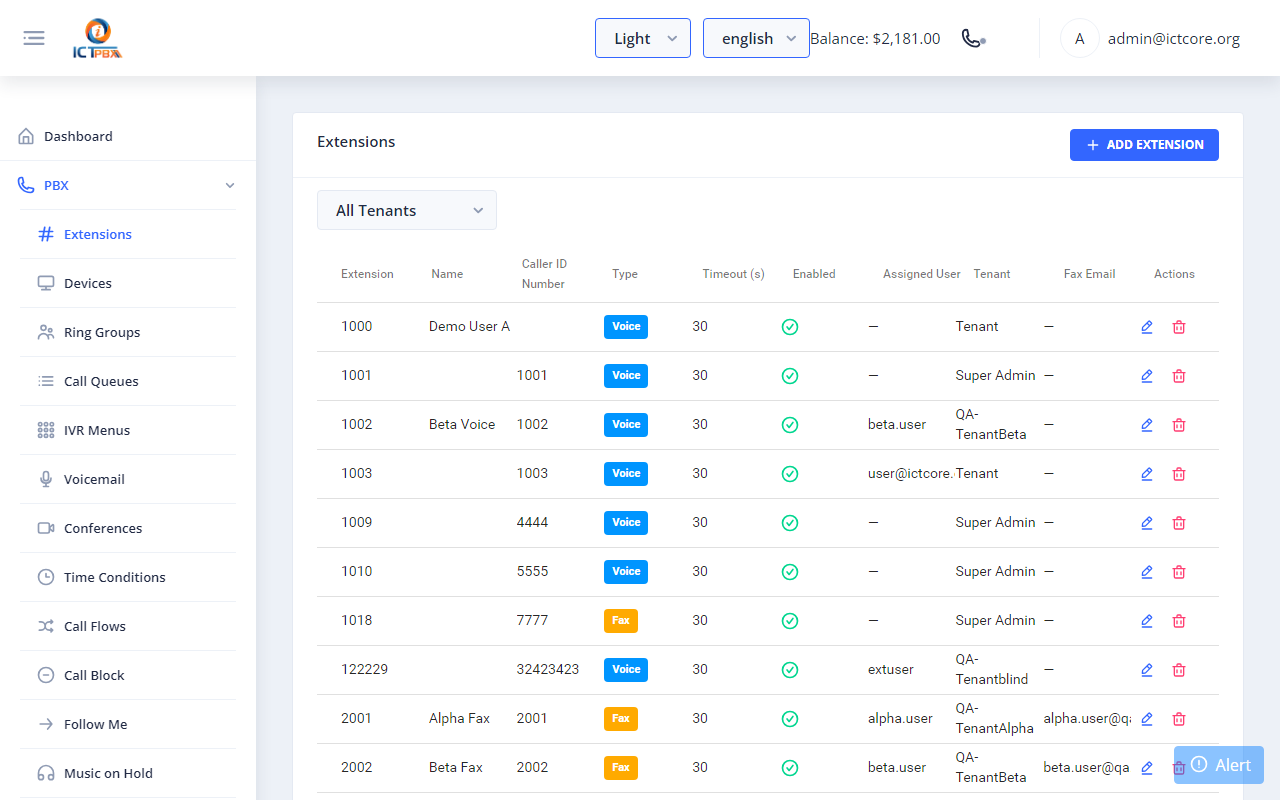
Fig 5-1 - Extensions list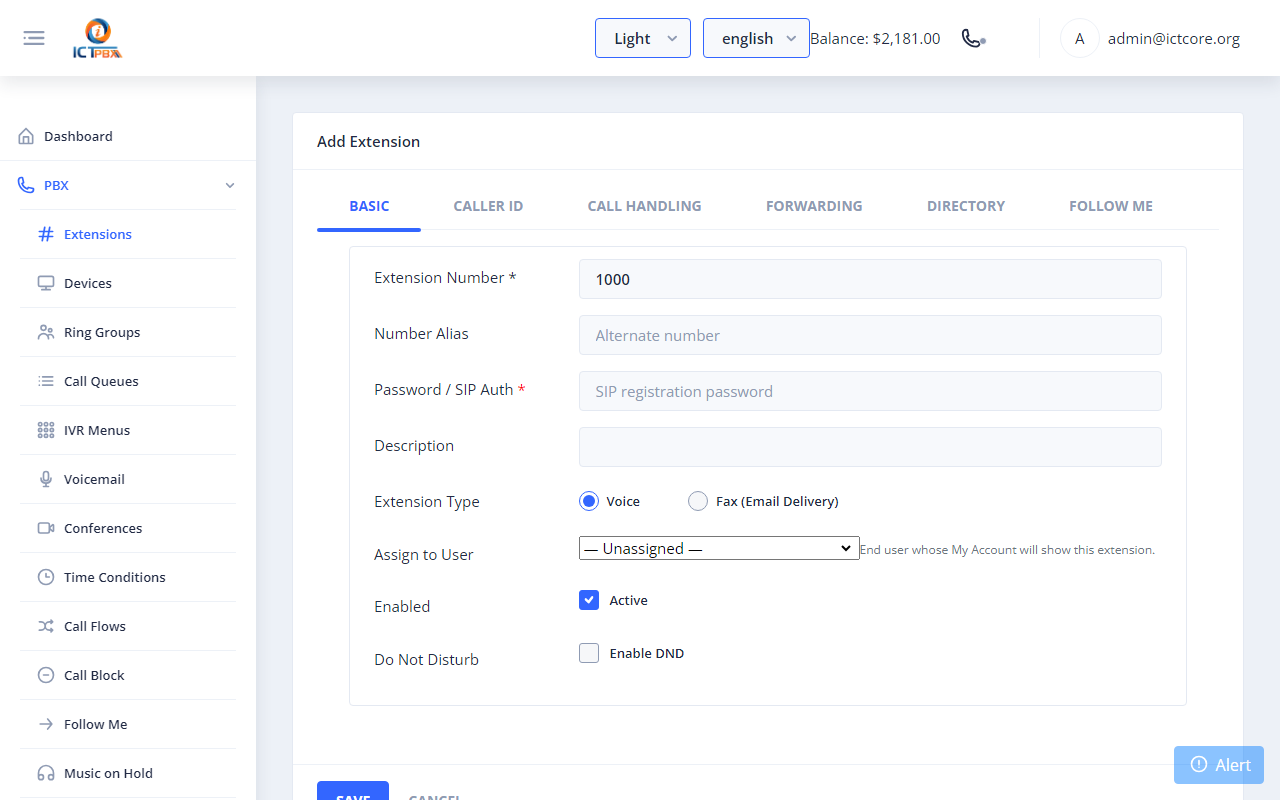
Fig 5-2 - Add Extension formFreeSWITCH reloads its XML configuration automatically after each save or delete.
6. Registering a WebPhone (Device)
The built-in browser softphone uses WebRTC/JsSIP - no plugin required. Create a device record first, then configure the softphone panel in the browser.6a. Create a Device Record
Go to PBX → Devices → Add Device. Set the extension number and assign to a user.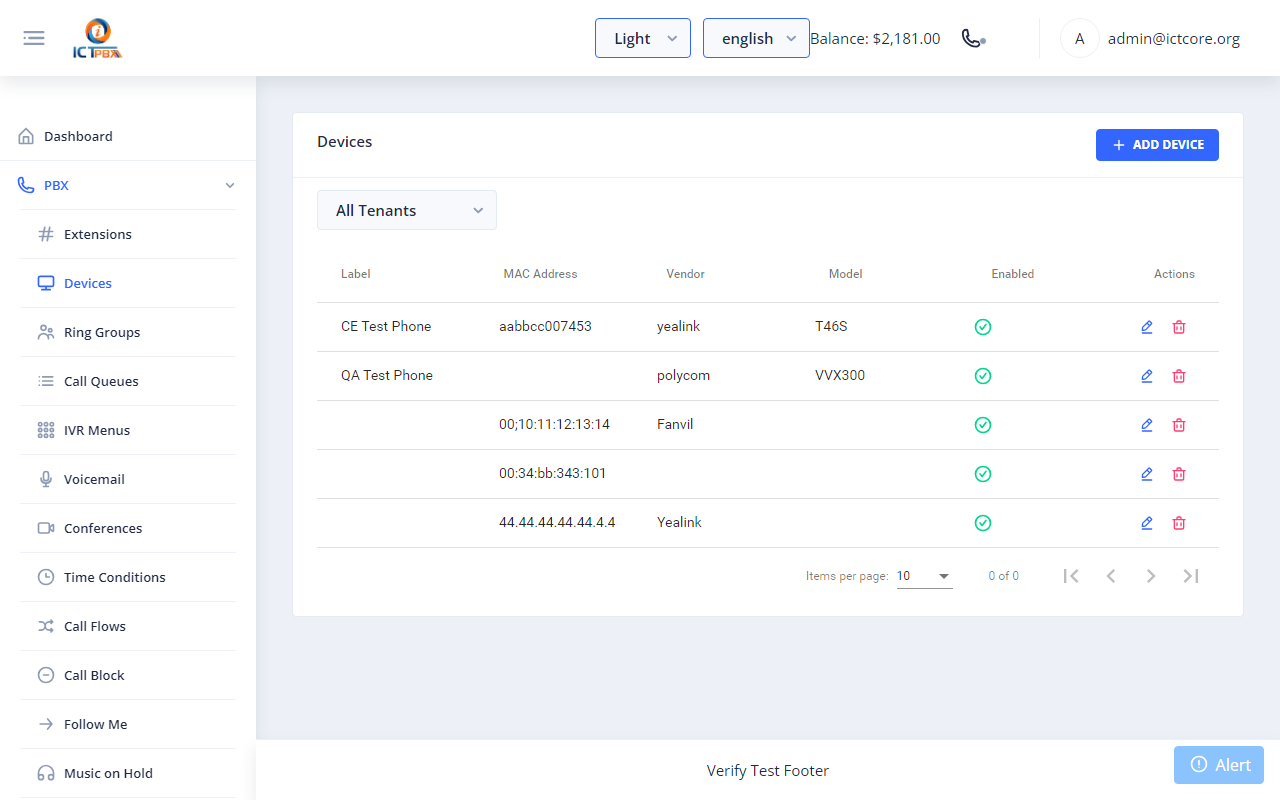
Fig 6-1 - Devices list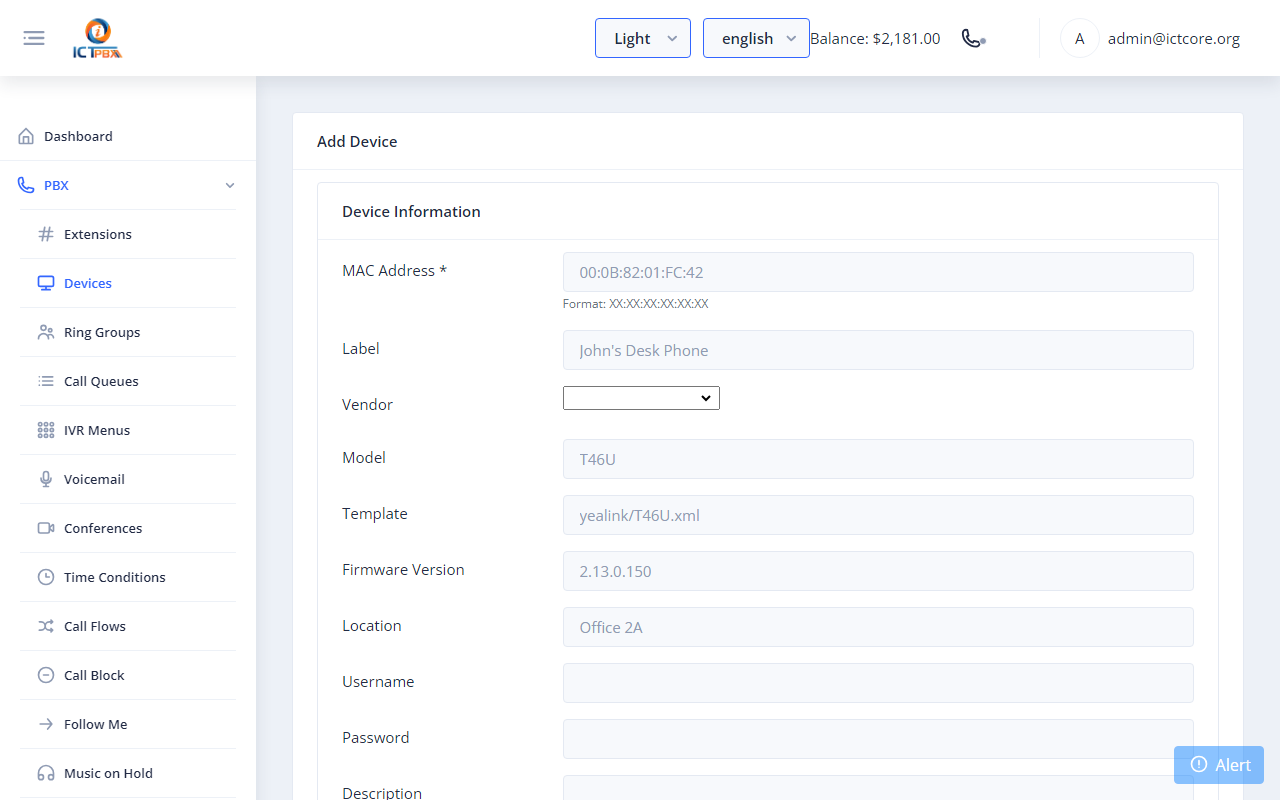
Fig 6-2 - Add Device form
6b. Connect the Browser Softphone
Click the phone icon in the top navigation bar. Enter the SIP extension, password, and server hostname in the settings panel. Click Connect - the status indicator turns green when registered.Fig 6-3 - Softphone panel - registered and readyTip: Open two browser windows (or use incognito) - register a different extension in each - to test extension-to-extension calls without needing a second physical device.
7. Setting Up a Ring Group
A Ring Group makes multiple extensions ring when a number is dialled. Go to PBX → Ring Groups → Add Ring Group.| Field | Notes |
|---|---|
| Name | Friendly label (e.g. Sales Team) |
| Extension | Internal dial number to reach this group |
| Strategy | simultaneous - all ring at once; sequence - one by one; round-robin |
| Timeout (sec) | Seconds to ring before going to the no-answer destination |
| No-Answer Action | Voicemail, extension, or IVR to forward unanswered calls |
| Members | Extension numbers to include |
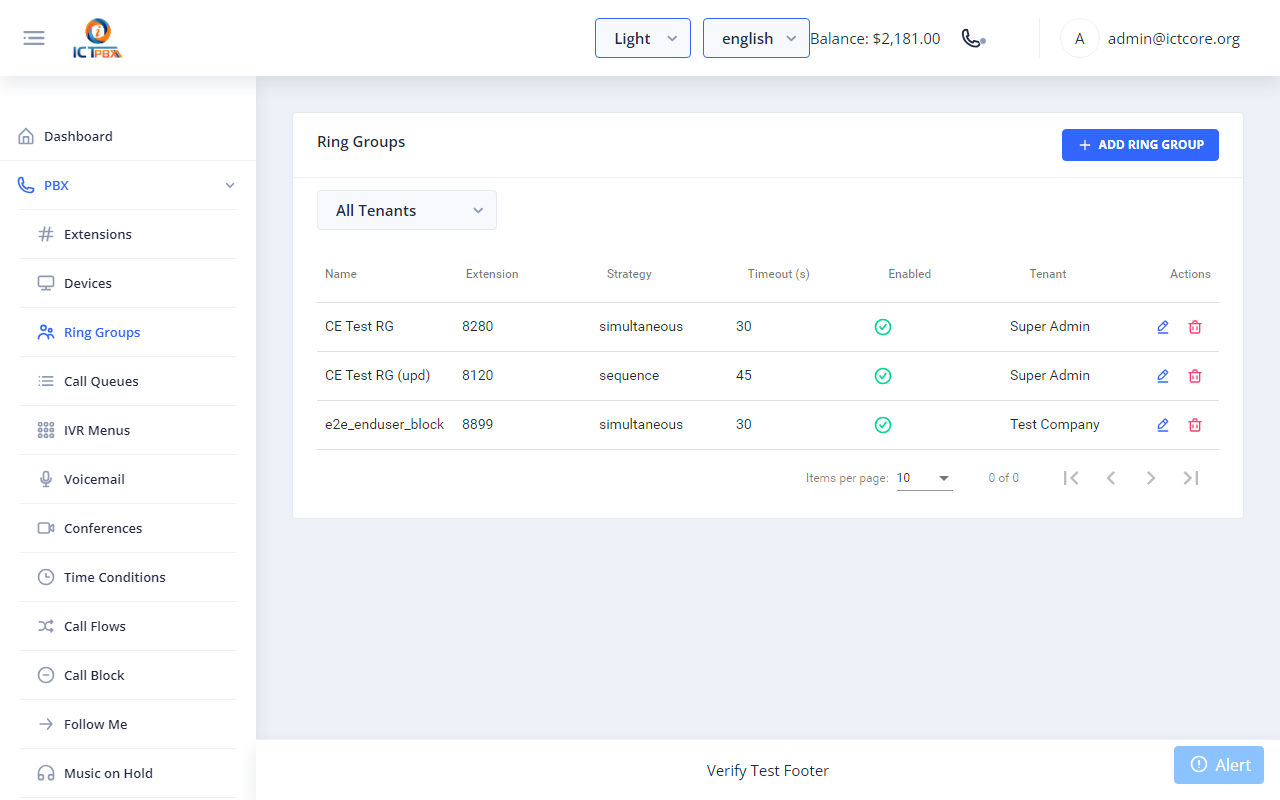
Fig 7-1 - Ring Groups list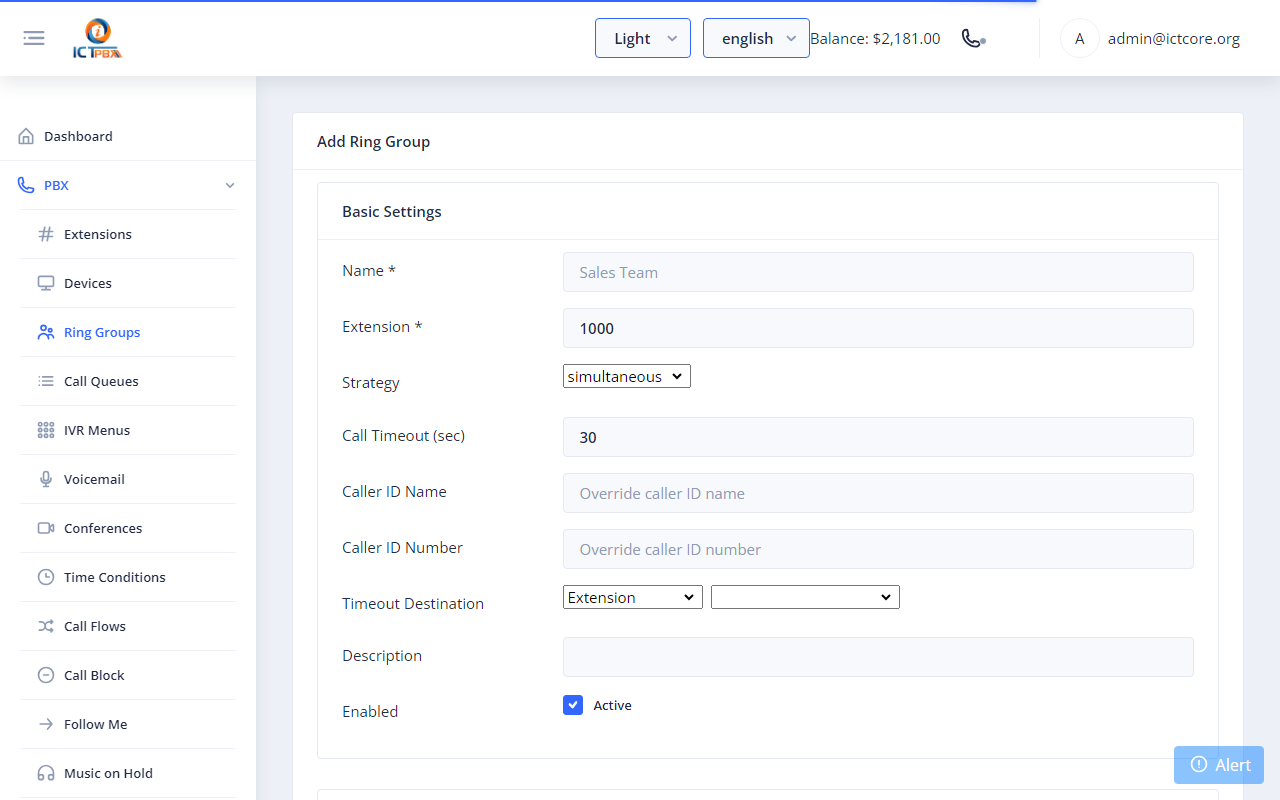
Fig 7-2 - Add Ring Group form
8. Setting Up an IVR Menu
An IVR (Interactive Voice Response) menu plays a greeting then routes callers by key press. Go to PBX → IVR Menus → Add IVR Menu.| Field | Notes |
|---|---|
| Name | Friendly label |
| Extension | Internal dial number |
| Greeting | WAV file (8kHz 16-bit mono) - upload via Fax → Fax Documents first |
| Timeout | Seconds to wait for a key press before repeating or transferring |
| Invalid Action | What to do when caller presses an unmapped key |
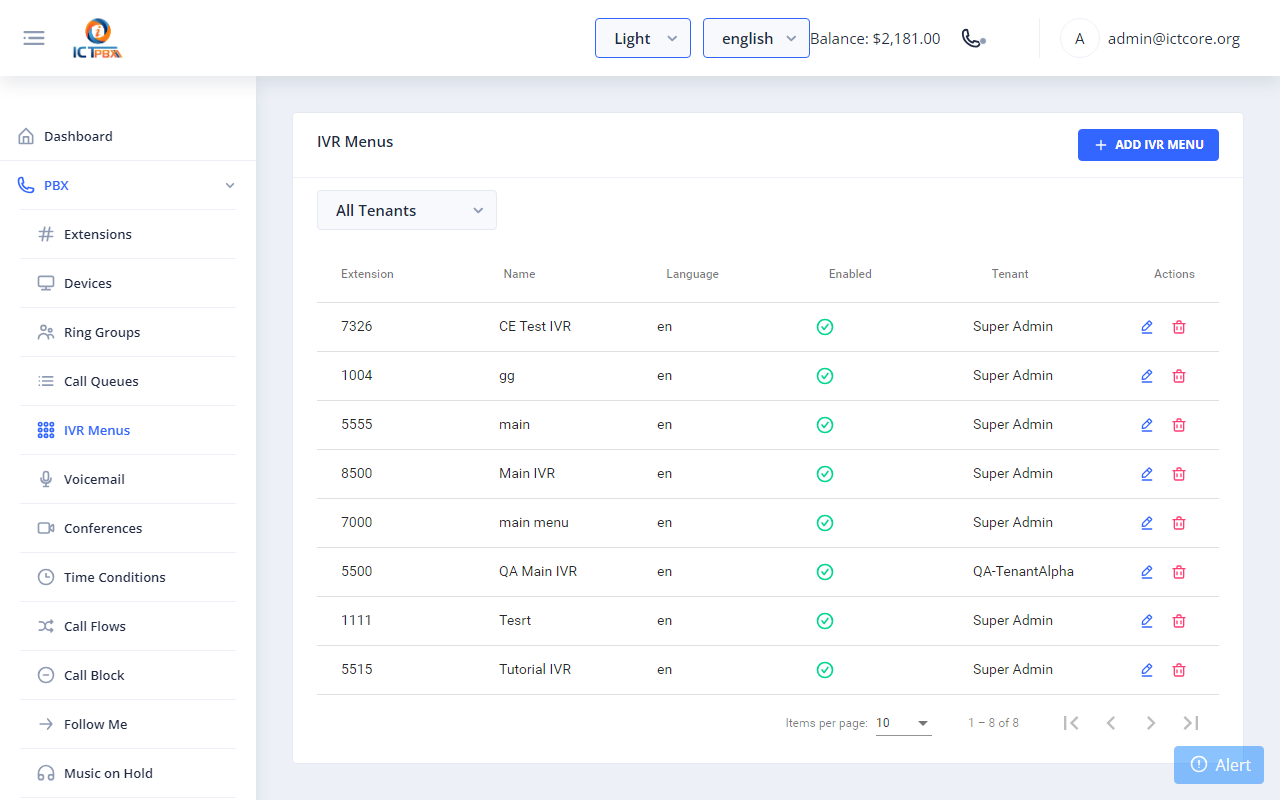
Fig 8-1 - IVR Menus list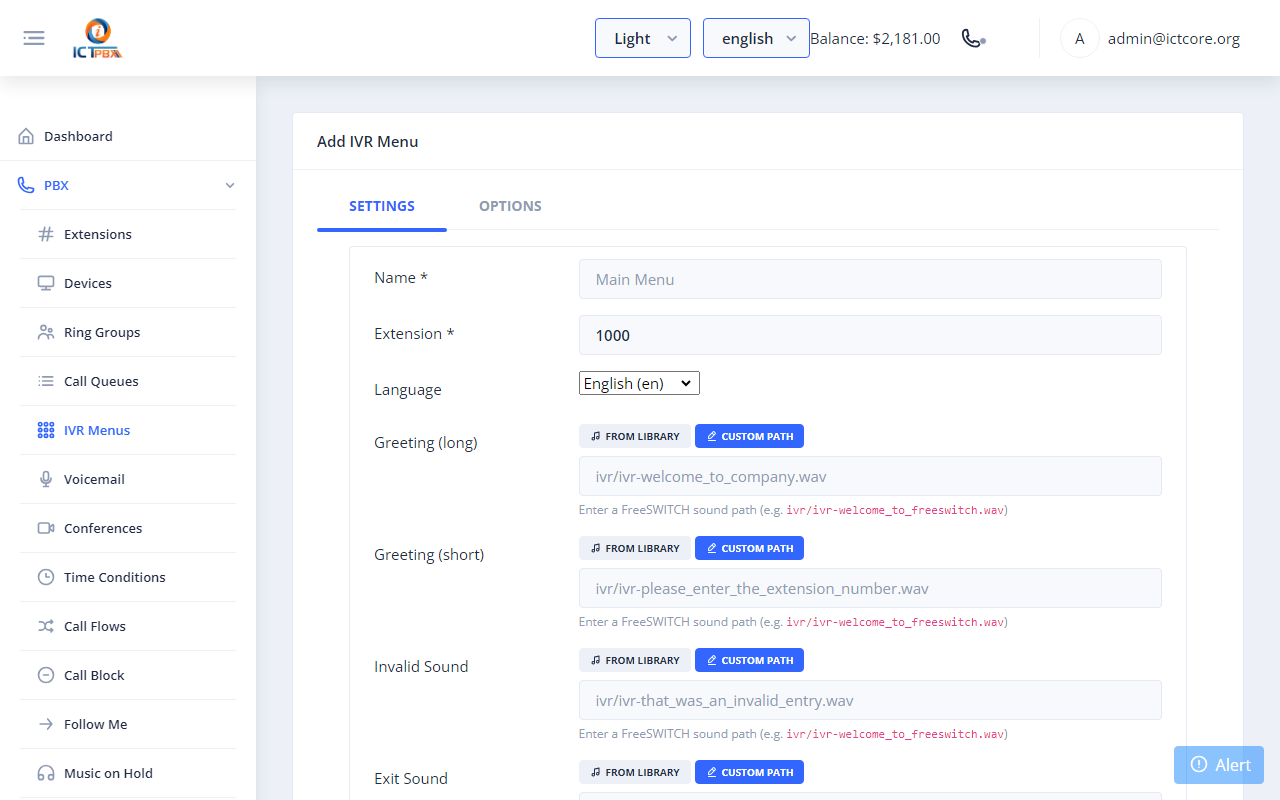
Fig 8-2 - IVR Menu form - top (name, extension, greeting)
Fig 8-3 - IVR options table - digit to destination mappingExample digit mapping:
| Digit | Destination type | Destination |
|---|---|---|
| 1 | Ring Group | Sales Team |
| 2 | Ring Group | Support |
| 0 | Extension | Operator |
| 9 | Voicemail | General Voicemail |
9. Setting Up Voicemail
Go to PBX → Voicemail → Add Voicemail.| Field | Notes |
|---|---|
| Voicemail Number | Usually matches the extension number |
| Password (PIN) | Numeric PIN used to retrieve messages via *98 |
| Display Name | Shown on email notifications |
| Receives audio attachment of every message left | |
| Greeting | Leave blank for default system greeting, or upload a WAV file |
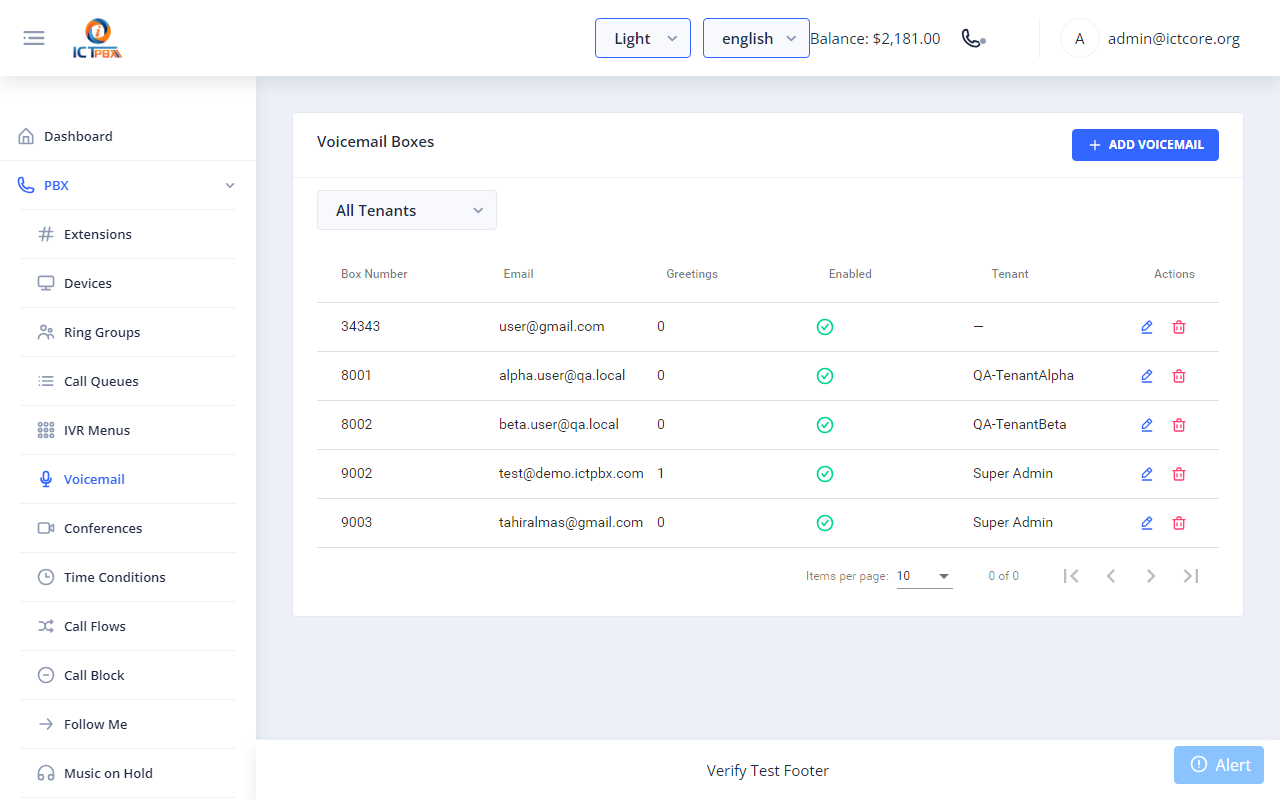
Fig 9-1 - Voicemail list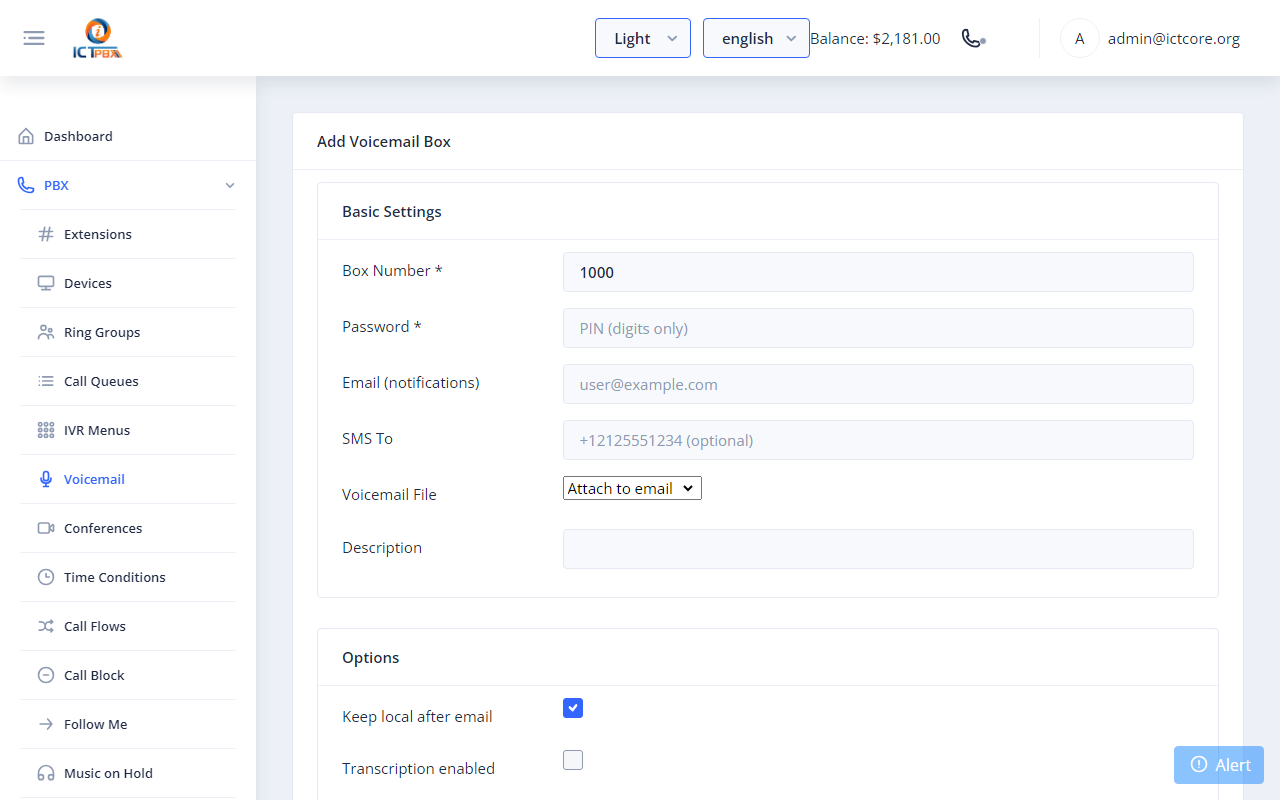
Fig 9-2 - Add Voicemail formTo retrieve messages: dial *98 from any registered extension, enter the voicemail number and PIN.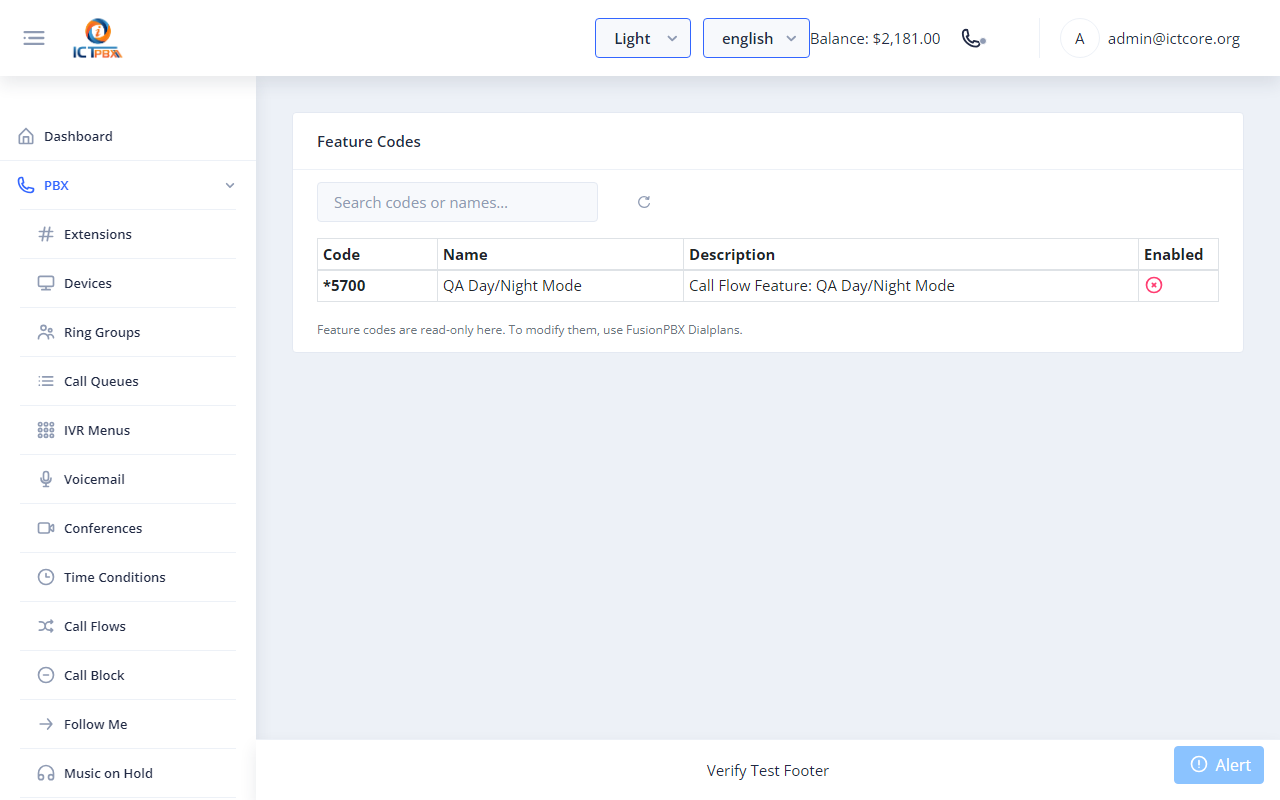
Fig 9-3 - Feature Codes page - *98 = Check Voicemail
10. Routing Your DID (Inbound Route)
Map each DID to a destination. Go to PBX → Inbound Routes → Add Inbound Route.| Field | Notes |
|---|---|
| DID Number | Must match exactly as stored in Routing → DID Numbers |
| Destination Type | IVR Menu, Ring Group, Extension, or Voicemail |
| Destination | The specific object to route to |
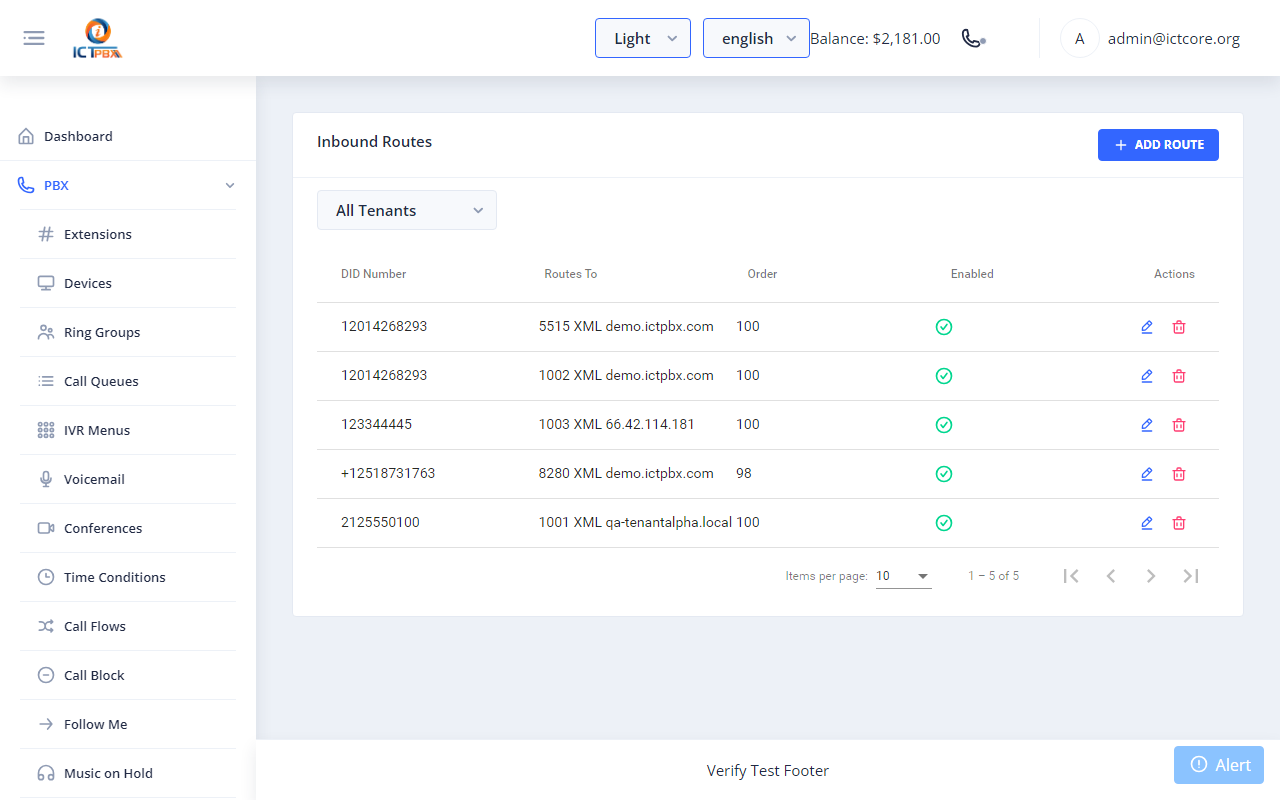
Fig 10-1 - Inbound Routes list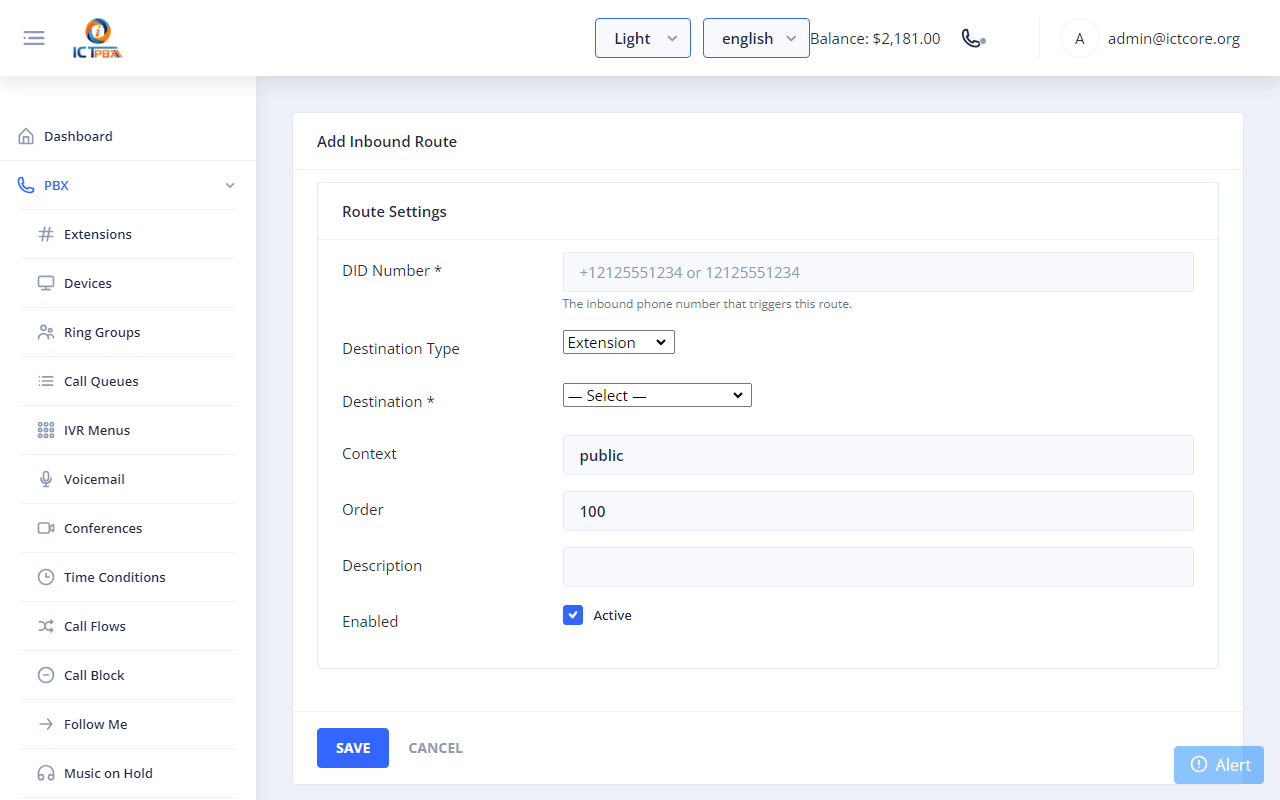
Fig 10-2 - Add Inbound Route form
| Scenario | DID routes to |
|---|---|
| Auto-attendant | IVR Menu |
| Team hunt | Ring Group |
| Direct line | Single Extension |
| Always-voicemail line | Voicemail |
11. Making & Transferring Calls via WebPhone
Extension-to-Extension Call
Open the softphone dialpad, type the target extension number, and click Call. The receiving extension rings in its softphone panel - click Answer to connect.Outbound PSTN Call
Type the number in E.164 format (e.g. +12125550100) in the dialpad and click Call. The system selects the matching outbound route and trunk automatically.Call Transfer
| Type | How | What happens |
|---|---|---|
| Blind | Click Transfer → Blind → enter ext → confirm | Call immediately forwarded; you disconnect |
| Attended | Click Transfer → Attended → enter ext → announce | You speak to recipient first, then complete or cancel |
| Code | Action |
|---|---|
| *2 + ext | Blind transfer |
| *4 + ext | Attended transfer |
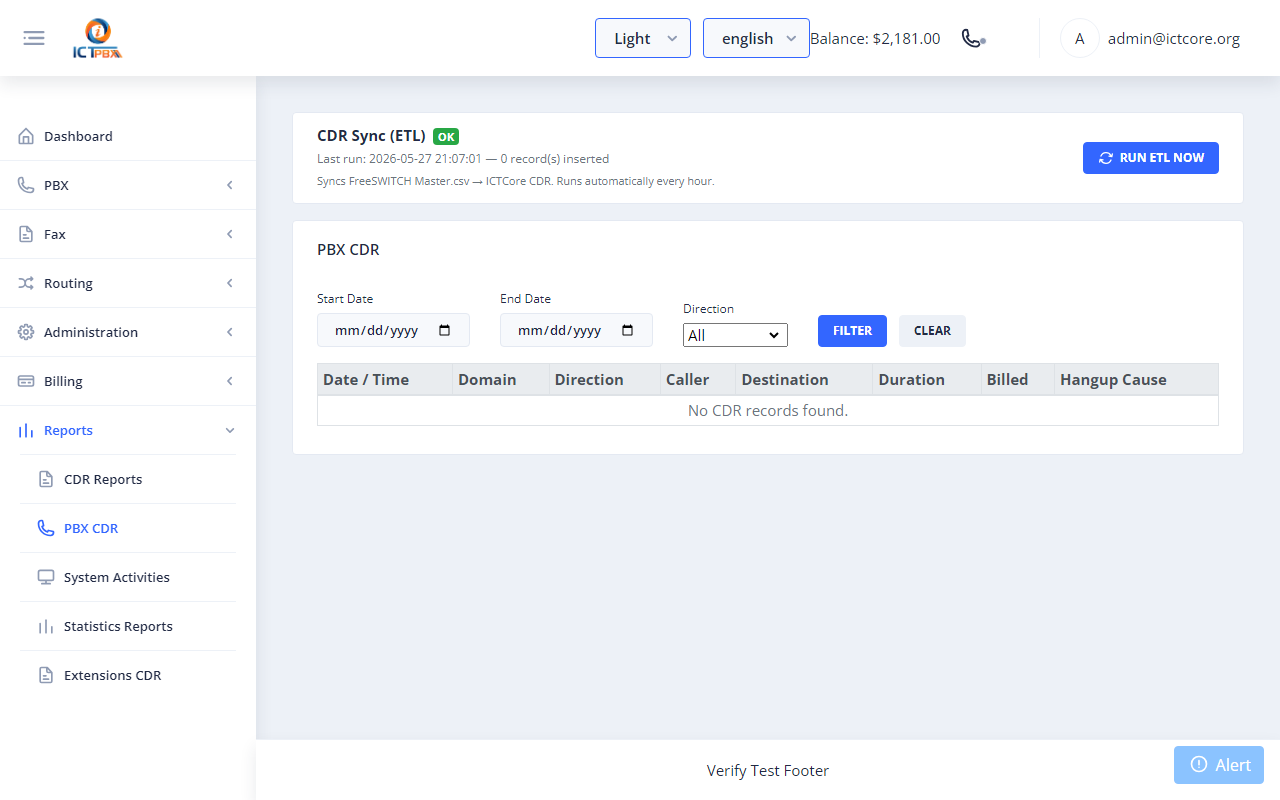
Fig 11-1 - PBX CDR showing call direction, duration, and disposition
12. Follow Me
Follow Me forwards calls to additional numbers (mobile, external) when the primary extension is busy or unanswered. Go to PBX → Follow Me.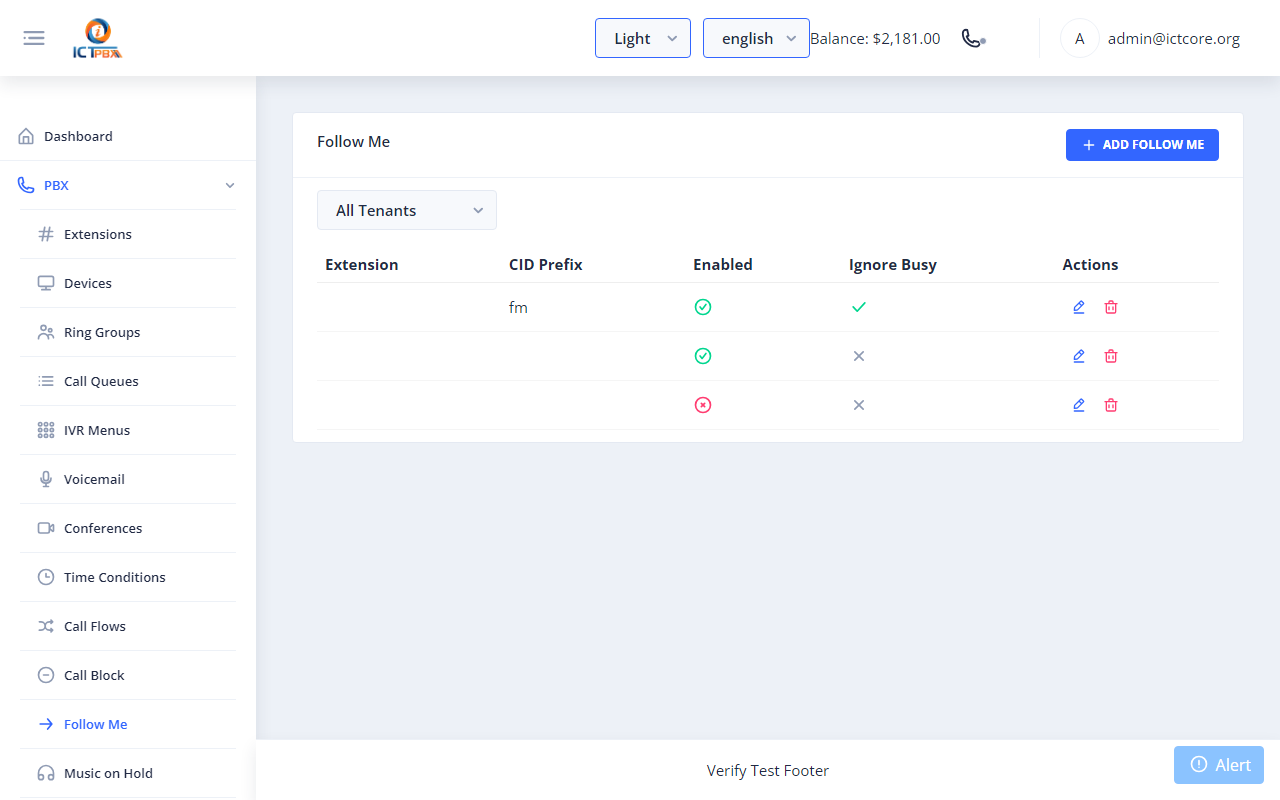
Fig 12-1 - Follow Me listEach Follow Me entry links to an extension and defines one or more forwarding destinations with individual ring timeouts. End users can manage their own Follow Me from My Account.
13. Sending and Receiving Fax
13a. Send a Fax
Go to Fax → Send Fax. Select the fax account, enter the destination number, choose a document, and optionally attach a cover page. Click Send.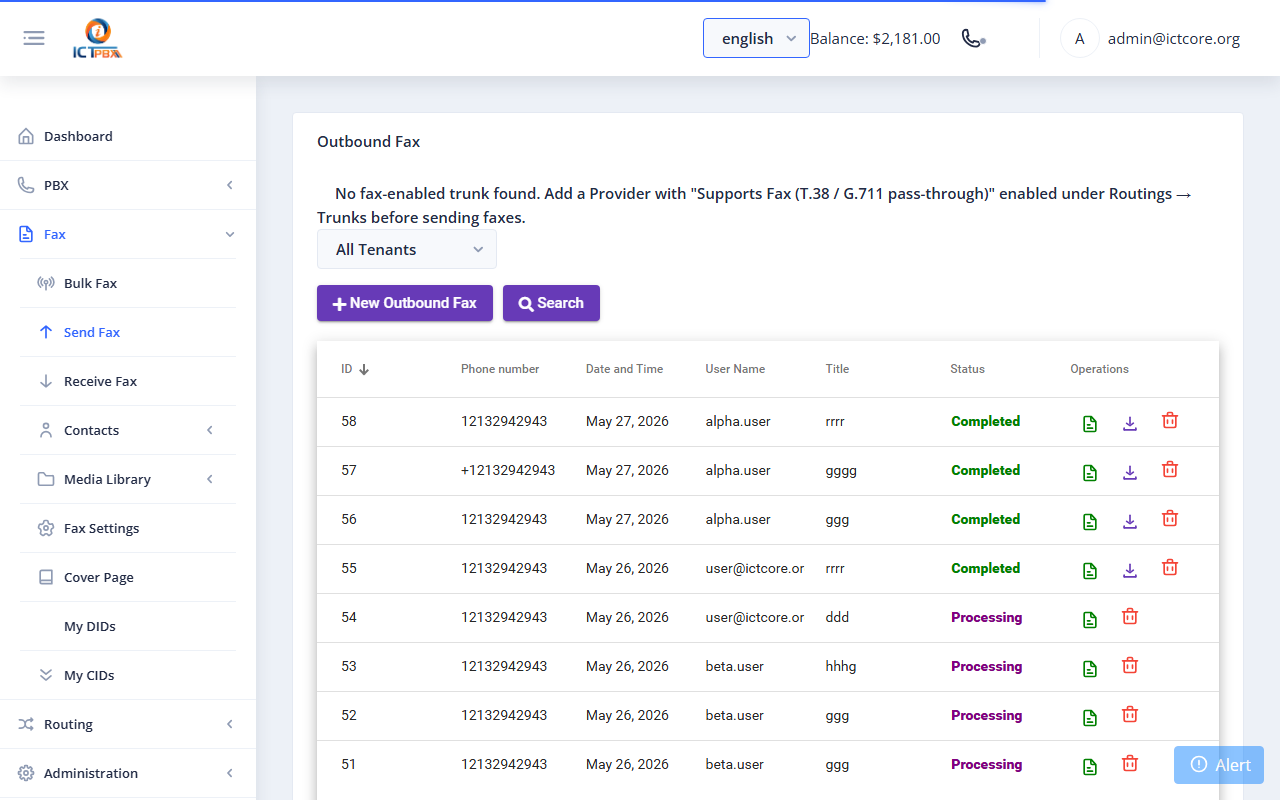
Fig 13-1 - Send Fax pagePre-upload reusable documents at Fax → Fax Documents.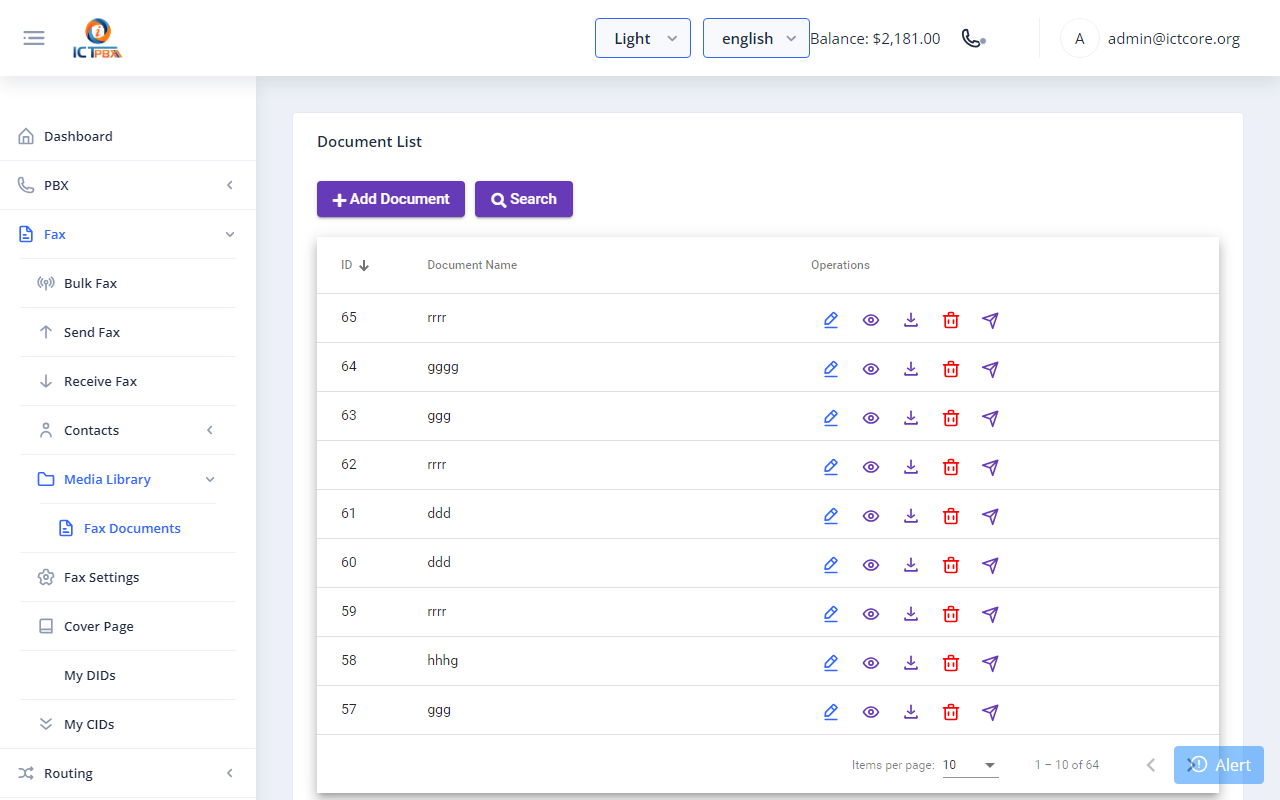
Fig 13-2 - Fax Documents library
13b. Receive a Fax
Assign a DID to a fax account via Fax → My DIDs → Assign. Received faxes appear at Fax → Receive Fax.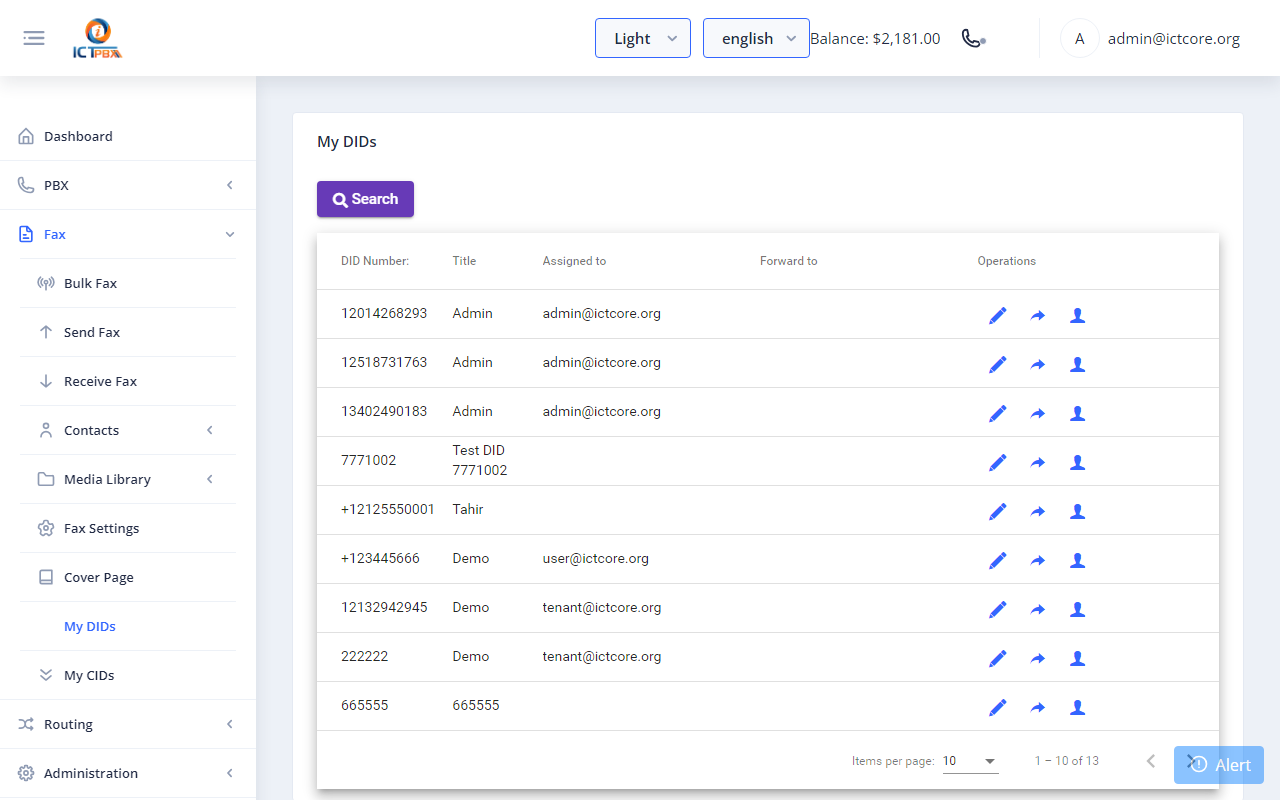
Fig 13-3 - My DIDs - Assign button maps a DID to a fax account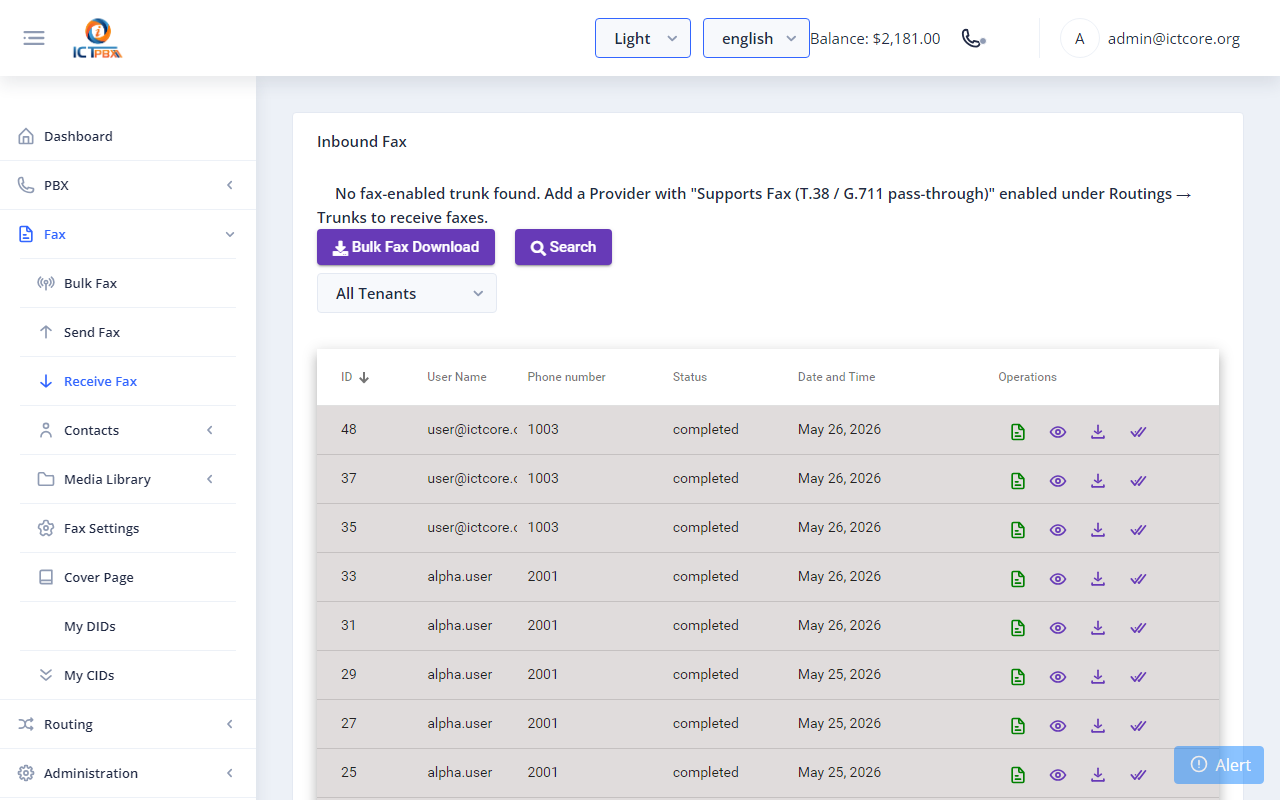
Fig 13-4 - Receive Fax list - download or preview each fax as PDF
13c. Email Delivery
Go to Fax → Fax Settings and set a Delivery Email. Every received fax is automatically emailed as a PDF attachment.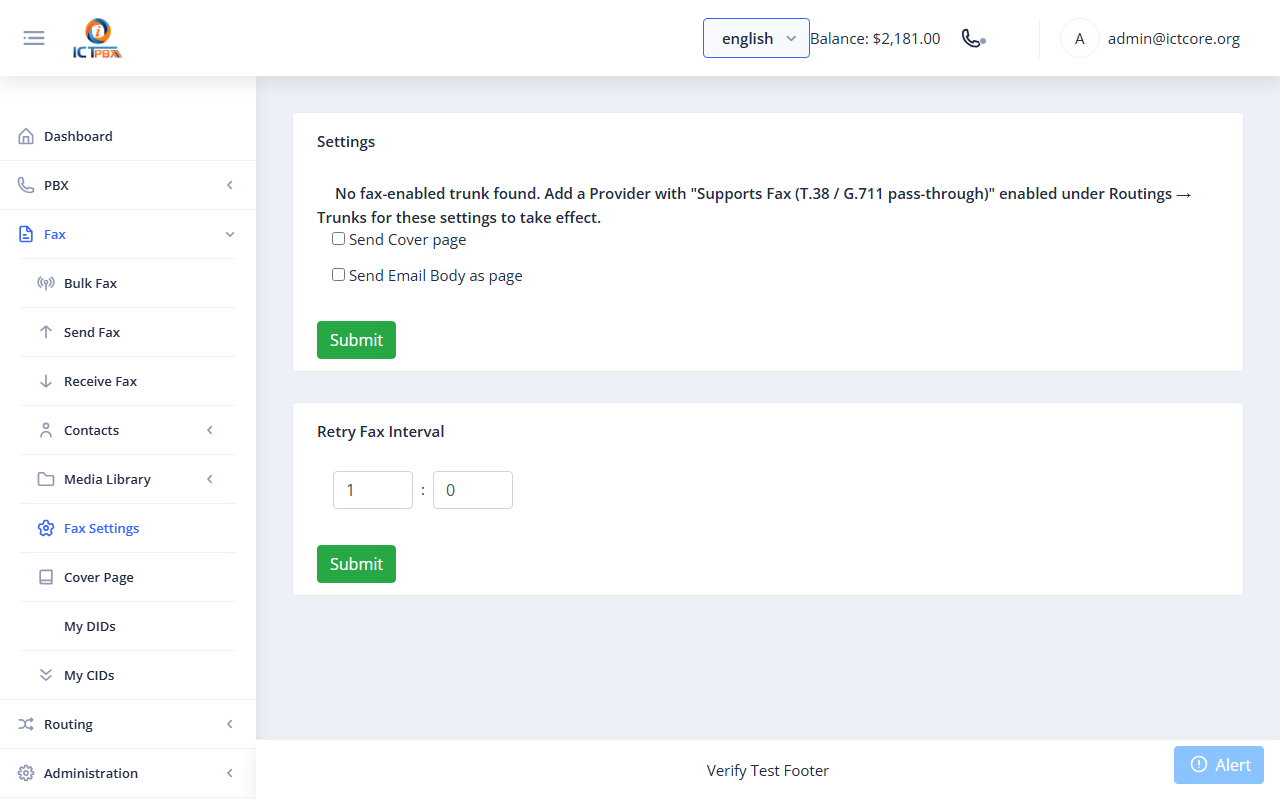
Fig 13-5 - Fax Settings - Delivery Email field
14. Billing - Overview
ICTPBX Enterprise Edition includes a full billing engine covering packages, resource quotas, usage tracking, and credit-based deductions. Community Edition does not include billing.| Concept | Description |
|---|---|
| Package | A named bundle of resource limits (extensions, ring groups, voice minutes, fax pages, etc.) |
| Subscription | Assigns a Package to a Tenant - one active subscription per tenant at a time |
| Quota | Per-tenant resource counters derived from the assigned package |
| Rate | Per-minute (voice) or per-page (fax) charge applied above the free-tier included in the package |
| Credit | Pre-paid balance held on the tenant; deducted when billable usage exceeds free-tier quota |
| Payment | Manual credit top-up recorded by admin against a tenant |
14a. Packages (Admin only)
A Package defines what a tenant can use. Go to Billing → Packages → Add Package.| Resource slot | Resource ID | Notes |
|---|---|---|
| Extensions | 15 | Max SIP extensions |
| Devices | 16 | Max SIP devices |
| Ring Groups | 7 | Max ring groups |
| Call Queues | 8 | Max call queues |
| IVR Menus | 17 | Max IVR menus |
| Voicemail Boxes | 9 | Max voicemail boxes |
| Conferences | 10 | Max conference rooms |
| Music on Hold | 11 | Max MOH entries |
| Voice Minutes/mo | 12 | Free minutes included per month before per-minute billing applies |
| Fax Pages/mo | 13 | Free pages included per month before per-page billing applies |
| Conference Min/mo | 14 | Free conference minutes included per month |
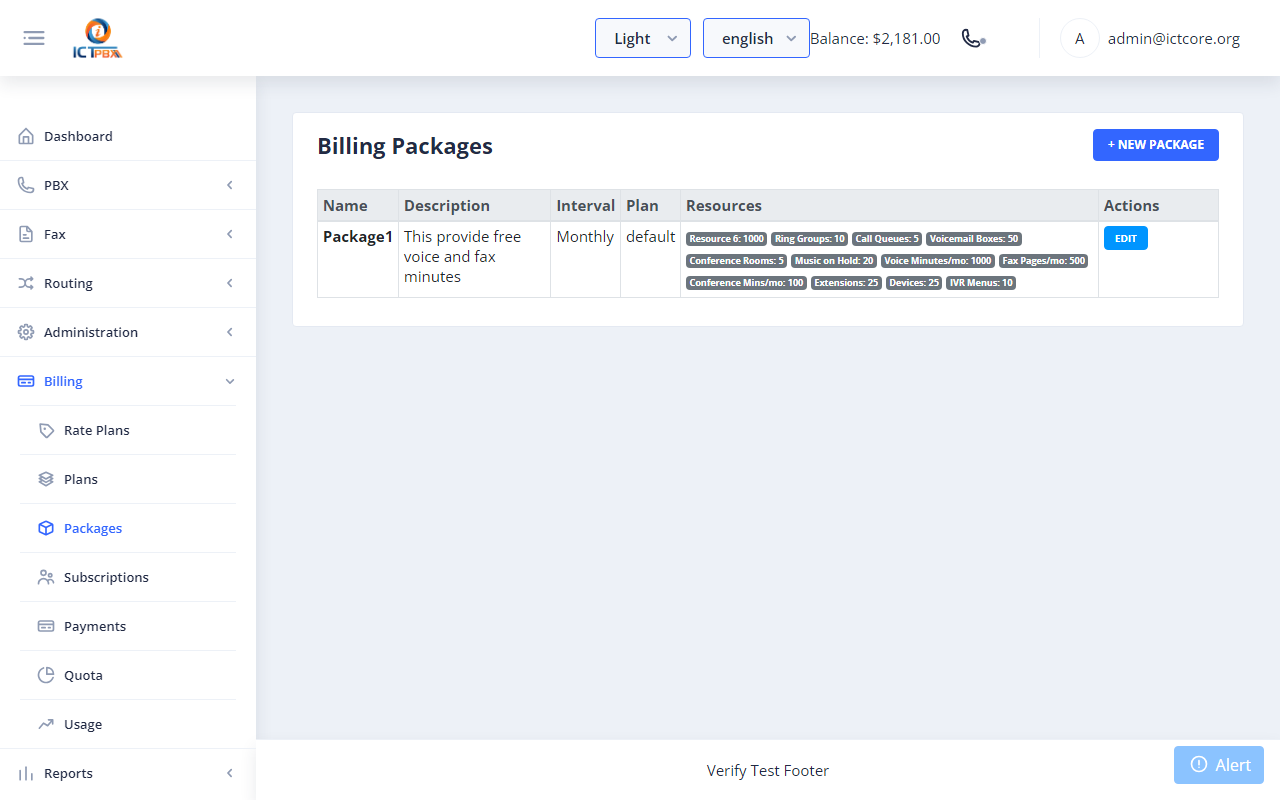
Fig 14-1 - Packages list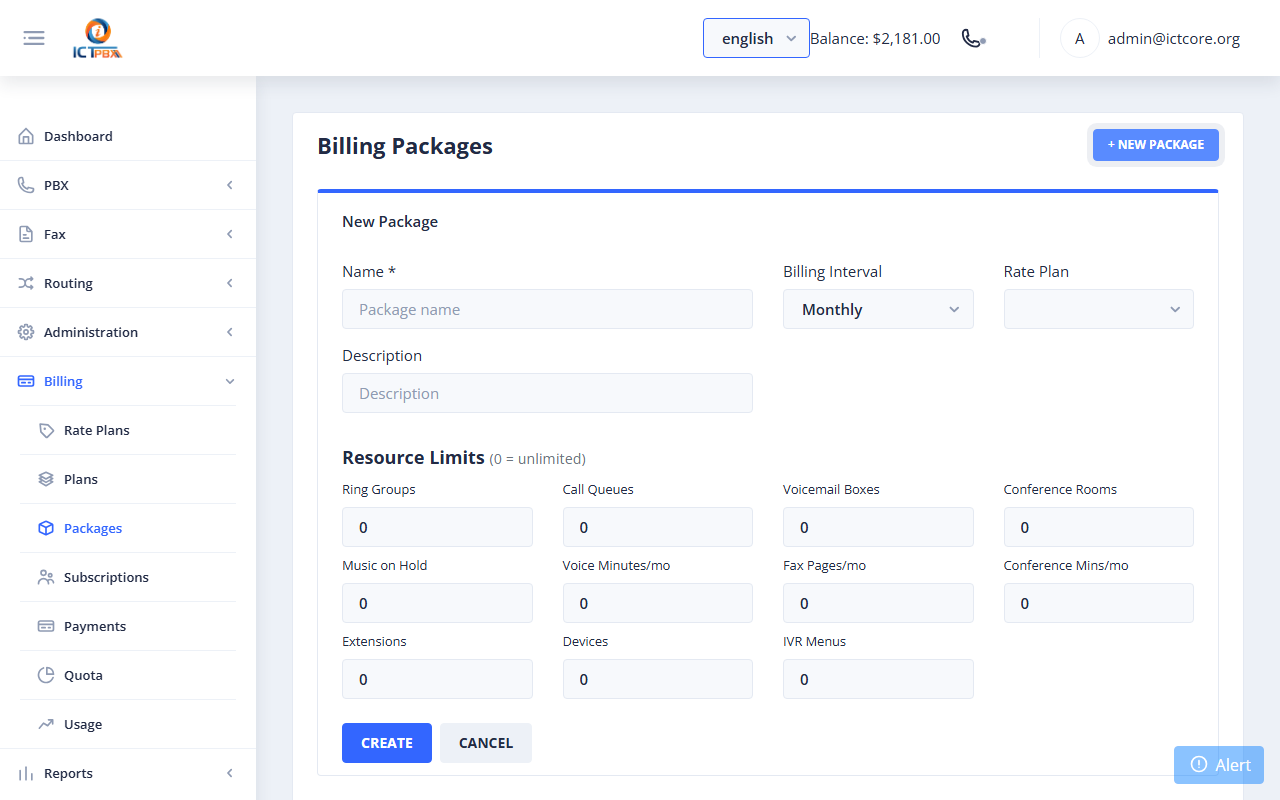
Fig 14-2 - Add Package form - 11 resource limits in a grid
14b. Subscriptions (Admin only)
Assign a Package to a Tenant. Go to Billing → Subscriptions. Each row shows the tenant and their current package. Click the package dropdown on a row to reassign.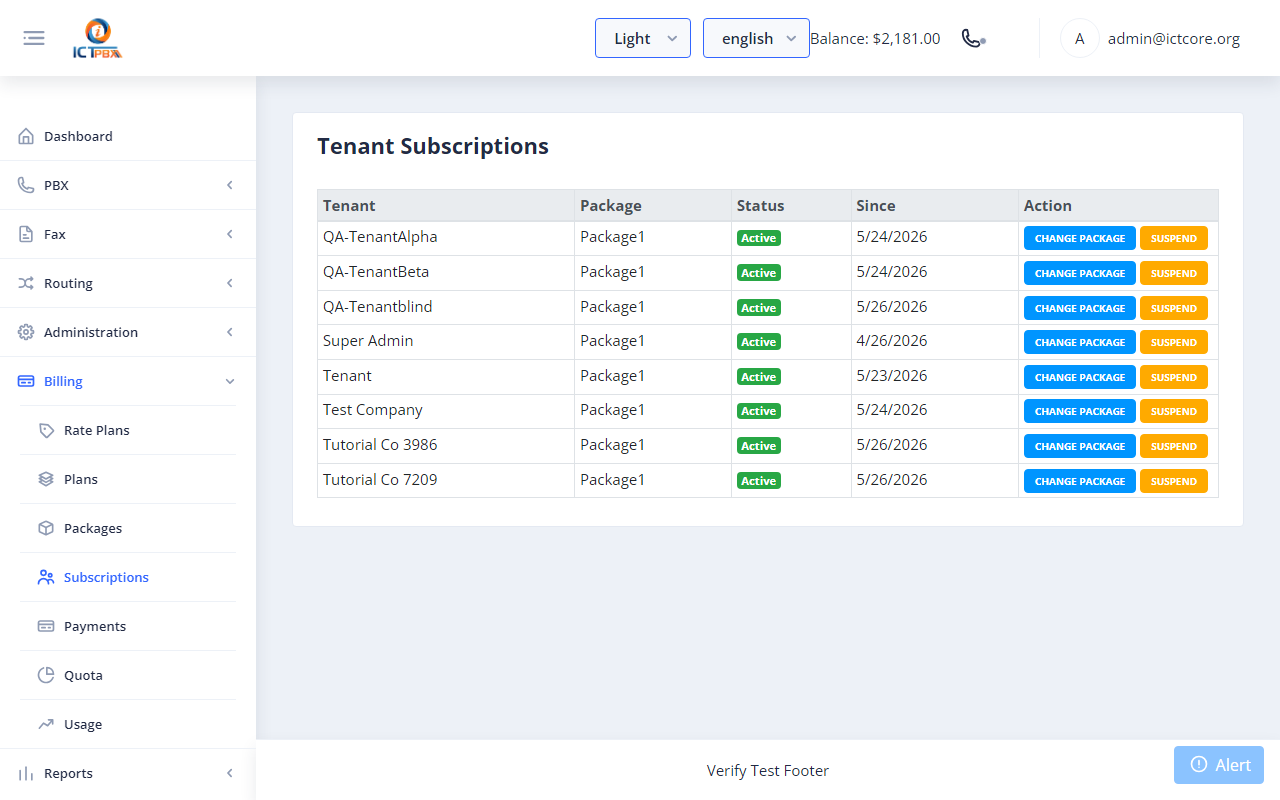
Fig 14-3 - Subscriptions page - inline package reassignment per tenantNote: Reassigning a package deactivates the old subscription and immediately seeds new quota rows from the new package.
14c. Rates (Admin only)
Rates define per-unit charges applied to billable usage above the free tier. Go to Billing → Rates → Add Rate.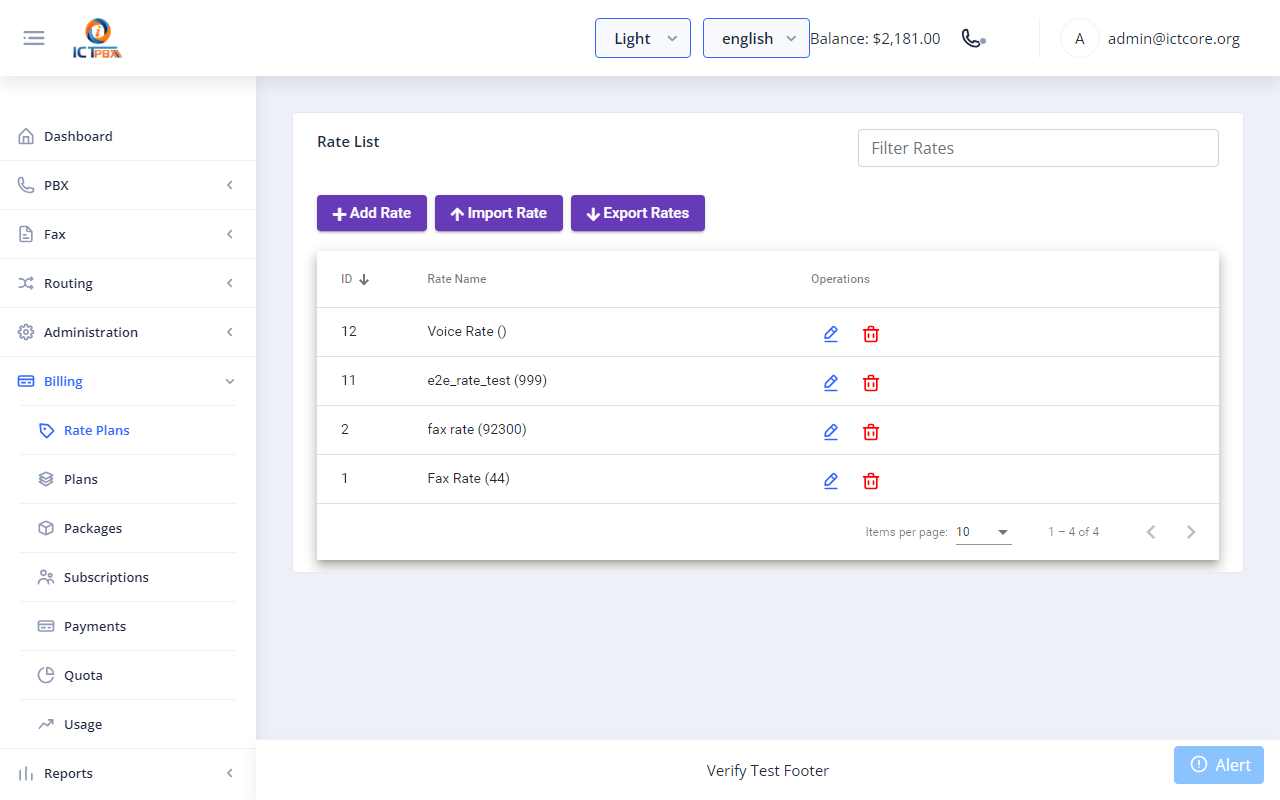
Fig 14-4 - Rates list
14d. Plans (Admin only)
Plans group Rates into pricing tiers that can be referenced by Routes. Go to Billing → Plans.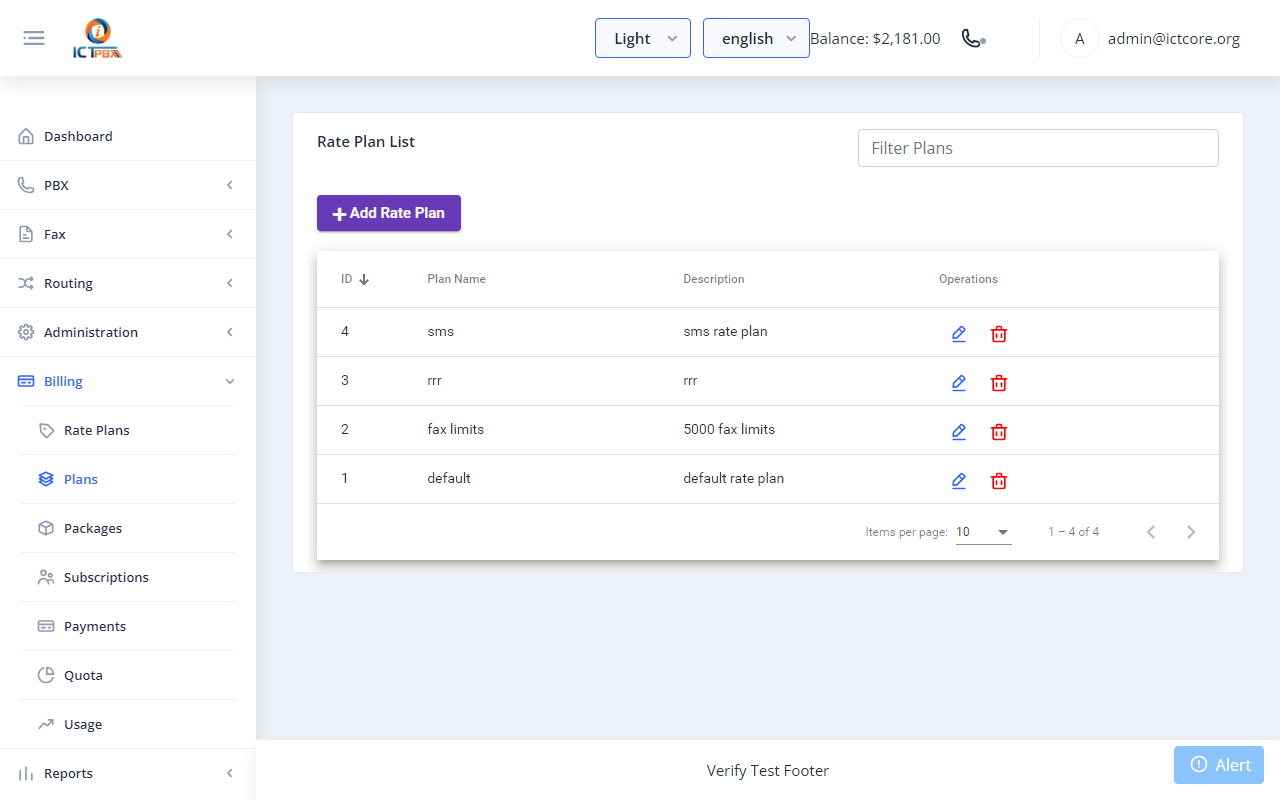
Fig 14-5 - Plans list
14e. Payments (Admin only)
Payments are manual credit top-ups applied to a tenant account. Go to Billing → Payments → Add Payment.| Field | Notes |
|---|---|
| Tenant | Select the organisation to credit |
| Amount | Credit amount to add to the tenant balance |
| Note | Optional reference (invoice number, payment method) |
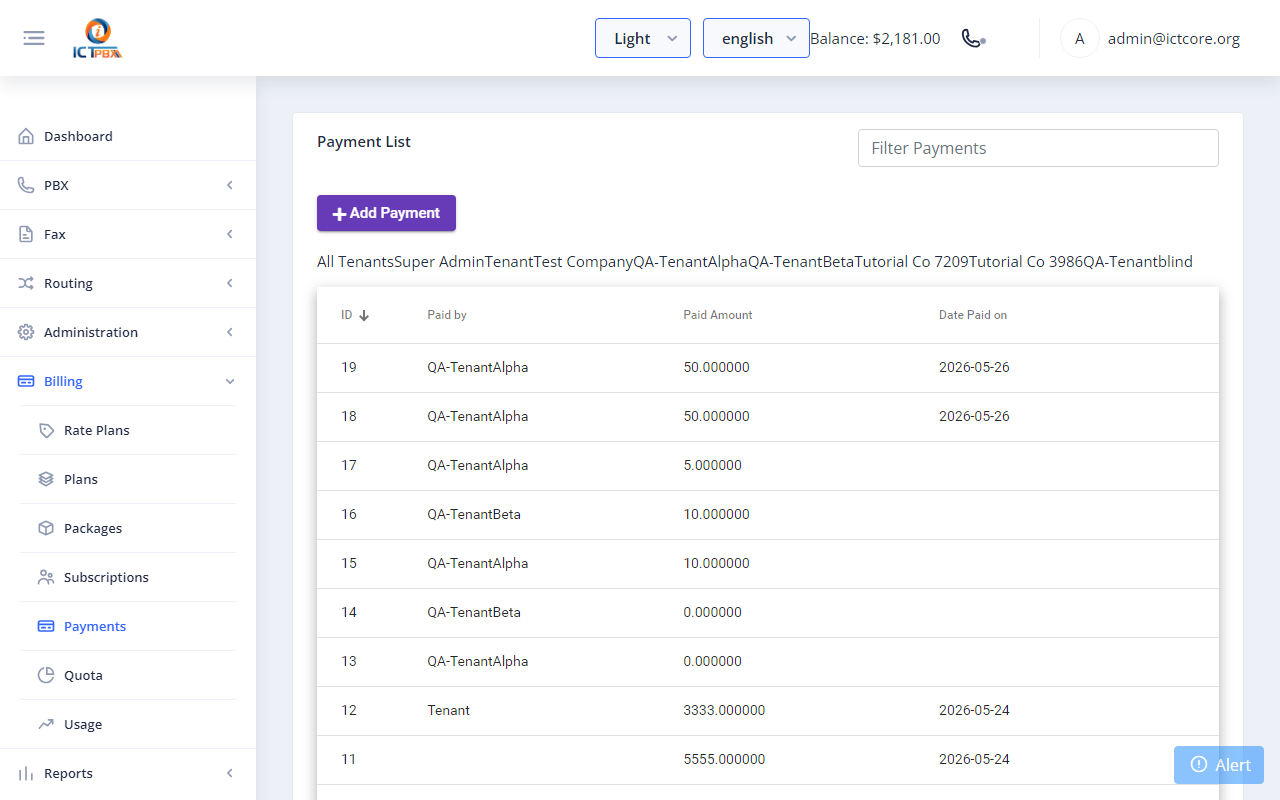
Fig 14-6 - Payments list - each row shows tenant, amount, and date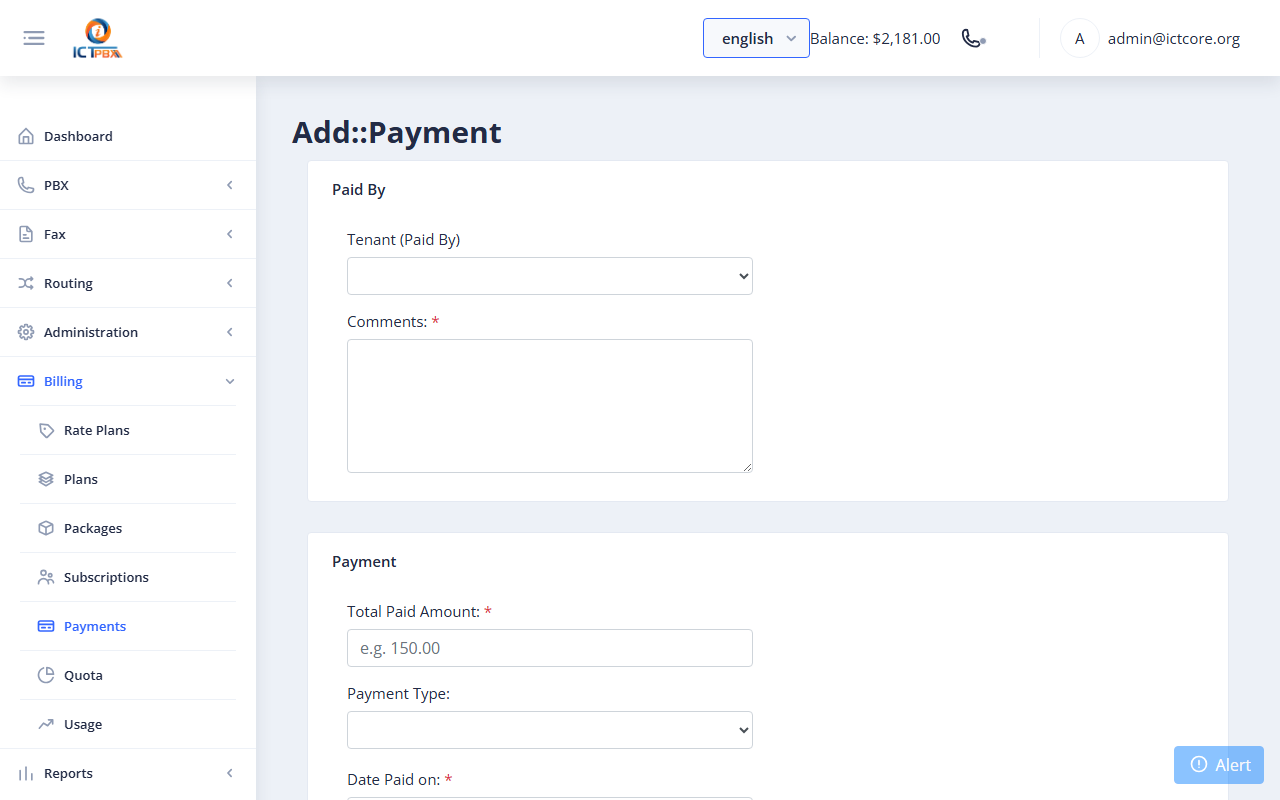
Fig 14-7 - Add Payment form
14f. Billing Quota (Admin, Tenant Admin, End User)
Shows current slot usage vs. package limits for each PBX resource, plus monthly voice, fax, and conference usage against the free-tier quota.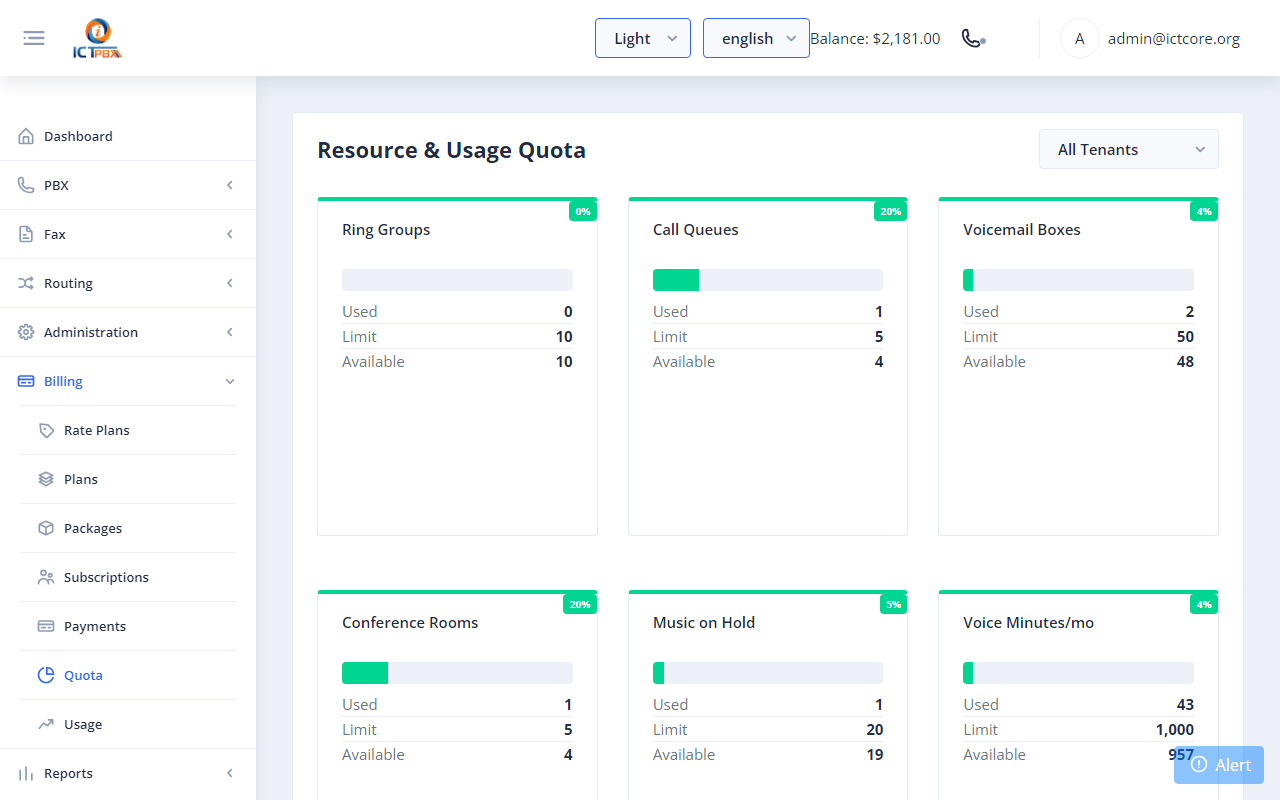
Fig 14-8 - Billing Quota - slot cards and usage cards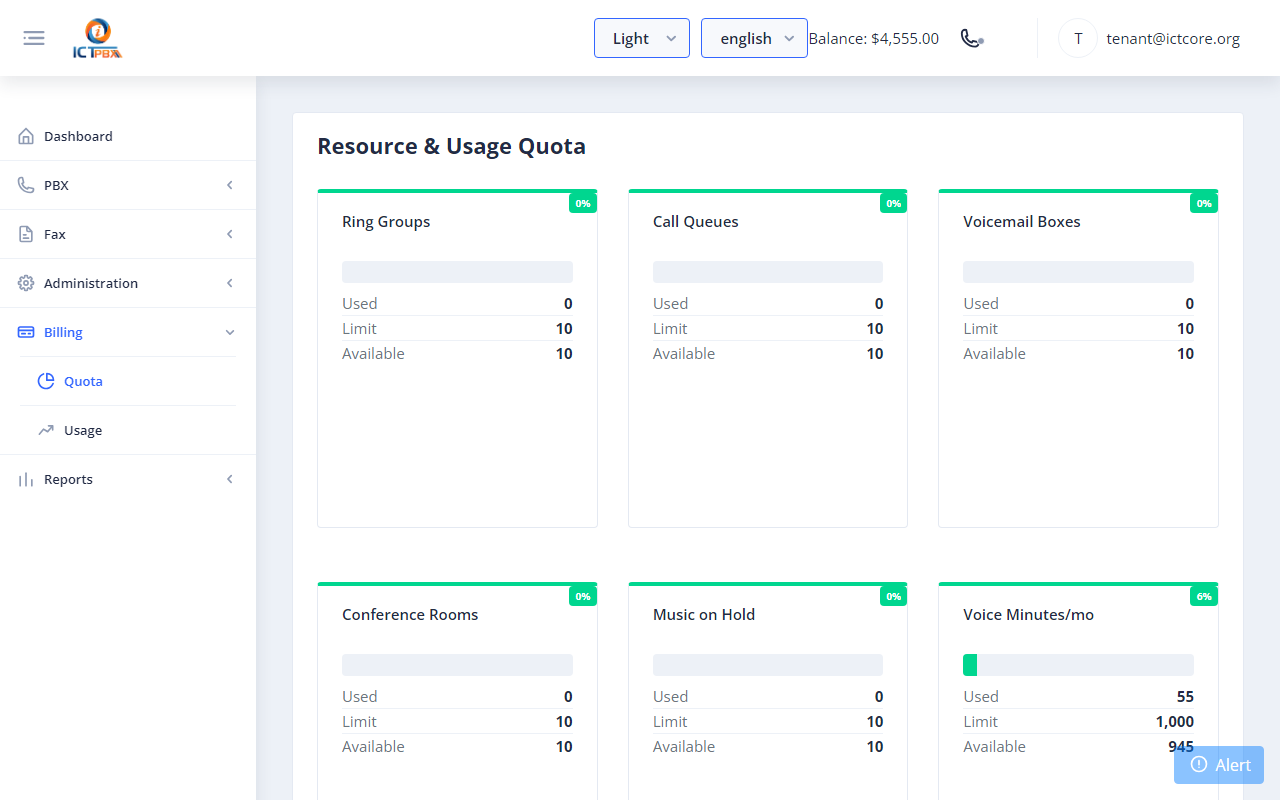
Fig 14-9 - Billing Quota - tenant view (scoped to own tenant)
14g. Billing Usage (Admin, Tenant Admin, End User)
Shows a breakdown of actual usage - calls made, faxes sent, minutes consumed - for the current billing period.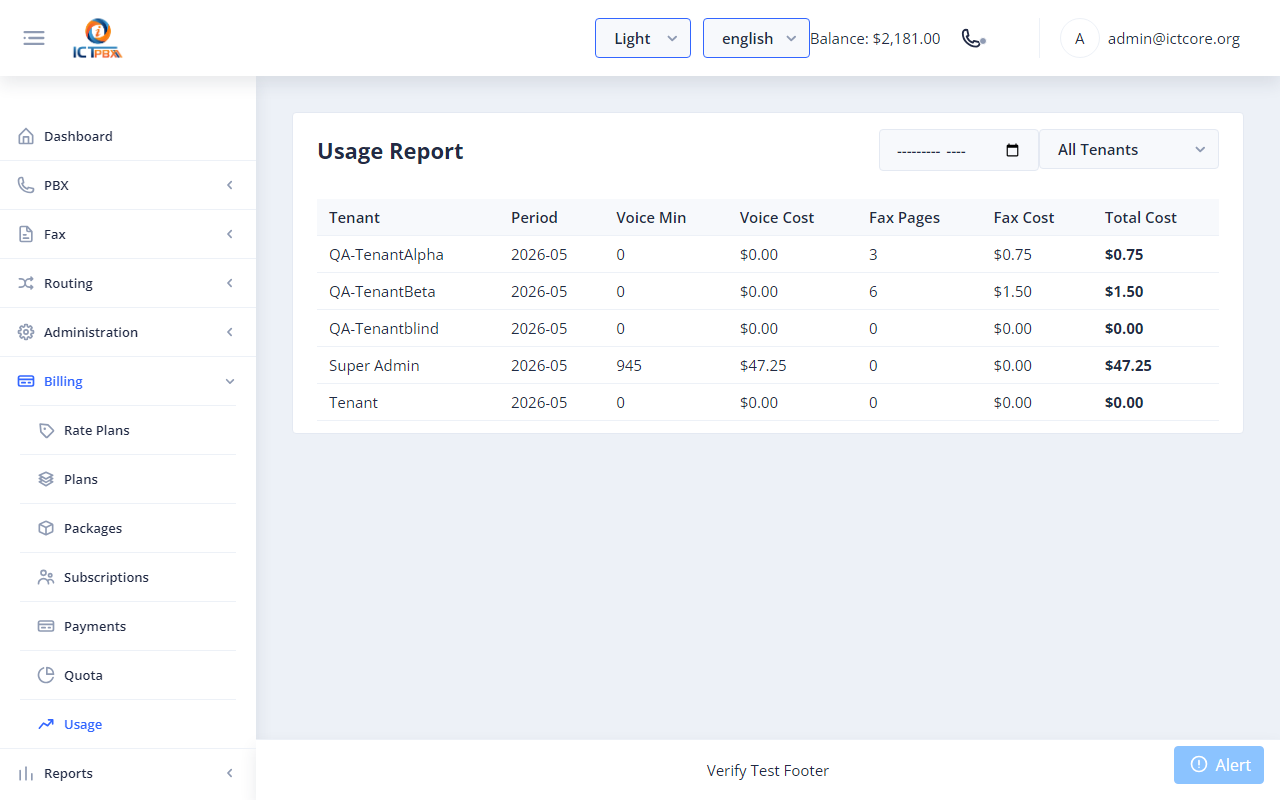
Fig 14-10 - Billing Usage page
14h. How Credit Deduction Works
ICTPBX uses an "Option A" deduction model:- Each package includes a free-tier quota (e.g. 100 voice minutes/month, 50 fax pages/month).
- Usage within the free tier is tracked but no credit is deducted.
- Usage above the free tier is billed at the per-unit Rate and deducted from tenant.credit.
- At the start of each new billing month, quota_used resets to 0 automatically.
- If a tenant's credit reaches zero, service continues but usage is flagged for admin review.
15. Devices & Provisioning
ICTPBX auto-provisioning lets IP phones fetch their full configuration - SIP credentials, codecs, feature keys - automatically when they boot. No manual programming is needed on each phone.This section covers the end-to-end workflow for both Administrators and Tenant Administrators:- Creating a Device Profile - shared configuration template for a group of phones
- Registering a Device - linking a phone's MAC address to the PBX
- Adding a SIP Line - binding the device to an extension so it can call
- Using the Provisioning URL - the URL you enter (or push via DHCP option 66) to auto-configure the phone
15a. Key Concepts
Device Profile
A Device Profile is a reusable template of shared settings (codecs, DTMF mode, timezone, feature keys) applied to many phones of the same type. Updating a profile immediately affects all phones using it on their next reboot.Device
A Device is a single physical IP phone registered by its MAC address. Each device stores a label, vendor, model, optional profile, and one or more SIP Lines.SIP Line
A SIP Line links a device to a PBX extension. ICTPBX auto-fills the extension number, SIP password, server address, and display name into the phone's config file when it provisions.Provisioning URL
After saving a device, ICTPBX generates a unique URL:https://demo.ictpbx.com/provision/aabbccdd1122The 12-character suffix is the phone's MAC address (lowercase, no separators). Enter this in the phone's Auto Provision settings or DHCP option 66.15b. Administrator Workflow
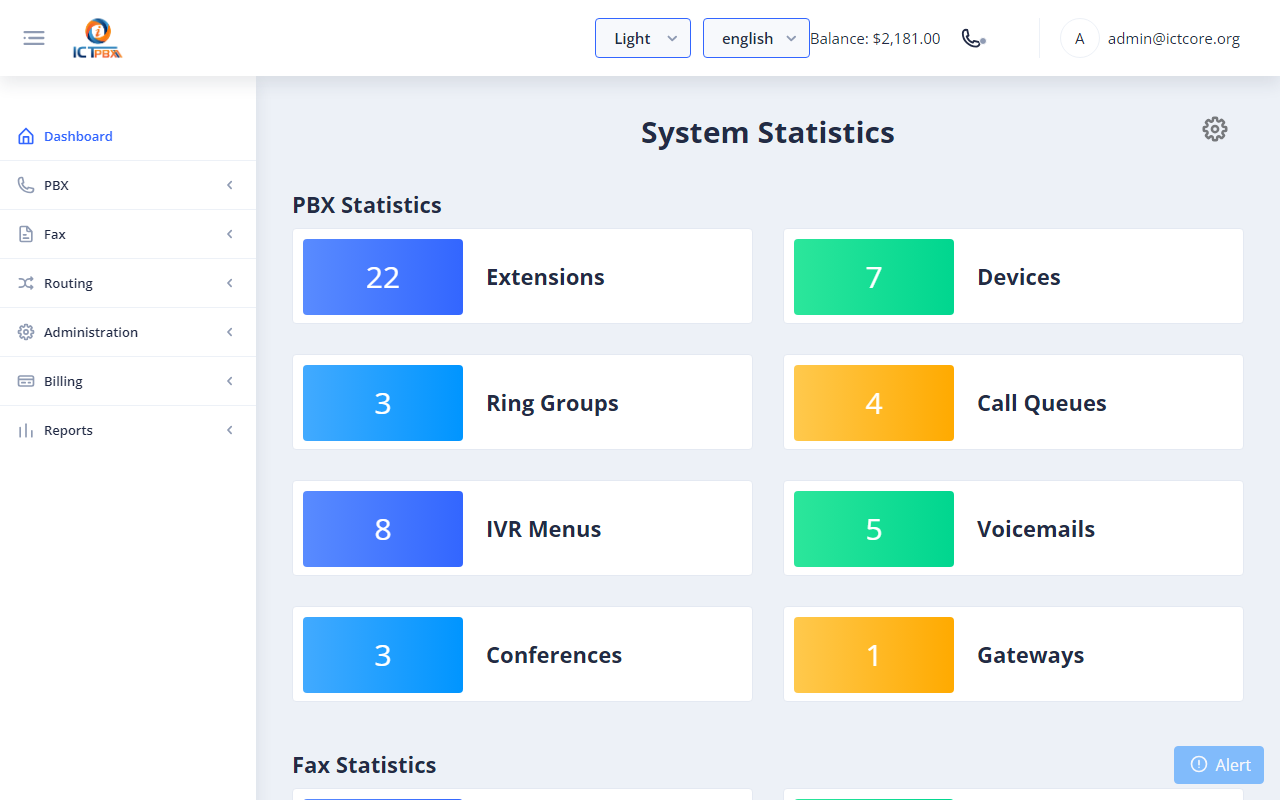
Fig 15-1 - Admin dashboard with PBX section in sidebar
Create a Device Profile
Step 1: PBX → Device Profiles → click Add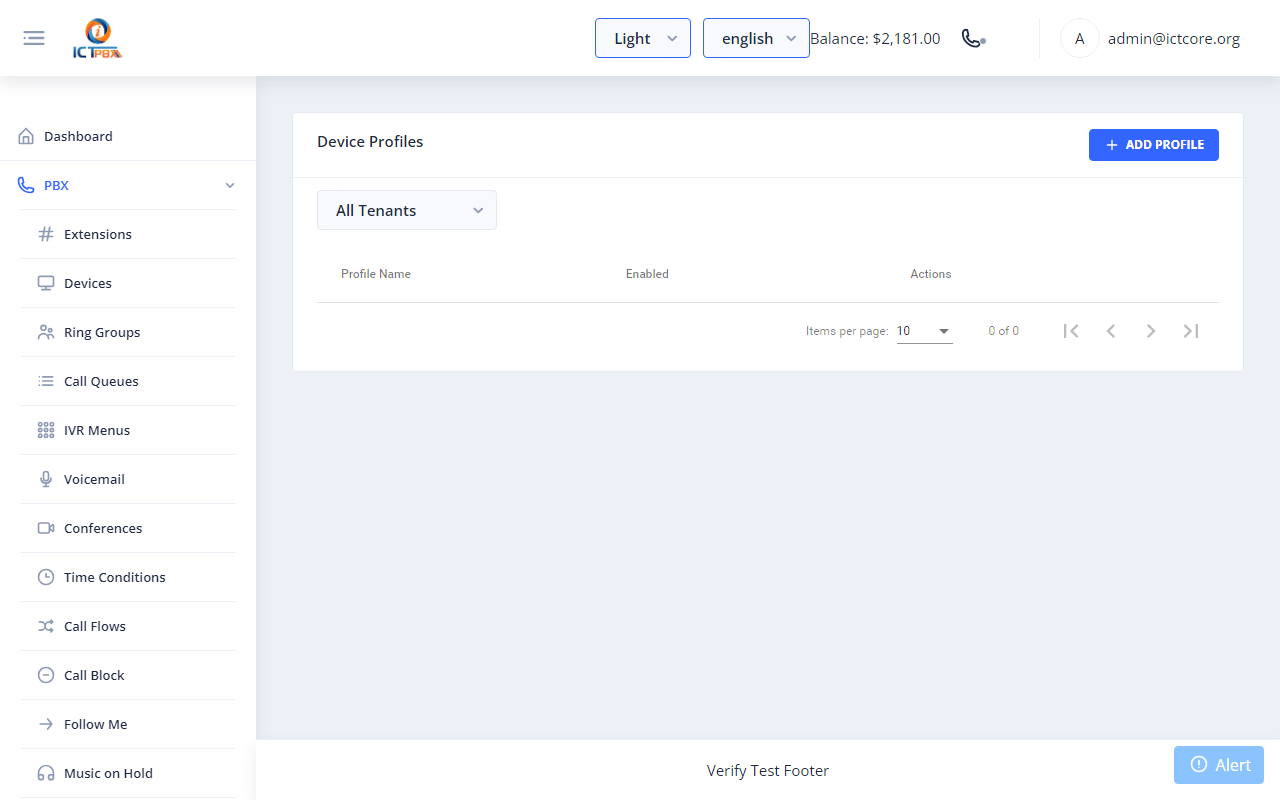
Fig 15-2 - Device Profiles listStep 2: Enter a Profile Name and Description, then click Save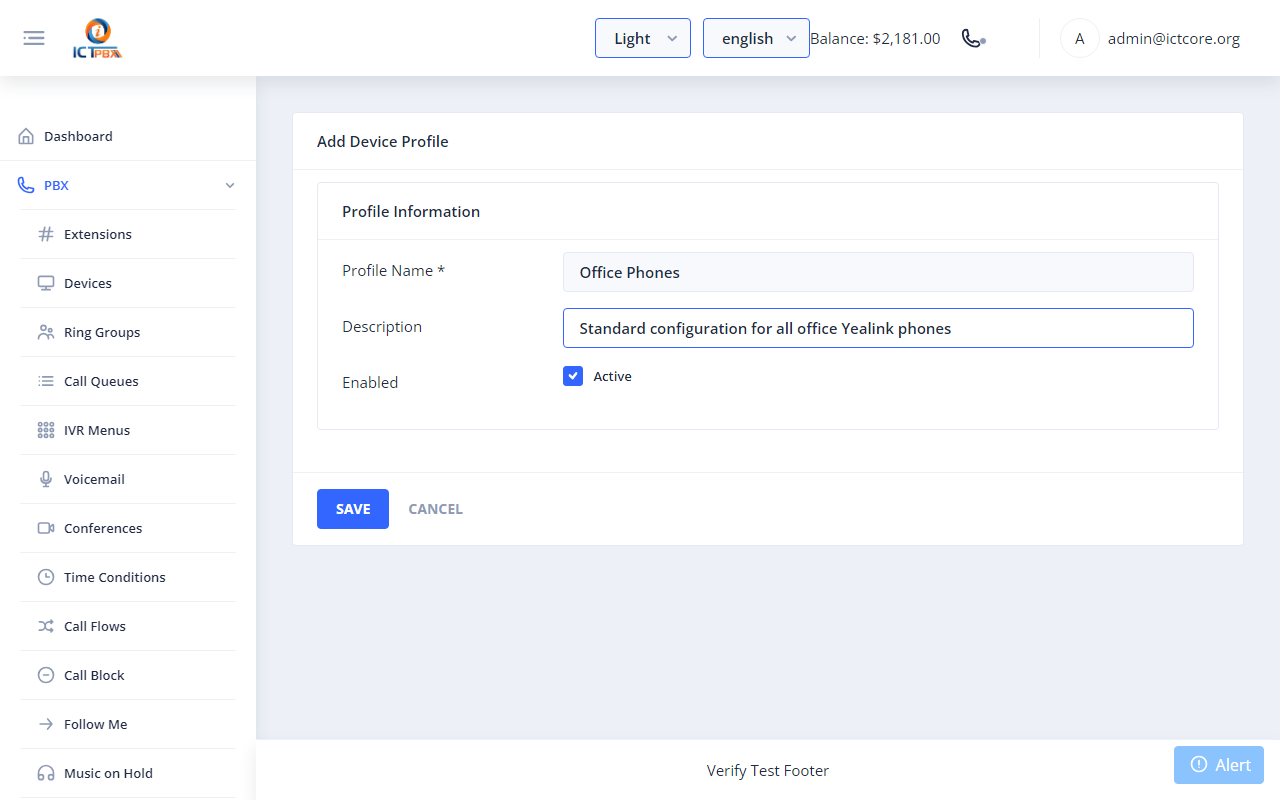
Fig 15-3 - Profile form filled in ("Office Phones")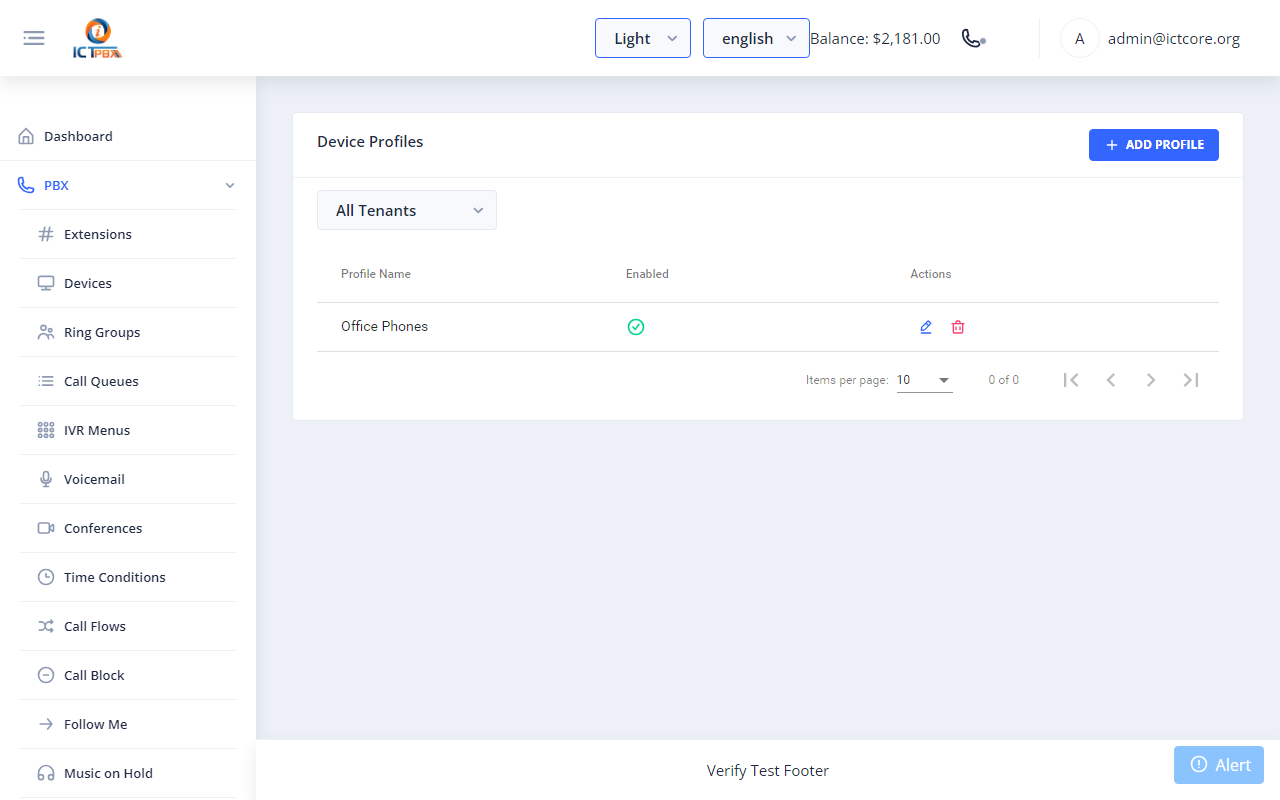
Fig 15-4 - Profile saved confirmation
Add a Device
Step 1: PBX → Devices → click Add Device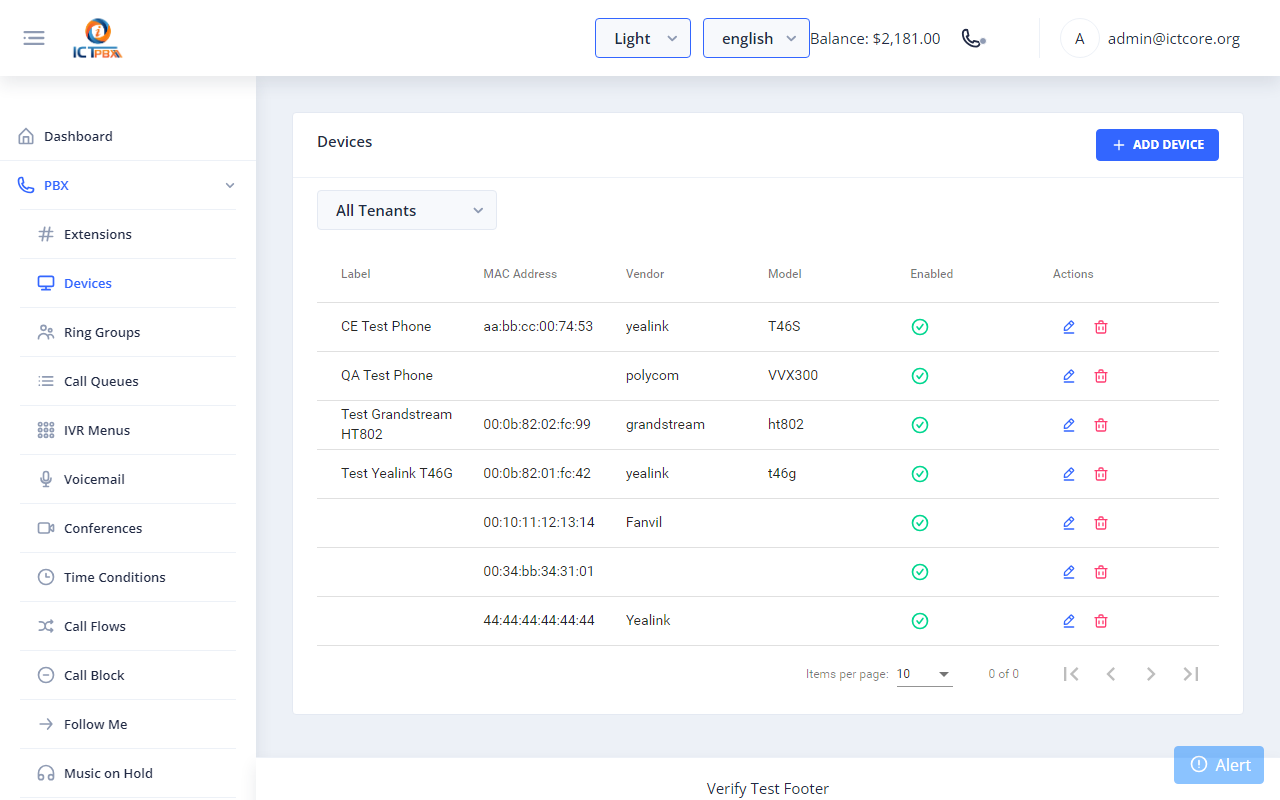
Fig 15-5 - Devices listStep 2: Enter MAC address and a descriptive labelAny MAC format is accepted: AA:BB:CC:11:22:33 or AABBCC112233 or aa-bb-cc-11-22-33. ICTPBX normalises to lowercase hex on save.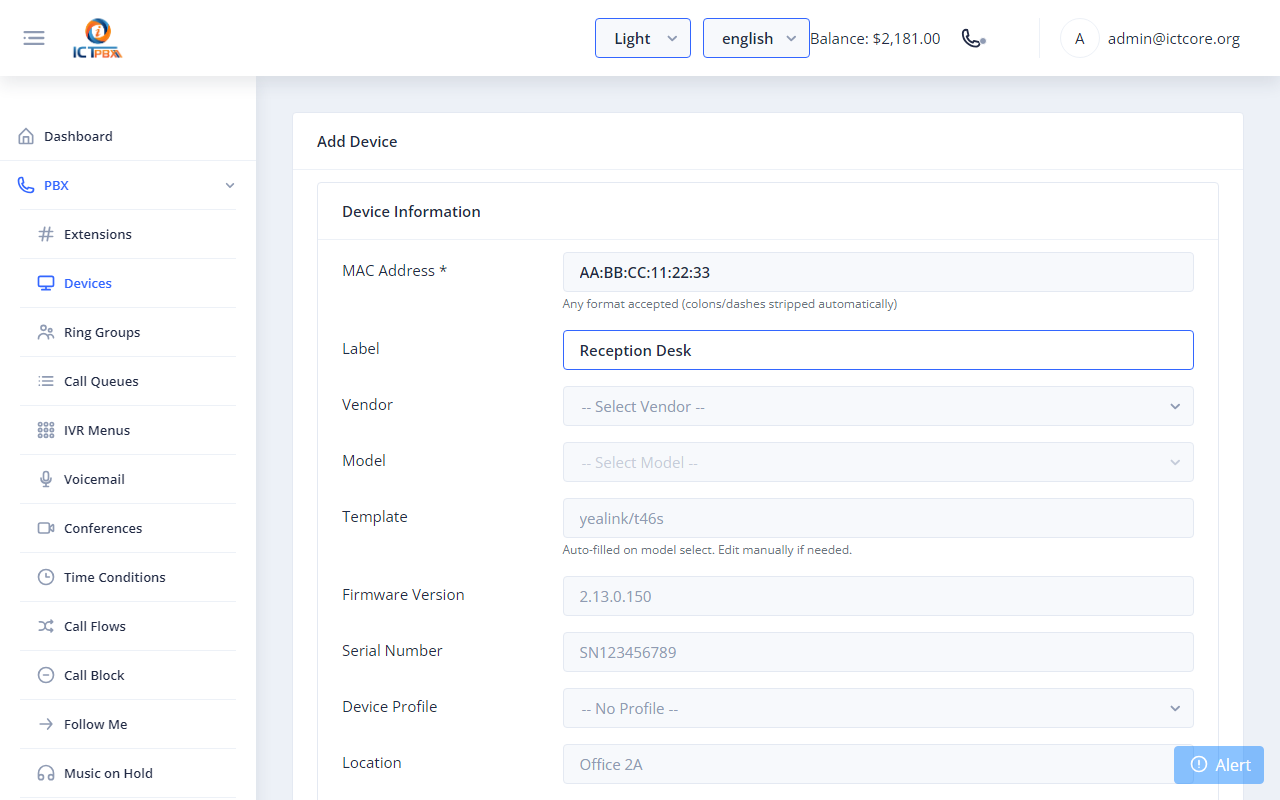
Fig 15-6 - MAC address and device label enteredStep 3: Select Vendor, then select ModelThe Model dropdown populates after the vendor is chosen. The Template field fills in automatically.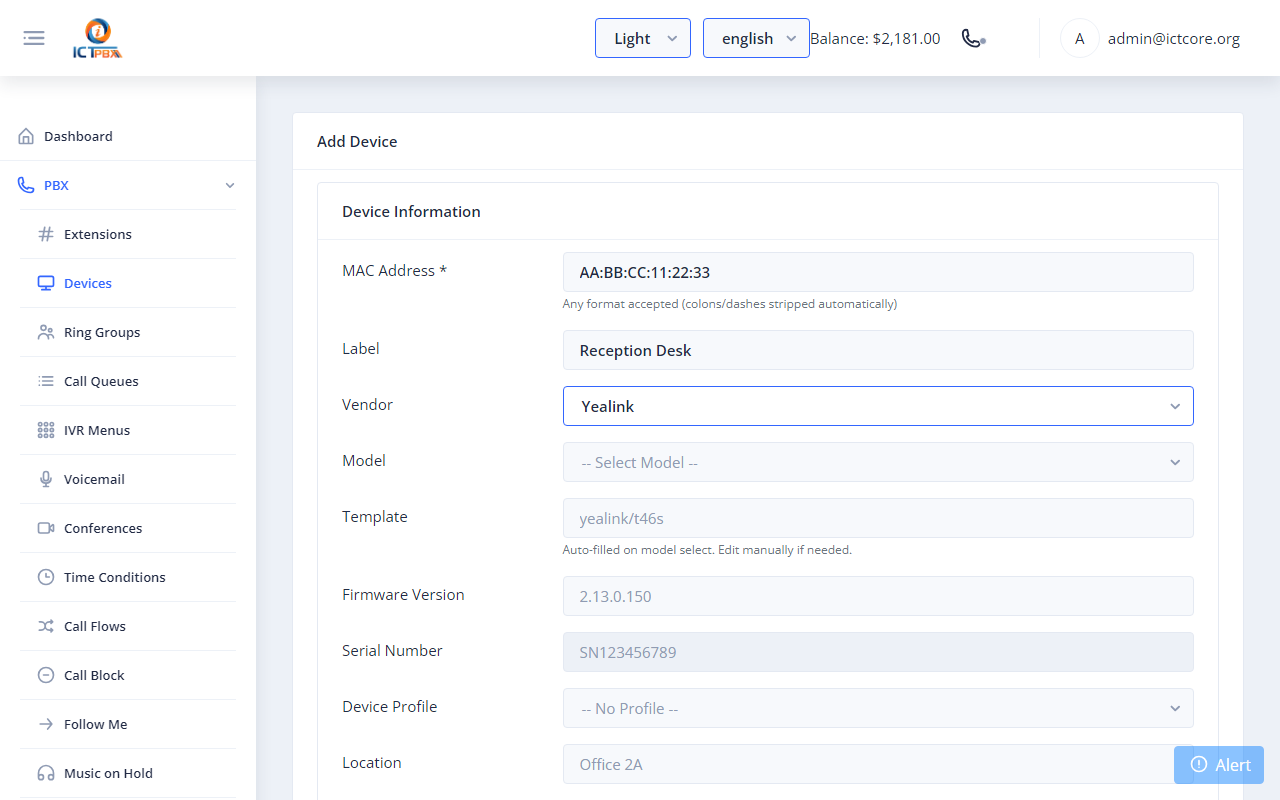
Fig 15-7 - Vendor selected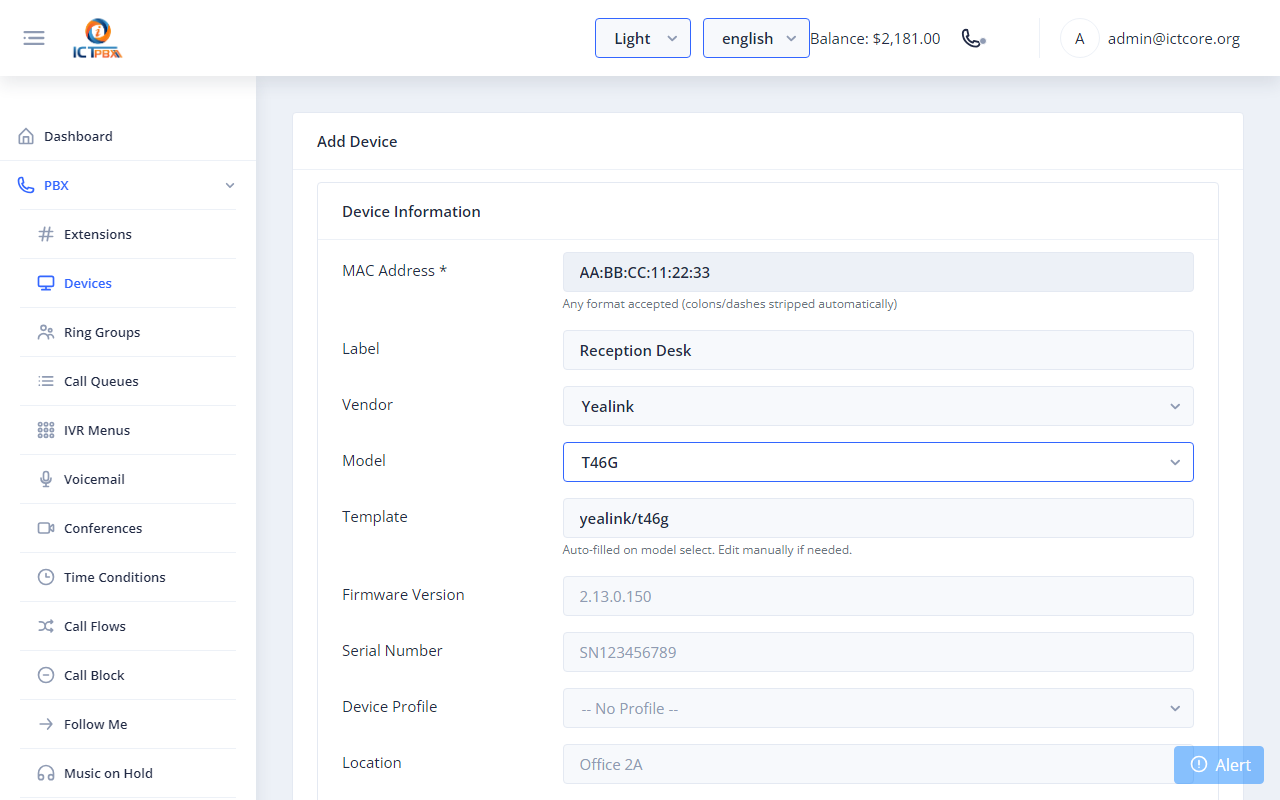
Fig 15-8 - Model selected; template auto-filled
Add a SIP Line
Step 1: Click "Add Line" in the SIP Lines section
Fig 15-9 - SIP Lines section with one empty rowStep 2: Click the Extension dropdown and select an extension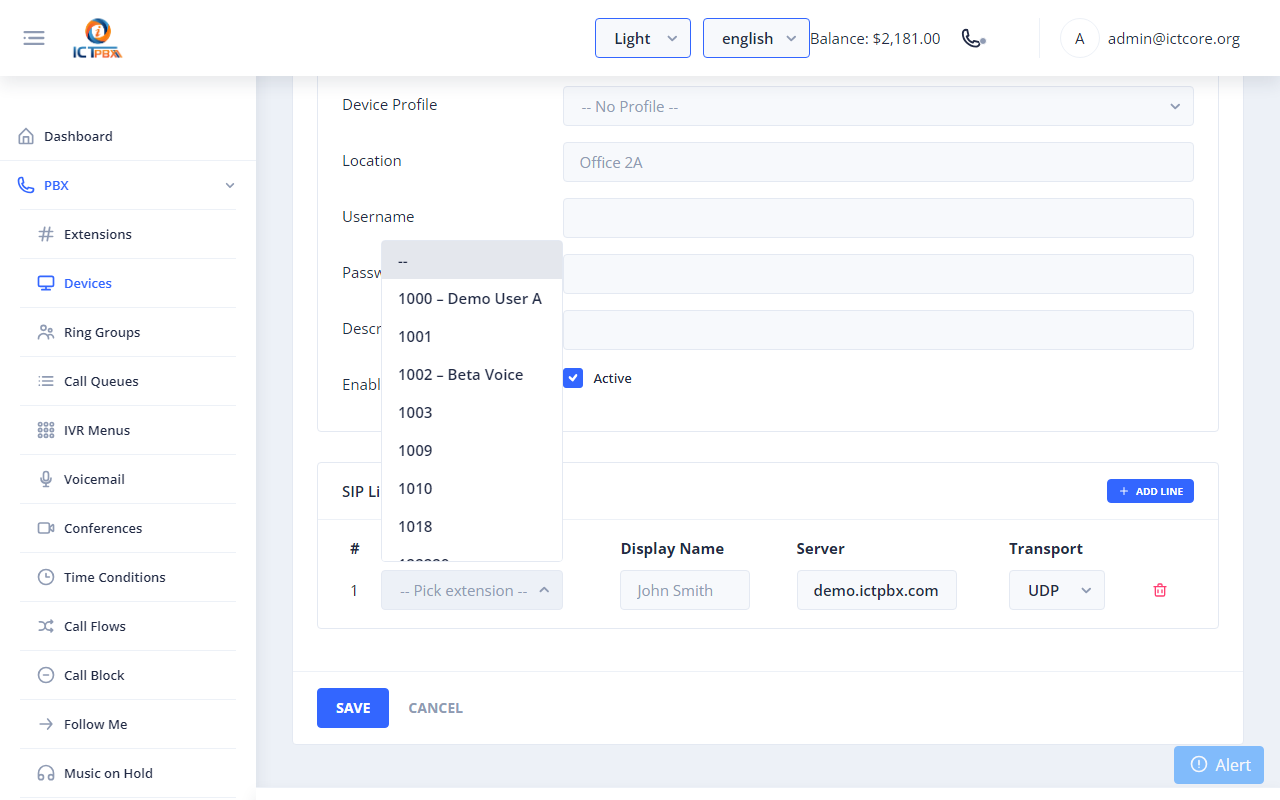
Fig 15-10 - Extension picker open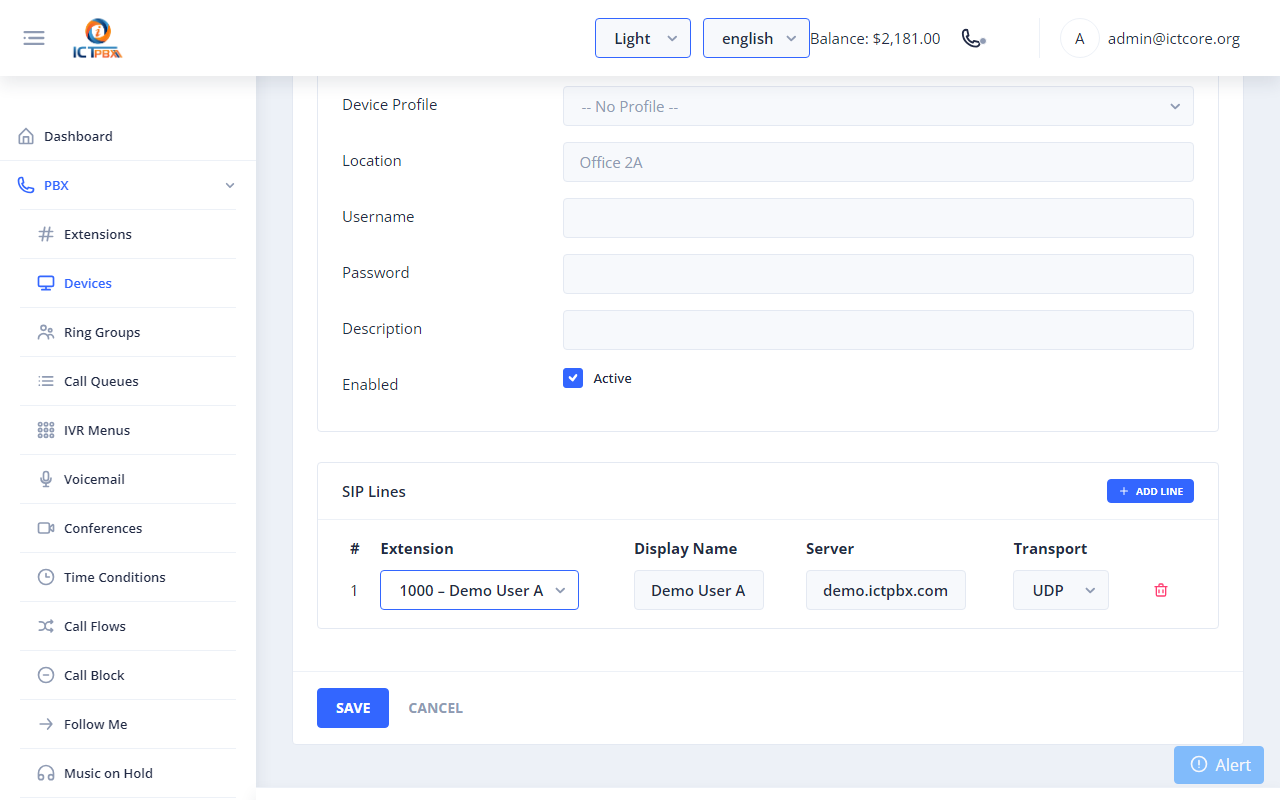
Fig 15-11 - Extension selected; server address pre-filledTip: The Server Address field is pre-filled with the PBX hostname. SIP credentials are written automatically from the extension record - no manual password entry needed. Transport defaults to UDP and the SIP port is 5080 (the port FreeSWITCH listens on); leave both as set.Step 3: Click Save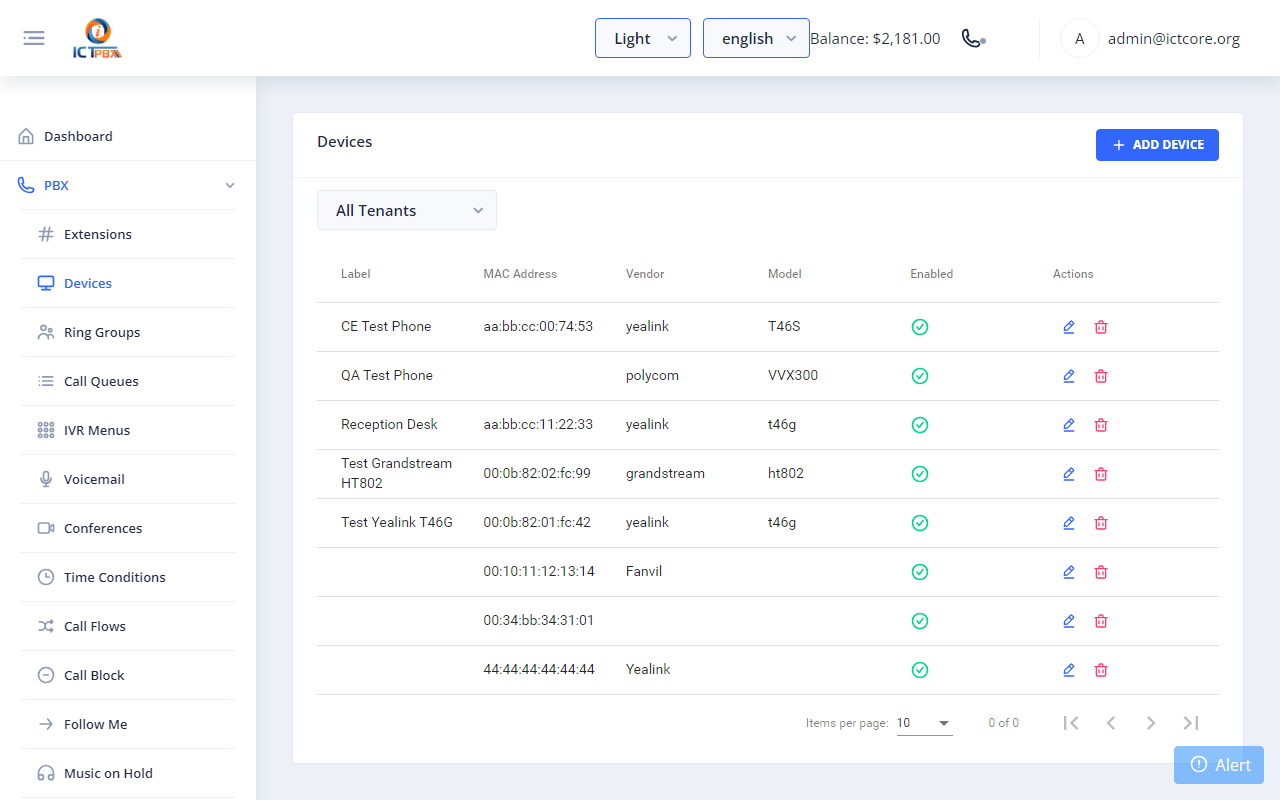
Fig 15-12 - Device saved
Retrieve the Provisioning URL
Open the device's edit page (pencil icon in the list). The provisioning URL appears in a read-only field at the top.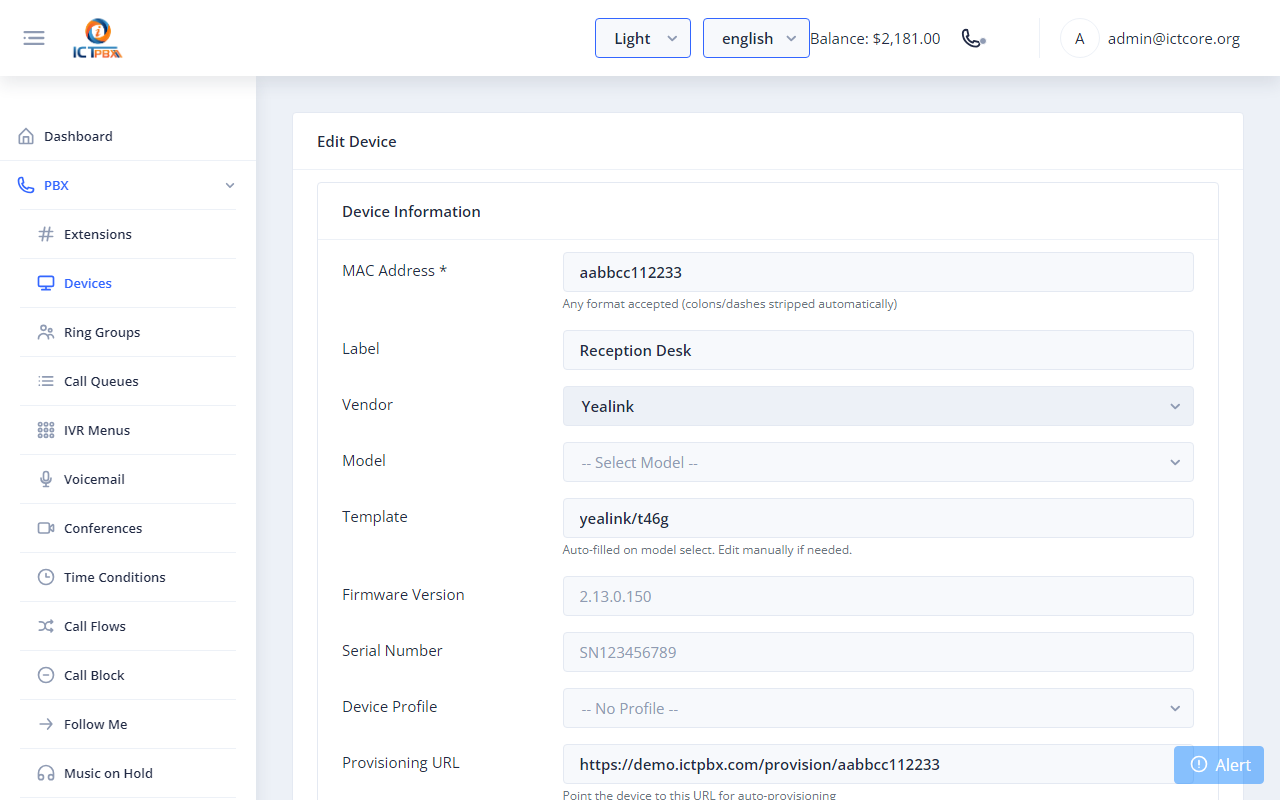
Fig 15-13 - Provisioning URL on device edit pageNote: Copy this URL and enter it in the phone's Auto Provision settings. The phone will download its config and register on the next reboot.
15c. Tenant Workflow
Tenant Administrators follow exactly the same steps as Admin. The only difference is scope: only extensions and devices belonging to their own tenant are visible.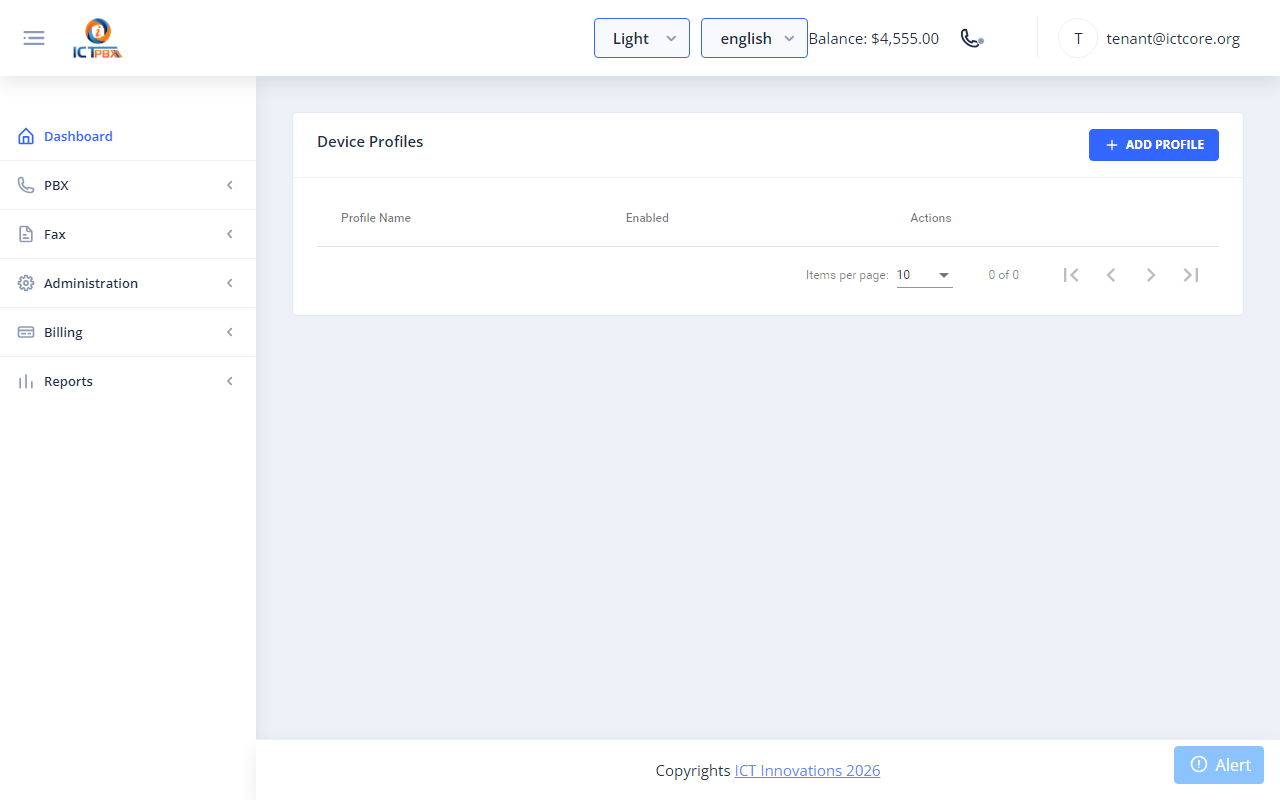
Fig 15-14 - Tenant view: Device Profiles list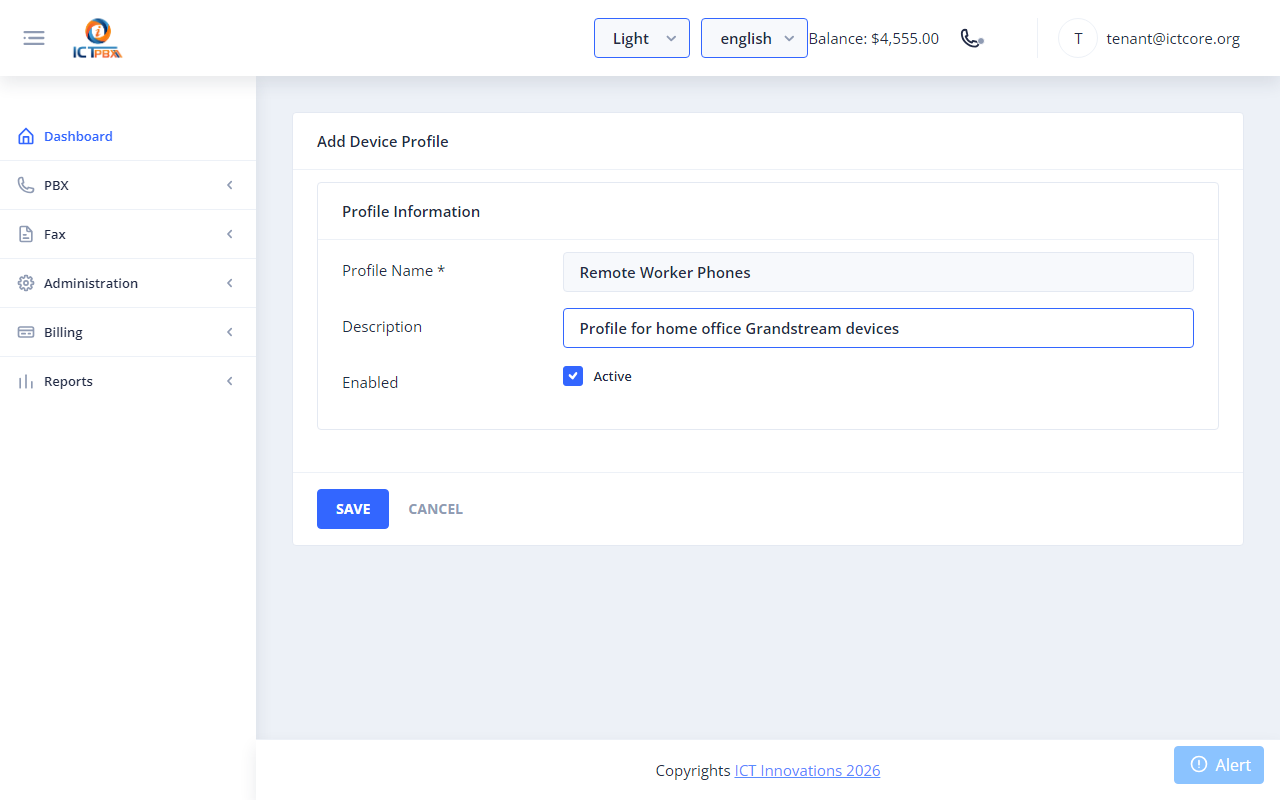
Fig 15-15 - Tenant: profile form filled in ("Remote Worker Phones")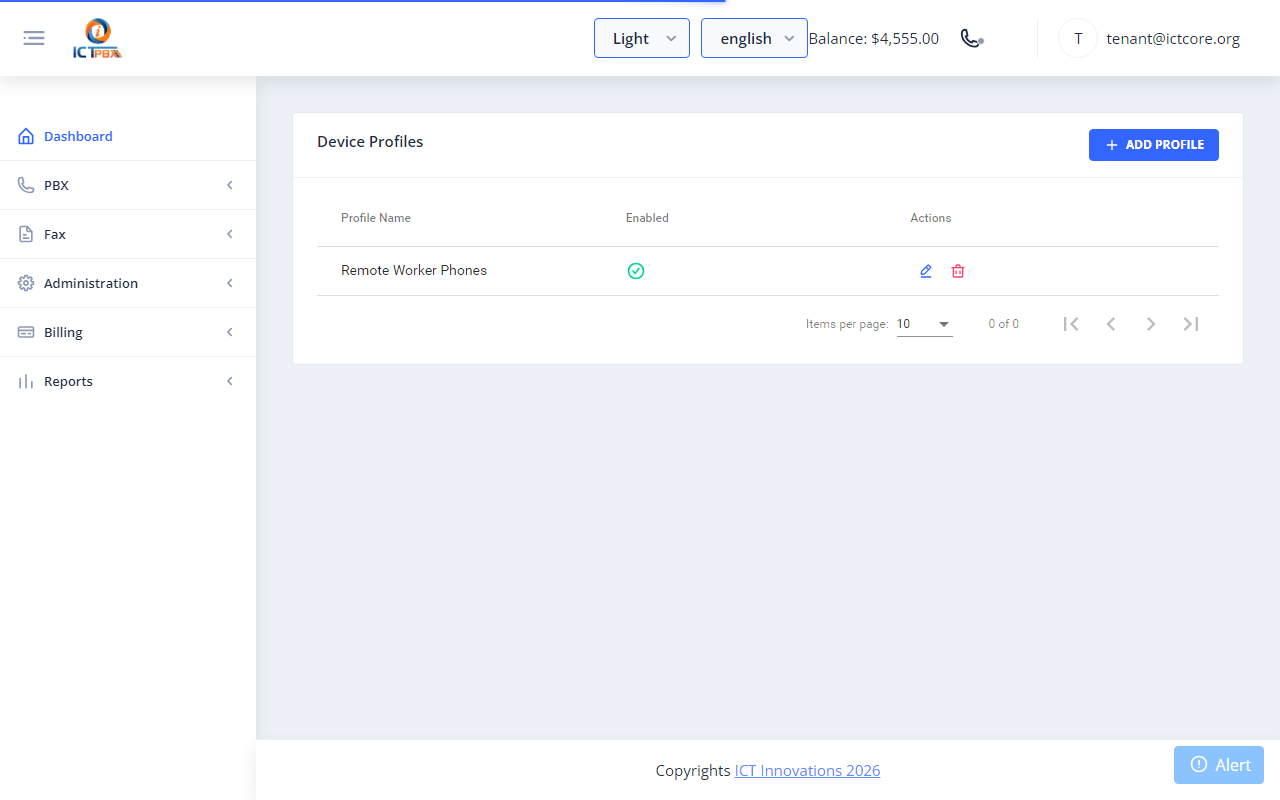
Fig 15-16 - Tenant: profile saved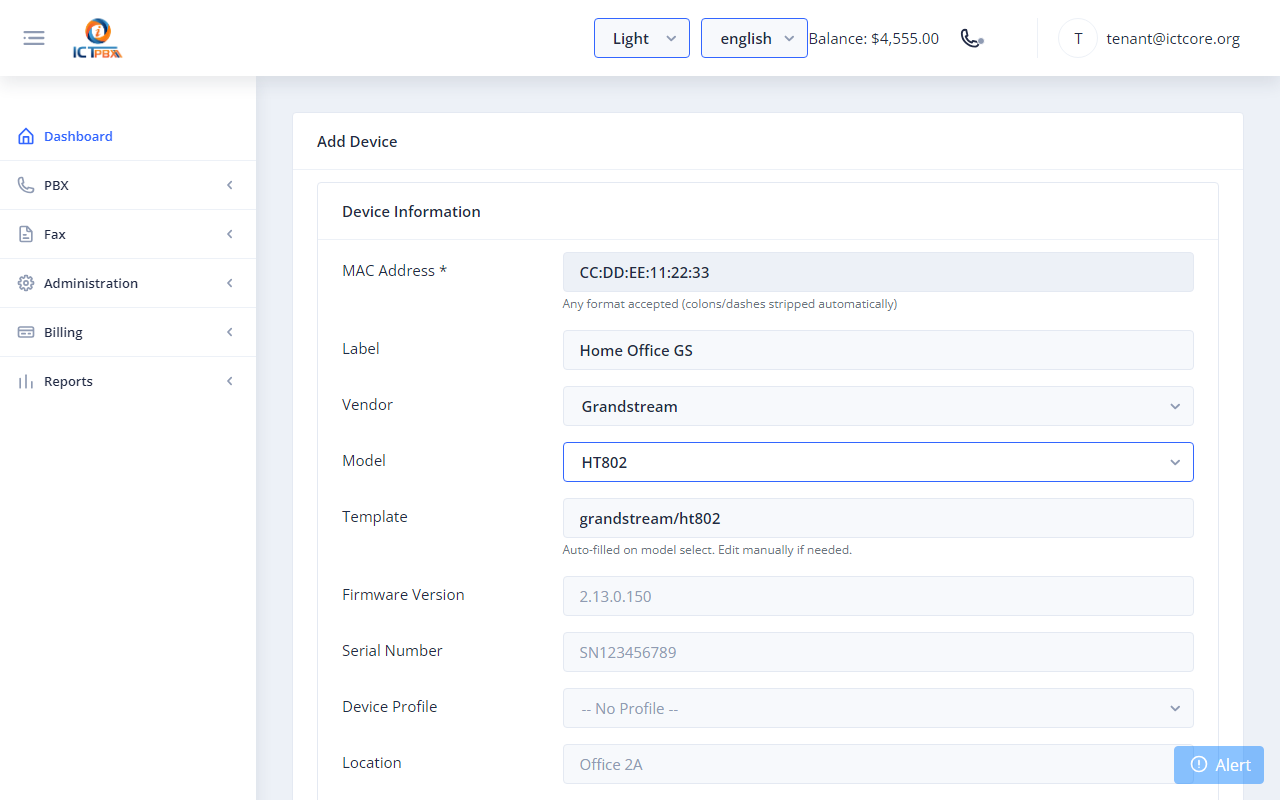
Fig 15-17 - Tenant: Grandstream HT802 selected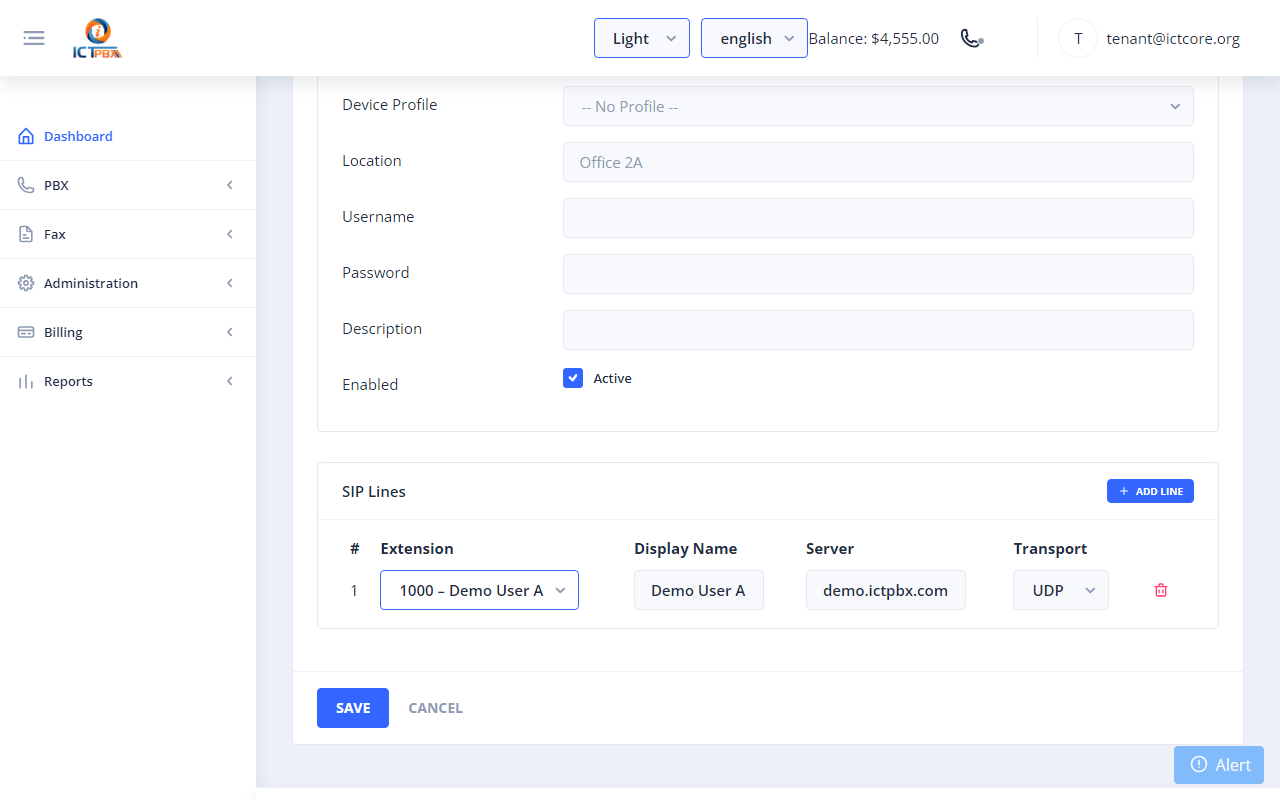
Fig 15-18 - Tenant: extension assigned to SIP line
Fig 15-19 - Tenant: device saved
15d. Entering the Provisioning URL on the Phone
Yealink Phones
- Open the phone web interface: http://
(default admin/admin) - Settings → Auto Provision → Server URL → paste the ICTPBX provisioning URL
- Protocol: HTTPS → click Autoprovision Now
Grandstream Phones
- Open the phone web interface: http://
- Maintenance → Upgrade and Provisioning → Config Server Path → paste URL (without https://)
- Upgrade Via: HTTPS → click Update and Provision
DHCP Option 66 - Zero-Touch Deployment
Set DHCP option 66 on your network to the base provisioning URL. Every phone that boots on the network will self-provision using its own MAC address.- Option 66 value: https://demo.ictpbx.com/provision/
15e. Quick Reference
- Admin/Tenant → PBX → Device Profiles → New → name → Save
- Admin/Tenant → PBX → Devices → New → MAC + label → Vendor → Model
- Add Line → select Extension → Save
- Edit device → copy Provisioning URL → paste into phone Auto Provision settings
16. Installing ICTPBX as an App
ICTPBX is a Progressive Web App (PWA): you can install it on a desktop or mobile device so it opens in its own window with an app icon - no app store and no separate download required. The installed app stays in sync with the web portal and updates itself automatically.Note: Installation is only offered when the portal is served over HTTPS. On a plain-HTTP install the browser will not show an install option.16a. Install on Windows / macOS (Chrome or Edge)
- Open your ICTPBX URL (e.g. https://demo.ictpbx.com) and sign in.
- Look for the install icon in the address bar - a small monitor/screen icon with a down-arrow, at the right-hand end of the URL field.
- Click it (or open the browser menu ⋮ and choose "Install ICTPBX…" / "Apps → Install this site as an app").
- Click Install in the confirmation dialog.
- ICTPBX opens in its own window and a shortcut is added to your Desktop / Start Menu (Windows) or Dock / Launchpad (macOS).
16b. Install on Android (Chrome)
- Open the ICTPBX URL in Chrome and sign in.
- Tap the menu (⋮) → "Add to Home screen" (or "Install app").
- Tap Add / Install. The ICTPBX icon appears on your home screen.
16c. Install on iPhone / iPad (Safari)
- Open the ICTPBX URL in Safari and sign in.
- Tap the Share button (the square with an up-arrow).
- Scroll down and tap "Add to Home Screen", then tap Add.
16d. Automatic Updates
When a new version of ICTPBX is published, the installed app detects it in the background and shows an update prompt. Click Reload (or re-open the app) to load the latest version - there is nothing to re-download or re-install.Note: If you ever see a stale screen after an upgrade, close and re-open the app, or refresh the page, to pick up the newest version.17. Tenant Fraud & Credit Controls
Note: Admin only. Enterprise Edition.Each tenant has two safeguards that limit toll-fraud exposure and warn before credit runs out. Set them on the Add Tenant or Edit Tenant form, in the "Billing & Call Limits" section.Go to Administration → Tenants → Add Tenant (or edit an existing tenant) and scroll to Billing & Call Limits.| Field | What it does |
|---|---|
| Low-credit alert threshold | Emails the tenant when their credit balance drops below this value. Set to 0 to disable the alert. |
| Max concurrent calls | Caps the number of simultaneous active calls allowed for this tenant. Set to 0 for unlimited. |
Fig 17-1 - Billing & Call Limits - Low-credit alert threshold and Max concurrent callsImportant: Max concurrent calls is the primary toll-fraud guard: if an account is compromised, the cap limits how many calls an attacker can place at once. Set it to the tenant's realistic peak (e.g. number of seats) rather than leaving it unlimited.Tip: Use the Low-credit alert threshold to give post-paid or pre-paid tenants advance warning before service is affected, so they can top up in time.
18. Click-to-Call from the Realtime Page
Click-to-Call lets you place a call from the browser without a softphone. The server first rings the chosen extension; when that phone is answered, ICTPBX automatically dials the destination and bridges the two parties.Go to PBX → Realtime. The Click to Call card is at the top of the page.| Field | Enter |
|---|---|
| From extension | A registered extension to ring first (e.g. 1001). This phone rings and the user answers to start the call. |
| To number | The destination - another extension (e.g. 1002) or an external number in E.164 / dial format (e.g. 0300…). |

Fig 18-1 - Realtime page - Click to Call card with From extension and To numberNote: The From extension must be registered (visible in the Registrations list lower on the same page) for the call to connect. Live calls then appear in the Active Channels table, where you can hold, transfer, or hang up.
Appendix A - Scenario Reference Matrix
| Goal | Sections |
|---|---|
| Onboard a new customer organisation | 2a → 2b → 14b |
| Create users with correct permissions | 2c → 2d |
| Set up a SIP trunk for outbound calls | 3 |
| Add a phone number (DID) | 4 |
| Create extensions and register softphone | 5 → 6 |
| Provision a physical IP desk phone | 5 → 15 |
| Make extension-to-extension calls | 6 → 11 |
| Incoming call rings all team members | 4 → 5 → 7 → 10 |
| Auto-attendant phone menu | 4 → 8 → 10 |
| Voicemail for unanswered calls | 9 → 10 |
| Transfer a live call | 11 |
| Forward calls to your mobile (Follow Me) | 12 |
| Make outbound PSTN call via softphone | 3 → 5 → 6 → 11 |
| Send a fax | 13a |
| Receive a fax on a DID | 4 → 13b |
| Set up billing packages and assign to tenant | 14a → 14b |
| Top up a tenant's credit balance | 14e |
| View how much quota a tenant has used | 14f → 14g |
Appendix B - Feature Codes
Full list at PBX → Feature Codes.| Code | Function |
|---|---|
| *98 | Check voicemail |
| *72 | Call forward - enable |
| *73 | Call forward - disable |
| *78 | Do Not Disturb - enable |
| *79 | Do Not Disturb - disable |
| *2 + ext | Blind transfer |
| *4 + ext | Attended transfer |
| *411 | Directory |
Appendix C - Troubleshooting
Softphone won't register
- Extension exists in PBX → Extensions
- SIP password matches exactly (case-sensitive)
- Browser is on HTTPS (WSS required on HTTPS installs - port 5067)
- No firewall blocking port 5067 from your network
Inbound call not reaching destination
- DID exists in Routing → DID Numbers
- Inbound Route configured in PBX → Inbound Routes
- Destination (ring group / IVR / extension) is saved and active
- Trunk shows REGED on PBX → Realtime
Fax stuck in Queued
- Trunk is registered (Realtime → Gateways)
- Outbound route pattern matches the fax destination number
- Document is a valid non-password-protected PDF
- Fax account DID is assigned (Fax → My DIDs)
Billing quota shows 0 for all resources
- No package assigned to the tenant - go to Billing → Subscriptions
- billing_seed.sql not loaded - contact admin to run the DB seed
User can't see a PBX menu item
- Check the tenant has the required permission token (Administration → Tenants → Edit)
- Check the user has the matching permission checkbox ticked (Administration → User Management → Edit)