
Getting Started with ICTPBX
Install the desktop app & make your first call with the built-in webphoneIn this guide
1 Install ICTPBX as a desktop app
ICTPBX runs in your browser, but you can install it like a normal desktop
application - it opens in its own window with the ICTPBX icon, no app store or download needed.
On a computer (Chrome or Microsoft Edge)
1
Open the portal
Go tohttps://demo.ictpbx.com and sign in. 2
(a small monitor with a down-arrow). Click it, then choose Install.
Click the Install icon in the address bar
Look at the right-hand end of the address bar for the install icon(a small monitor with a down-arrow). Click it, then choose Install.
ICTPBX portal…
No install icon? Open the browser menu
(⋮ in Chrome, ⋯ in Edge) and choose
“Install ICTPBX…” (Edge: Apps → Install this site as an app).
(⋮ in Chrome, ⋯ in Edge) and choose
“Install ICTPBX…” (Edge: Apps → Install this site as an app).
3
ICTPBX icon. You can pin it to your taskbar.
Launch it like any app
ICTPBX now opens in its own window and appears in your Start Menu / Dock with theICTPBX icon. You can pin it to your taskbar.
On a phone or tablet
Android (Chrome)
Tap the ⋮ menu → Install app /Add to Home screen.
iPhone / iPad (Safari)
Tap the Share button → Add to Home Screen.When a new version is released, the installed app will show a
“A new version is available - reload now?” prompt. Click
OK to update.
“A new version is available - reload now?” prompt. Click
OK to update.
2 Register the webphone
The webphone is built into the portal - no separate install. Register it once
with your extension and SIP password (find these on My Account, or ask your administrator).
The example below registers extension 1001.
1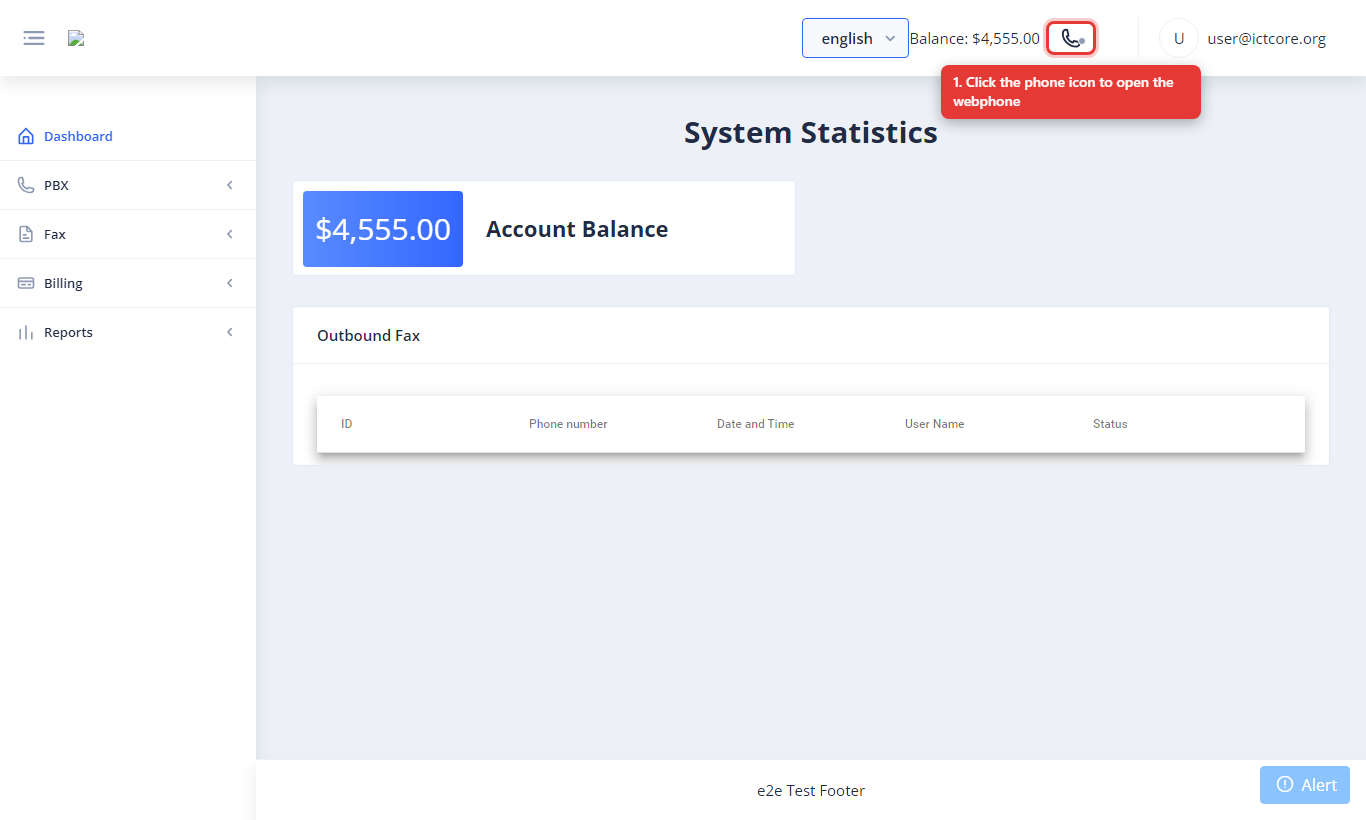
Open the webphone
Click the phone icon in the top bar. 2
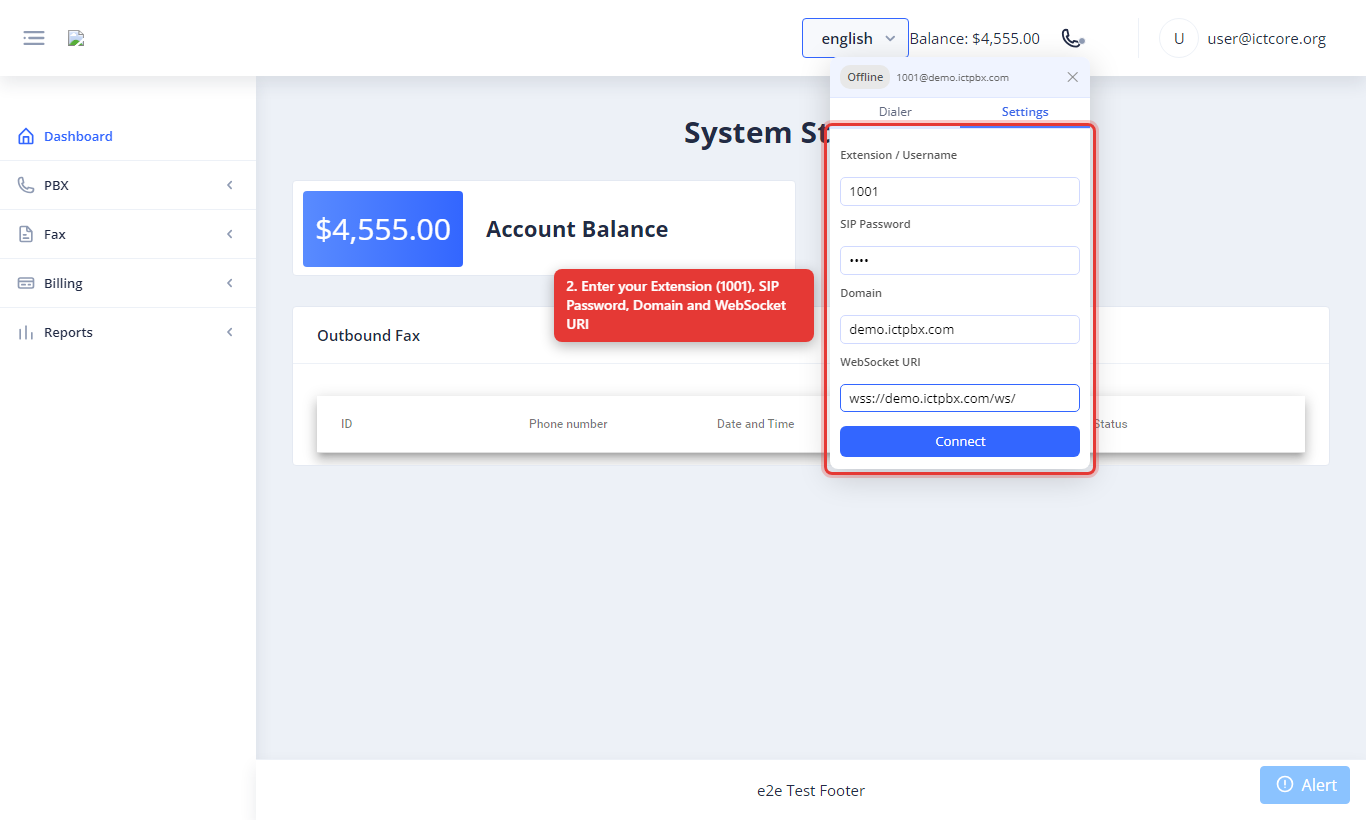
Enter your connection details
On the Settings tab, fill in the four fields:| Extension / Username | 1001 |
|---|---|
| SIP Password | your extension’s SIP password |
| Domain | demo.ictpbx.com |
| WebSocket URI | wss://demo.ictpbx.com/ws/ |
3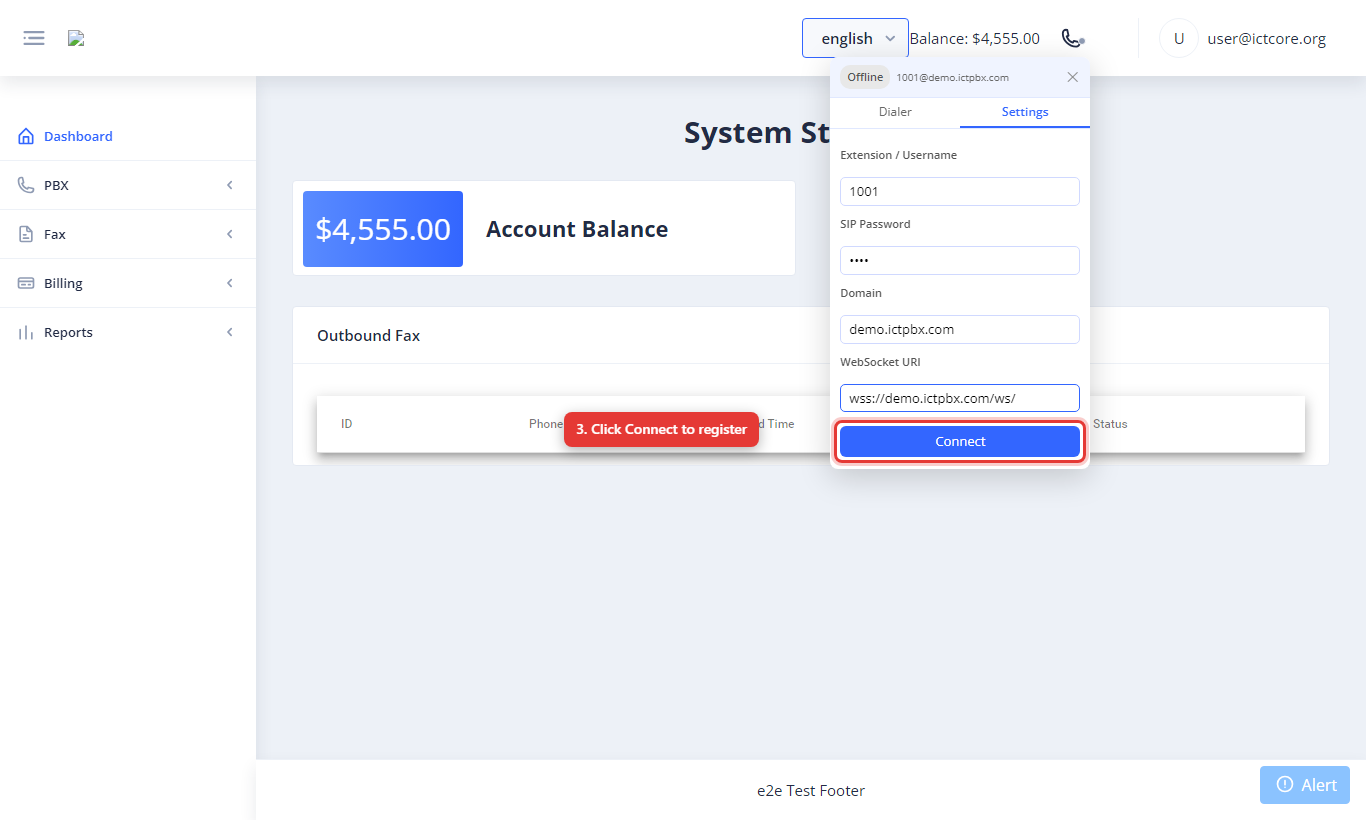
Click Connect
Press Connect to register with the phone system. 4
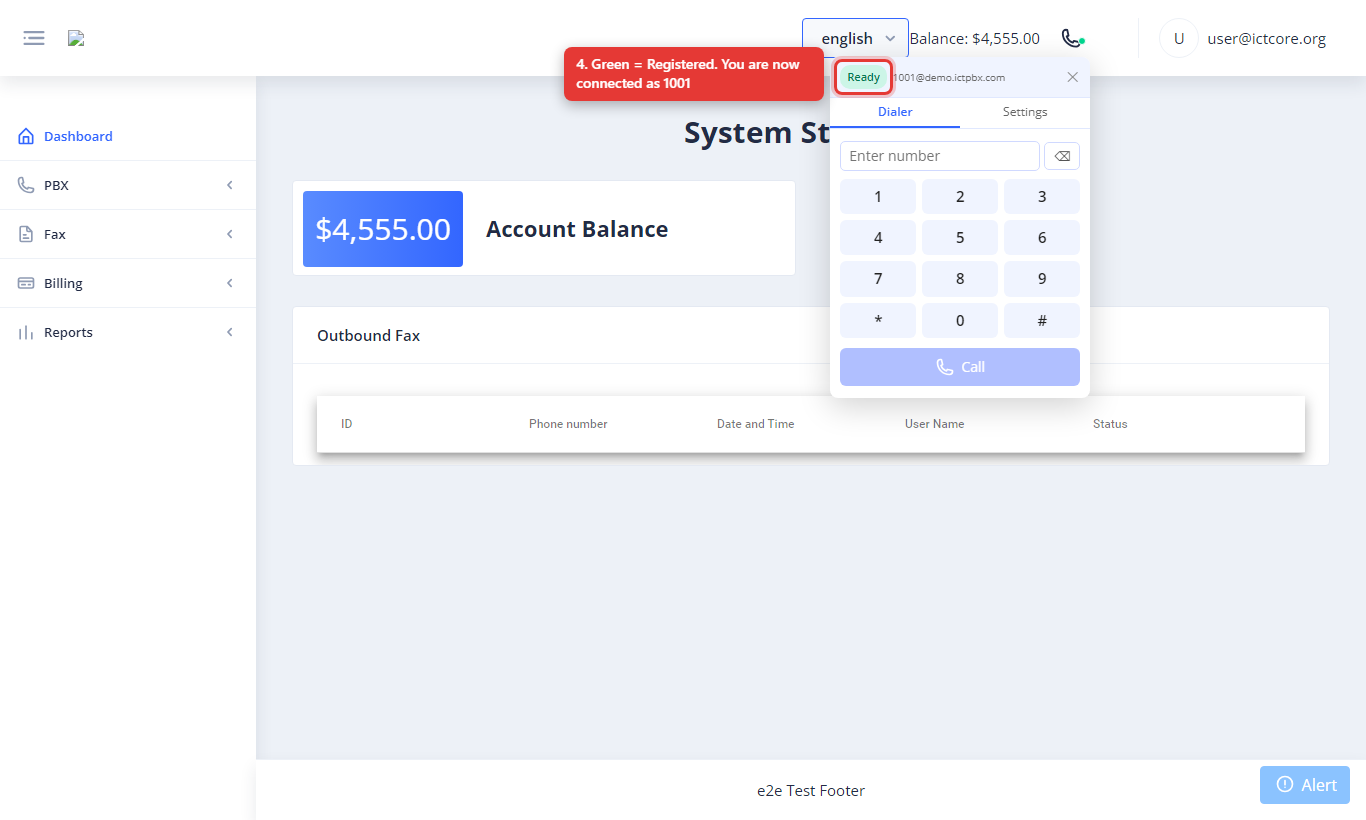
Confirm you are registered
The status turns green and shows1001@demo.ictpbx.com. You are ready to make and receive calls. 3 Call another extension
Once registered, dialing an internal extension takes two clicks.
This example calls extension 1002 from 1001.
1
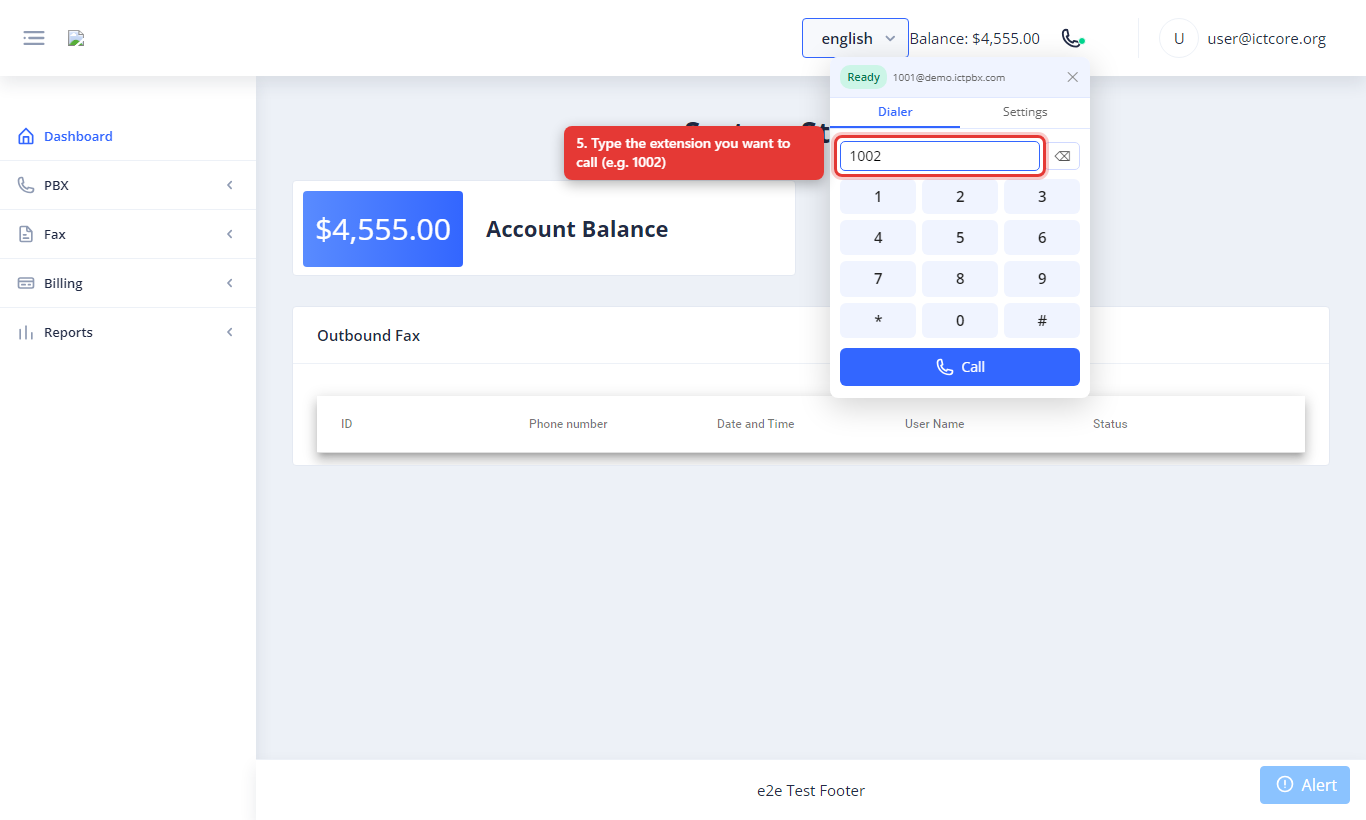
Type the extension
On the Dialer tab, type the number you want to call - e.g.1002 - using your keyboard or the on-screen keypad. 2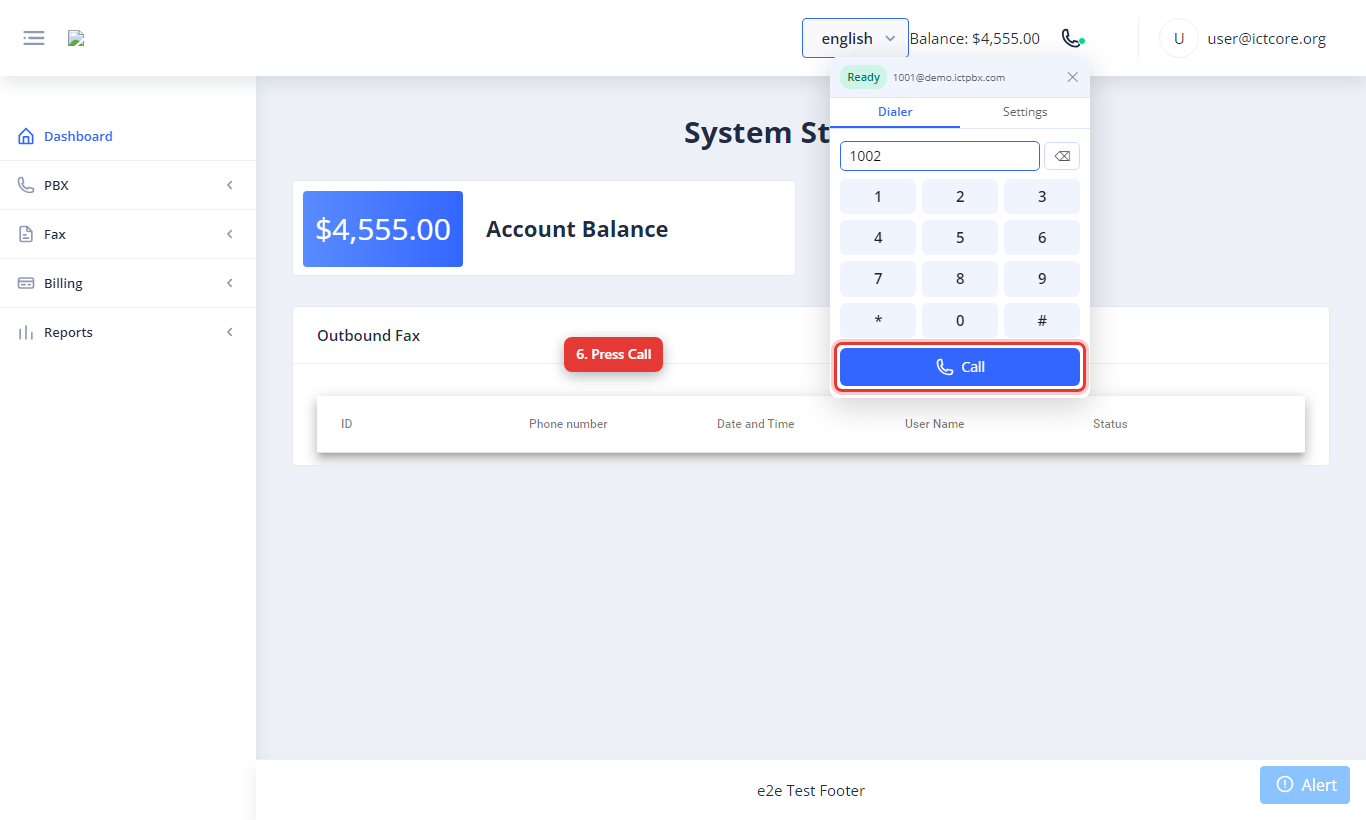
Press Call
Click the green Call button to start the call. 3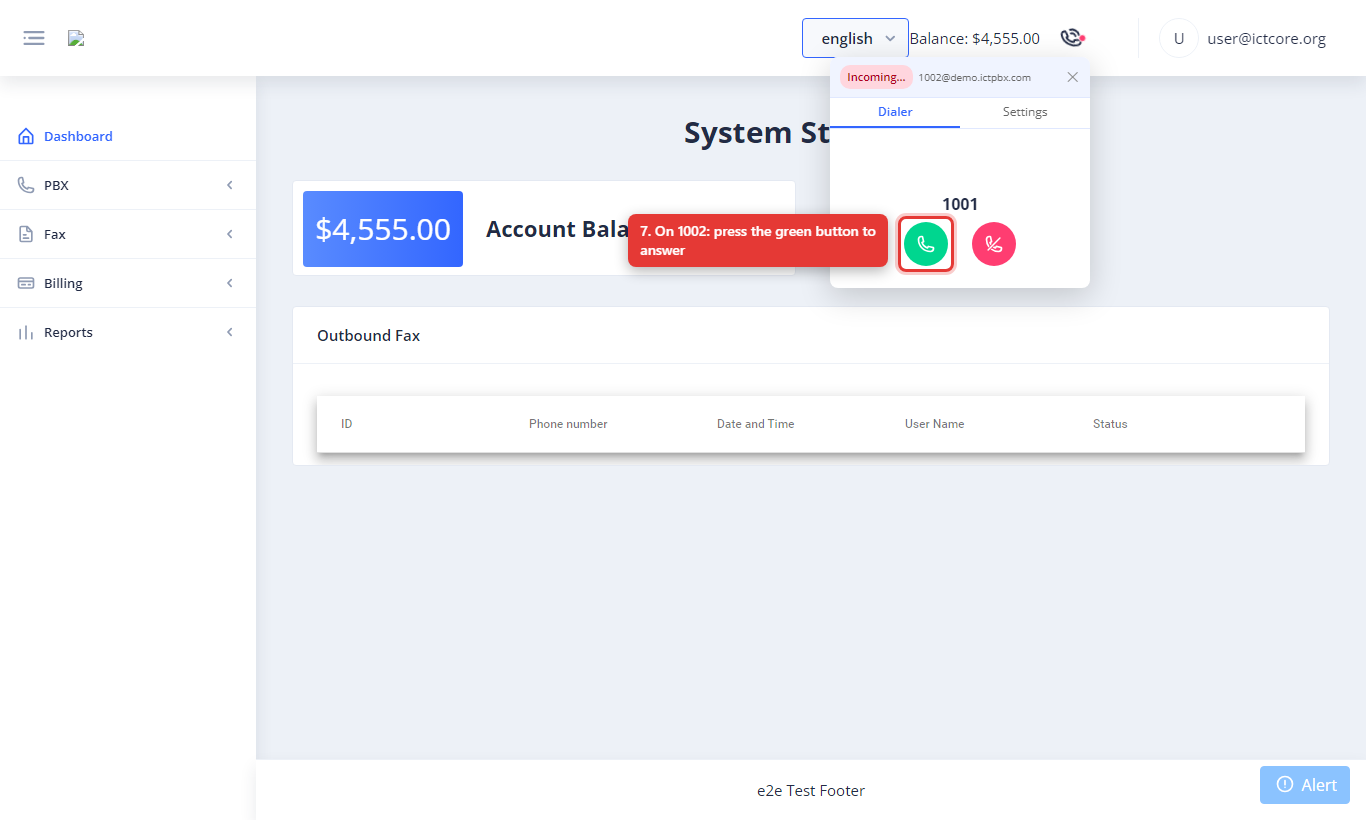
The other extension rings
Extension 1002 sees an incoming call and presses the green button to answer. 4
call you can Mute, Hold, Transfer,
or hang up with the red button.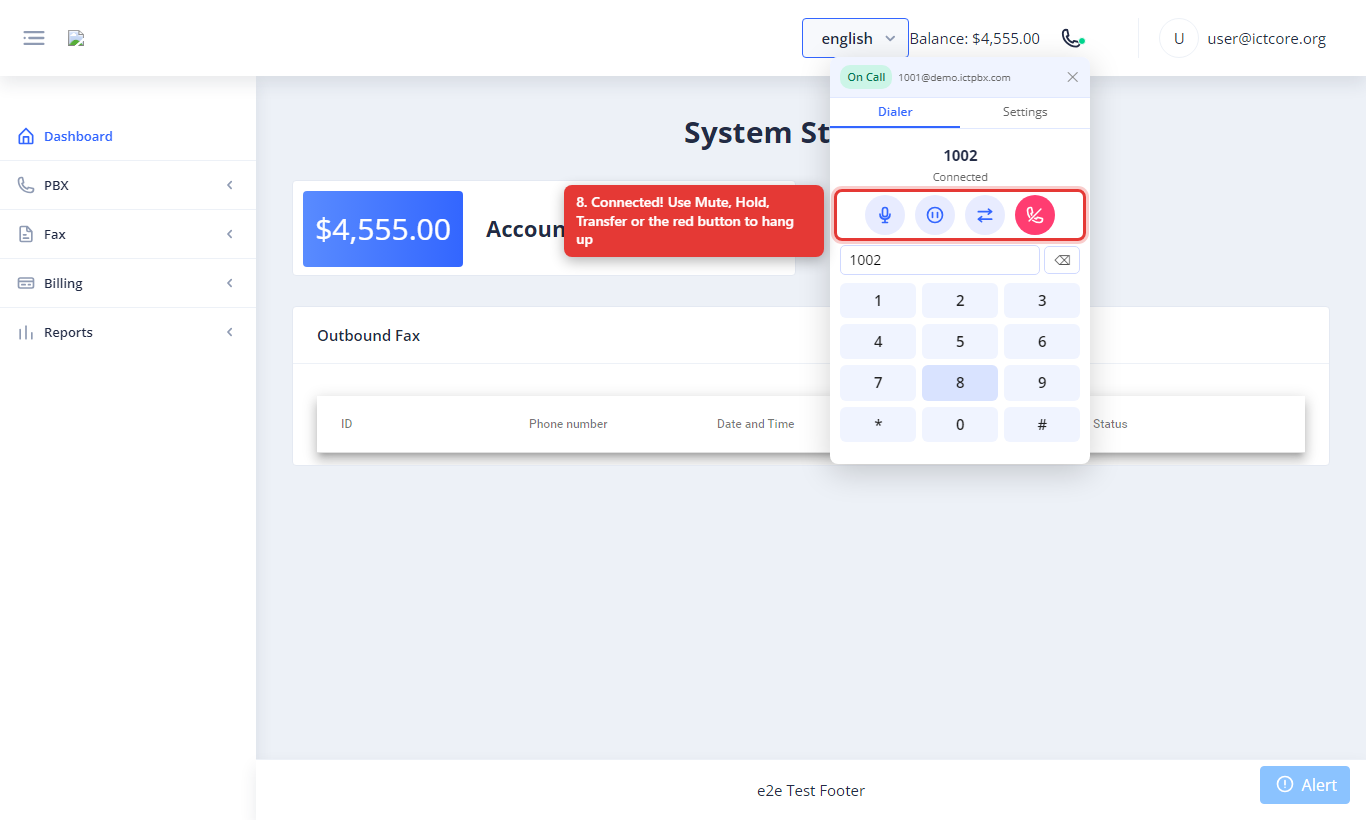
You’re connected
The header shows On Call and Connected. During thecall you can Mute, Hold, Transfer,
or hang up with the red button.
5
returns to green (registered), ready for the next call.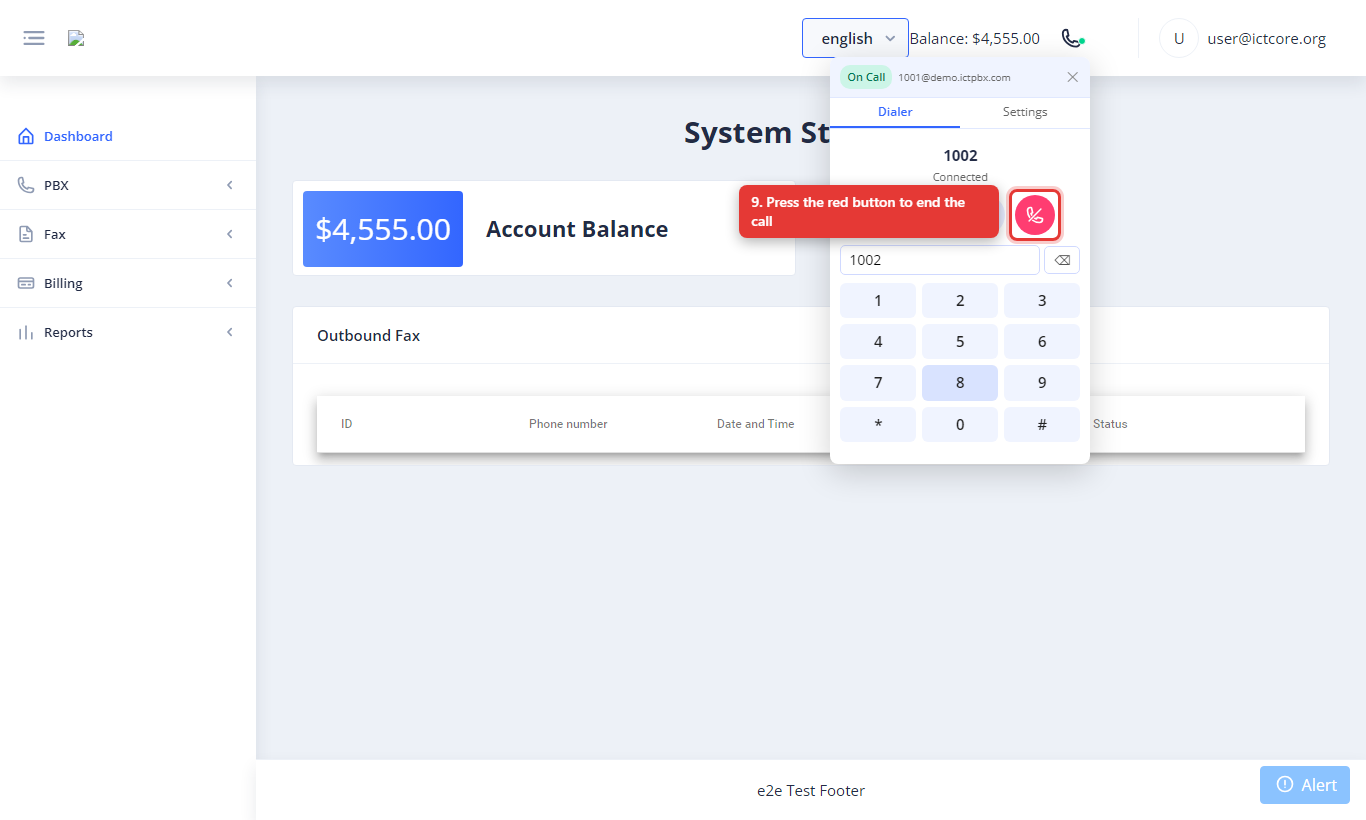
End the call
Press the red button to hang up. The statusreturns to green (registered), ready for the next call.
You can dial any internal destination the same way - other extensions, a
ring group (e.g.
ring group (e.g.
8280), an IVR menu (e.g. 8500), or voicemail.