
End User
Role: End User | Access Level: Level 4 — Personal Communication Tools
Introduction
The End User role in ICTPBX provides access to your personal communication tools — your SIP extension, the built-in WebRTC softphone, personal call forwarding, fax send and receive, and your account settings. This guide covers everything available to you as an End User.
You do not have access to PBX administration. Contact your tenant administrator for changes to extensions, ring groups, queues, or DID routing.
1. Logging In
Open your browser and navigate to your ICTPBX portal URL (e.g. https://ictpbx.com).
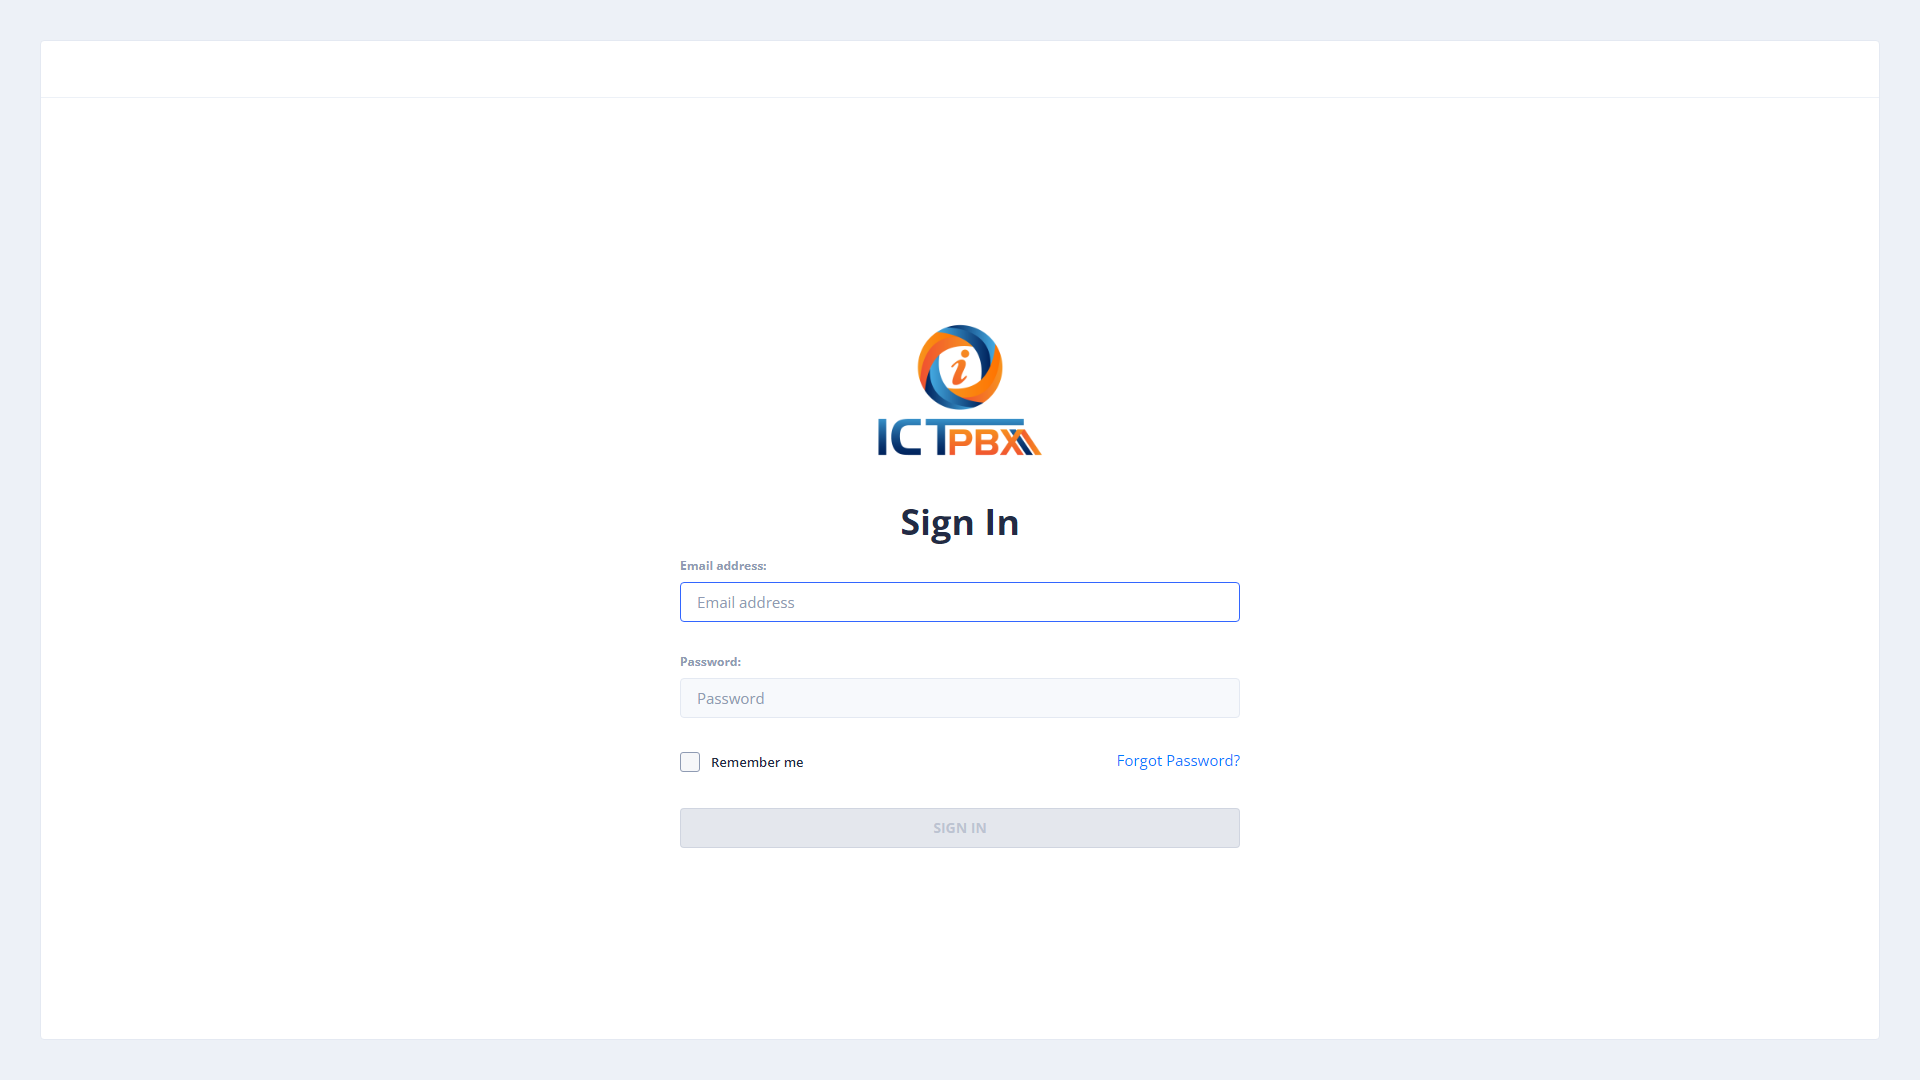
- Enter your Email Address.
- Enter your Password.
- Optionally tick Remember me to stay signed in across sessions.
- Click SIGN IN.
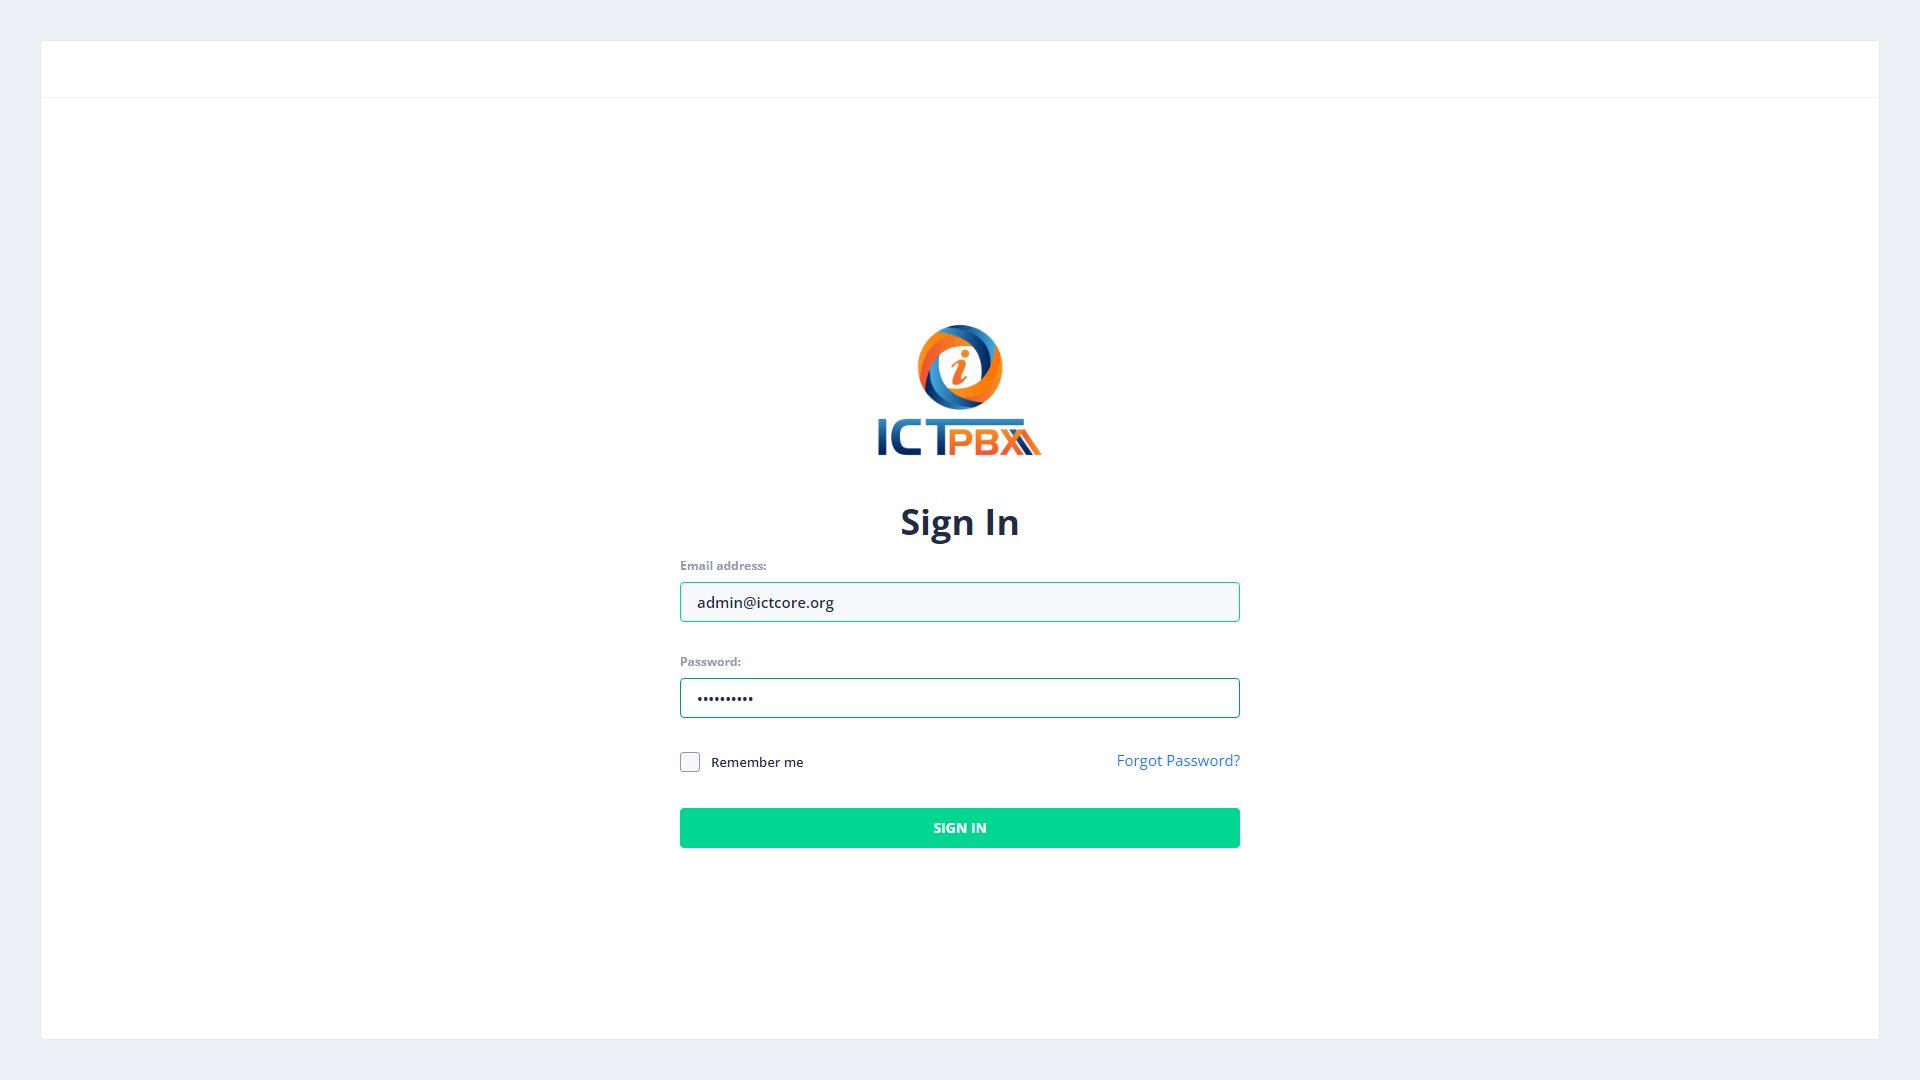
Tip: If login fails, confirm Caps Lock is off. After several failed attempts your account may be temporarily locked — contact your administrator to unlock it.
2. Dashboard
After login you land on the Dashboard showing your tenant’s current system statistics — active extensions, devices, queues, fax counts, and your remaining credit balance (if billing is enabled).
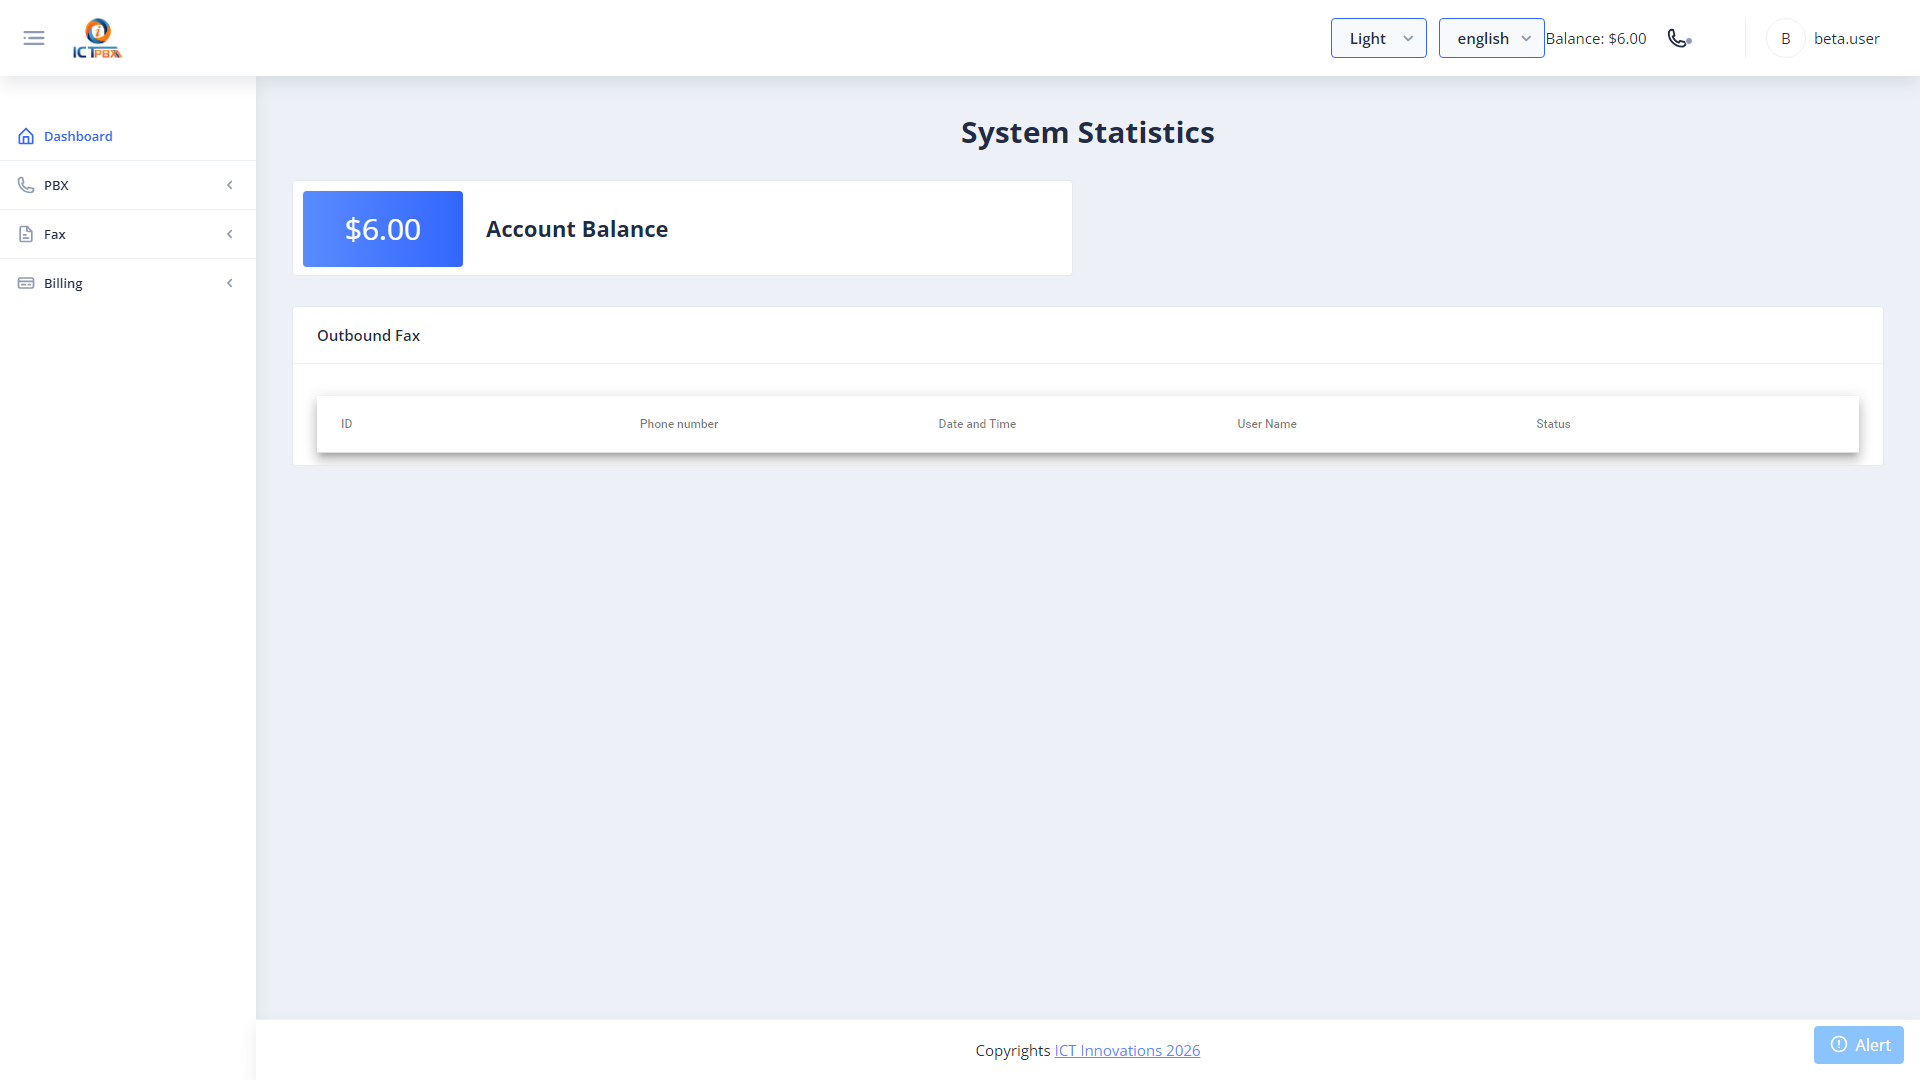
Your credit balance appears in the top-right header and updates every 10 seconds automatically.
3. My Account
My Account is your personal settings page — find your SIP credentials here, configure Do Not Disturb, set call forwarding, and update your fax delivery email.
Navigate to My Account from the left sidebar.

3.1 SIP Credentials
Your SIP credentials are shown in the Voice Extension card:
Use these credentials to configure the built-in softphone or any external SIP client such as Zoiper, Linphone, or a Grandstream IP phone.
3.2 Do Not Disturb (DND)
Scroll down to the Extension Settings card.
- Tick Reject Incoming Calls (DND) to reject all inbound calls to your extension. Callers will be sent to voicemail or hear a busy tone.
- Click Save Extension Settings to apply.
Important: DND affects ALL inbound calls — including calls routed from queues. Always remember to disable DND when you return.
3.3 Fax Delivery Email
Scroll to the Fax card.

Enter your email address in the Fax Delivery Email field. All inbound faxes received on your fax extension will be sent to this address as PDF attachments. Click Save.
4. WebRTC Softphone
The WebRTC softphone is built directly into the ICTPBX portal — no separate app or plugin required. It uses your SIP extension credentials to connect to the PBX via a secure WebSocket.
Click the phone icon (☎) in the top-right header bar to open the softphone panel.

4.1 First-Time Setup
- Click the Settings tab inside the softphone panel.
- Enter your SIP Extension (e.g.
1001). - Enter your SIP Password (from My Account).
- Enter the SIP Domain (e.g.
demo.ictpbx.com). - Enter the WebSocket Server (e.g.
wss://demo.ictpbx.com/ws/). - Click Save.
The status indicator turns green when the softphone successfully registers.

Microphone: The browser will ask for microphone permission the first time you register or make a call. Click Allow — the softphone cannot work without it.
4.2 Making a Call
- Click the Dialer tab.
- Type the destination extension or external phone number.
- Click the green call button (▶).
The call connects through FreeSWITCH. For external calls dial the full number including country code (e.g. +12125550100).
4.3 Receiving a Call
When an inbound call arrives, the softphone panel displays the caller’s number with Answer and Reject buttons. Click Answer to accept the call.
4.4 In-Call Controls
4.5 Transferring a Call
- While on an active call, click Transfer.
- Enter the destination extension number.
- Click Transfer to complete the blind transfer.
Your call ends immediately and the remote party rings the new destination.
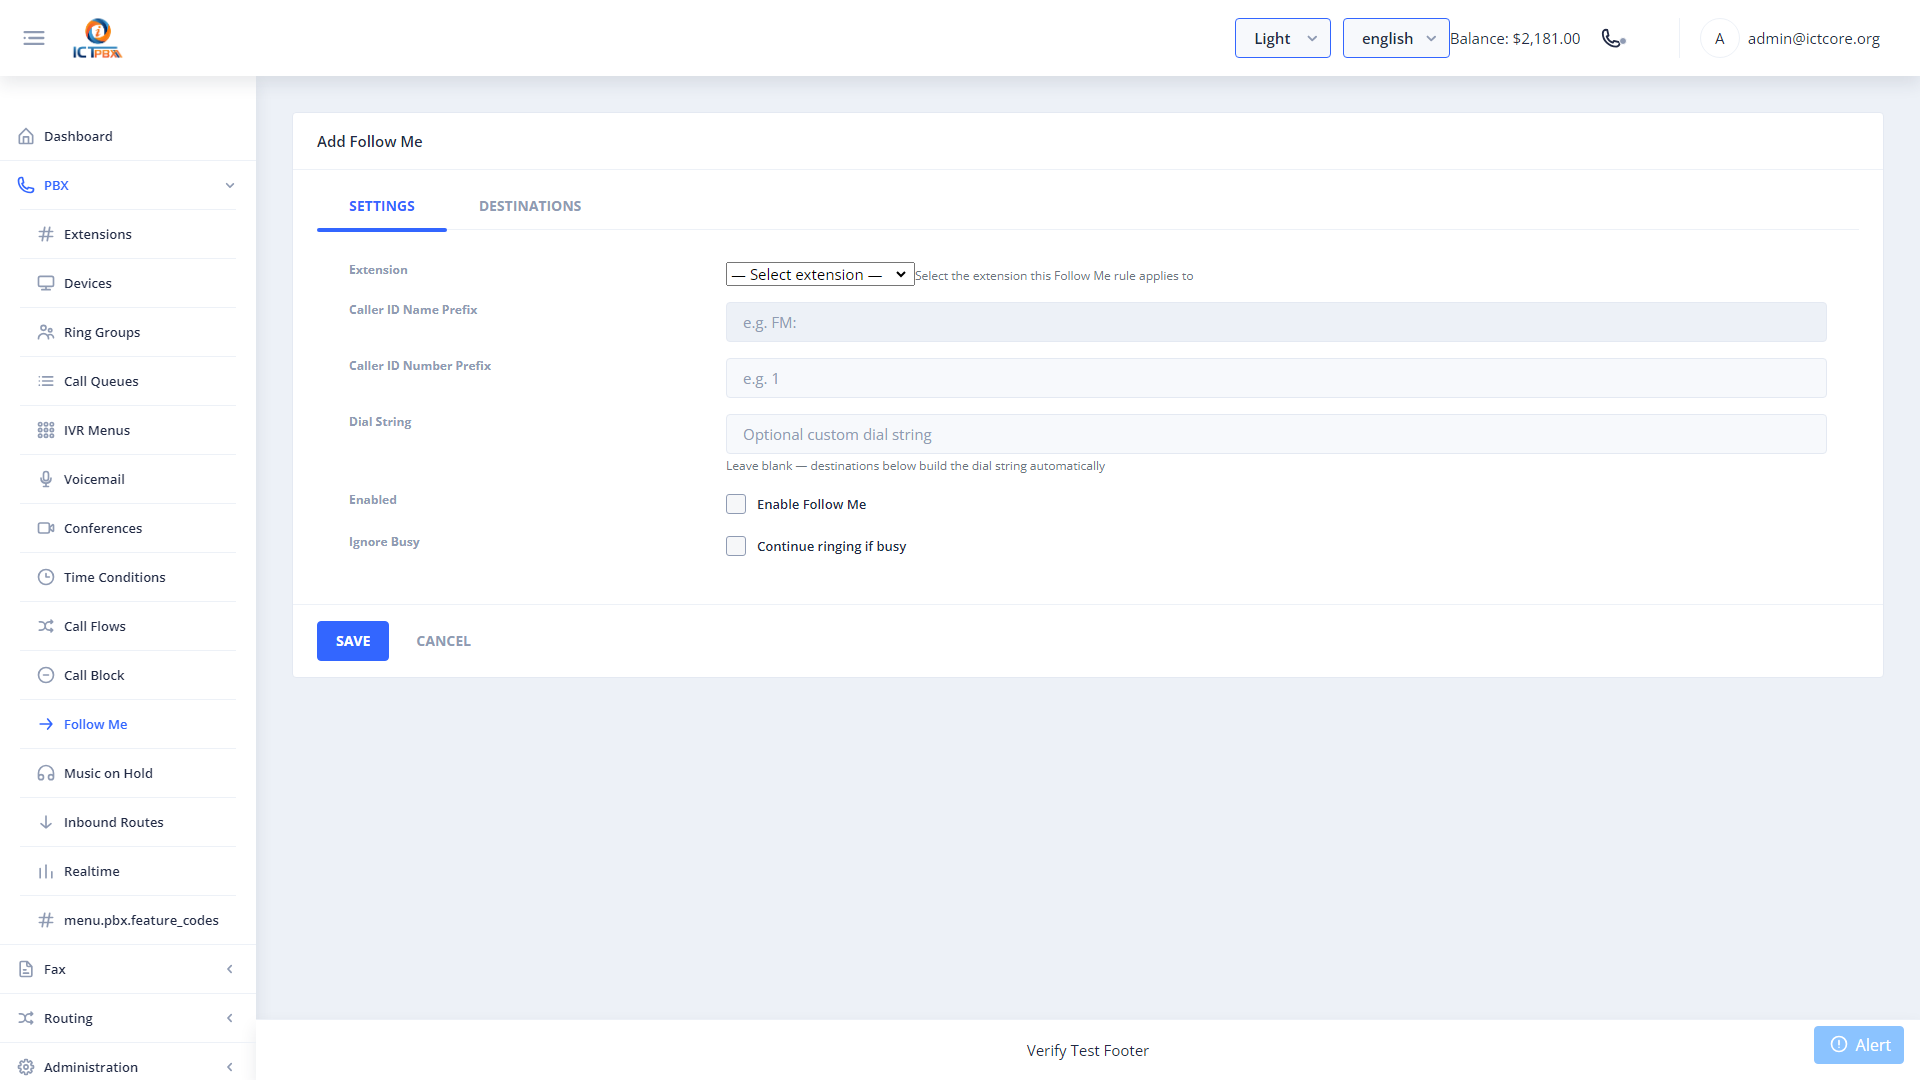
5. Follow Me — Personal Call Forwarding
Follow Me lets you forward calls to your extension to one or more external or internal numbers — your mobile phone, a colleague’s extension, or any number you choose.
Navigate to PBX → Follow Me from the left sidebar.
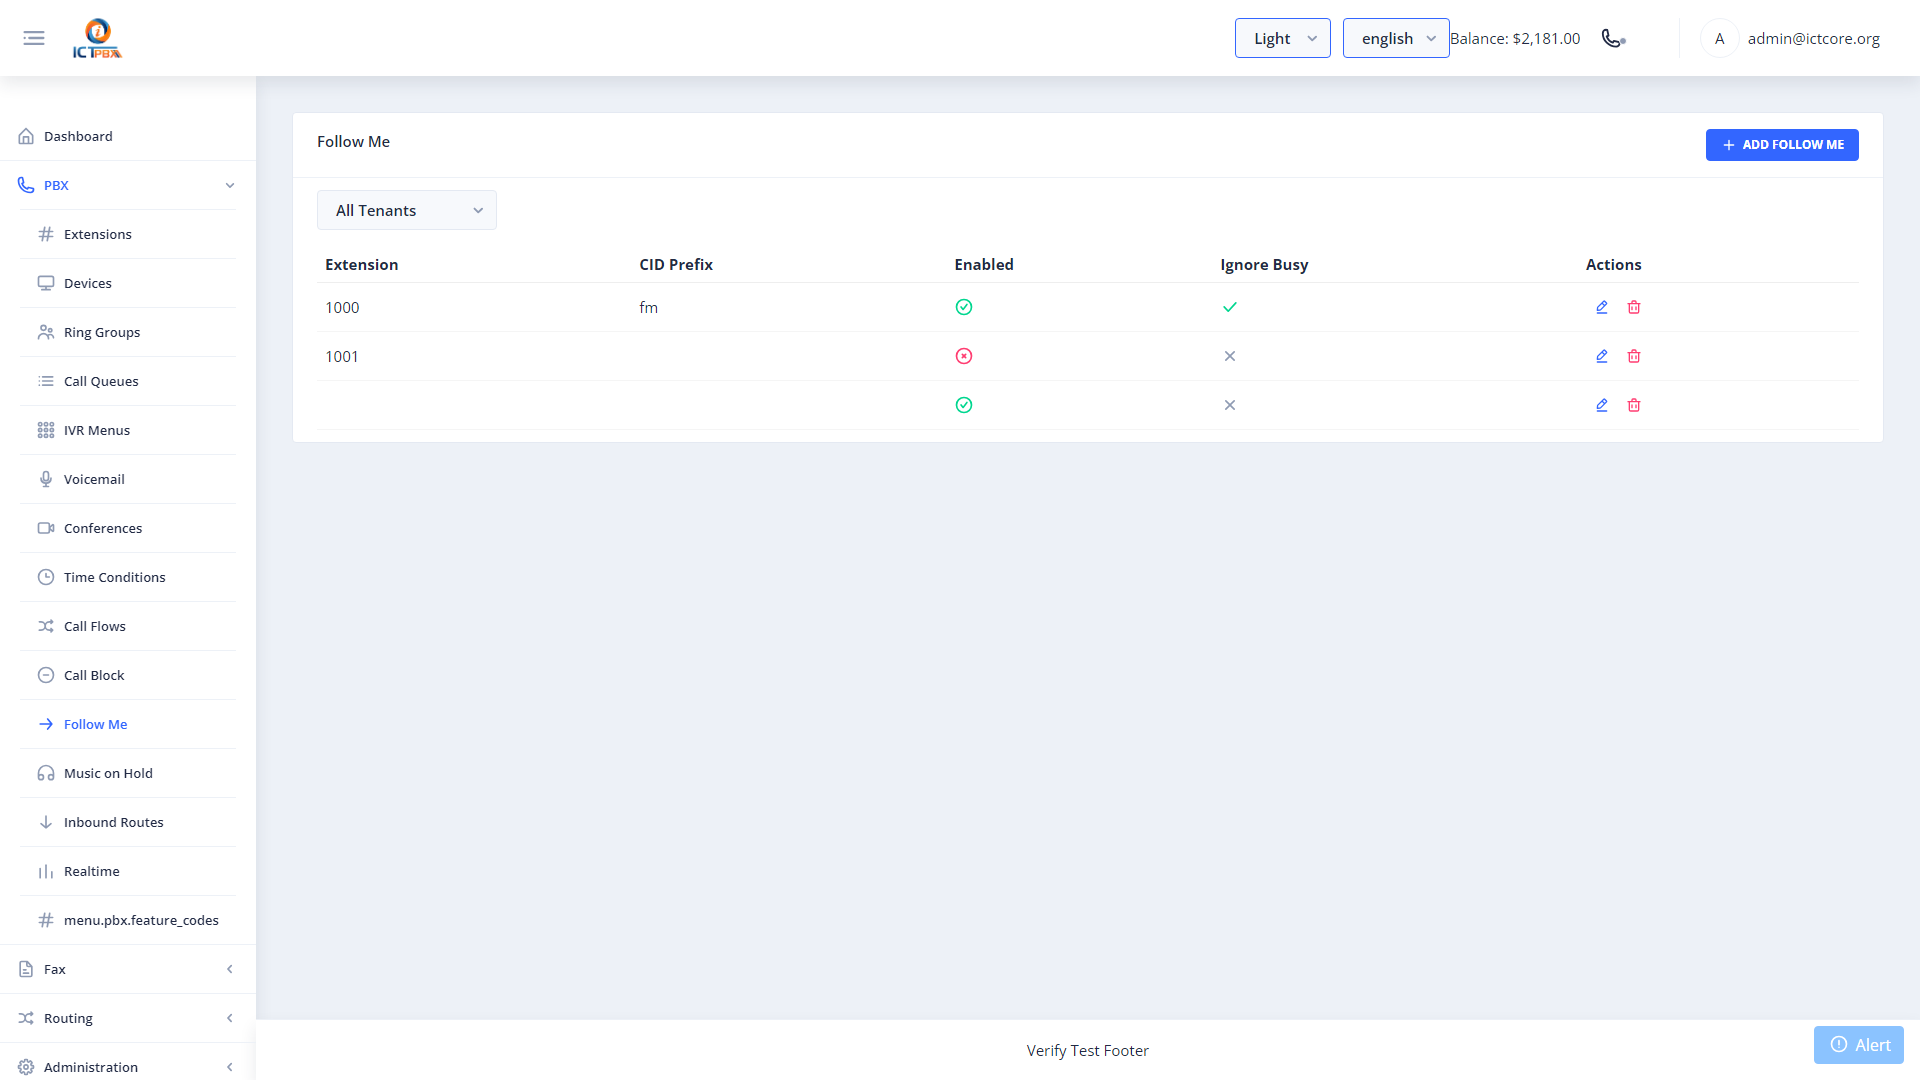
5.1 Creating a Follow Me Rule
- Click New.
- Select your Extension from the dropdown.
- Tick Enable Follow Me.
- Click Add Destination to add a forwarding number.
- Enter the destination number (e.g.
+12125550100for a mobile). - Set Delay — seconds before this destination starts ringing (0 = ring immediately).
- Set Timeout — seconds to ring before moving to the next destination or voicemail.
- Optionally add additional destinations for cascaded forwarding.
- Click Save.
Example: Delay=0, Timeout=20 rings your mobile immediately. If unanswered after 20 seconds the call falls through to voicemail.
Cascaded example: First destination = your desk phone (Delay=0, Timeout=15). Second destination = your mobile (Delay=15, Timeout=20). Your desk phone rings first; if unanswered your mobile picks up 15 seconds later.
To disable forwarding without deleting the rule, untick Enable Follow Me and save.
6. Sending a Fax
Navigate to Fax → Send Fax from the left sidebar.

Steps:
- Enter the recipient’s fax number in the To field (include country code for international numbers, e.g.
+12125550199). - Select a Cover Page template (optional).
- Upload your PDF document using the file picker.
- Add a subject or note if required.
- Click Send Fax.
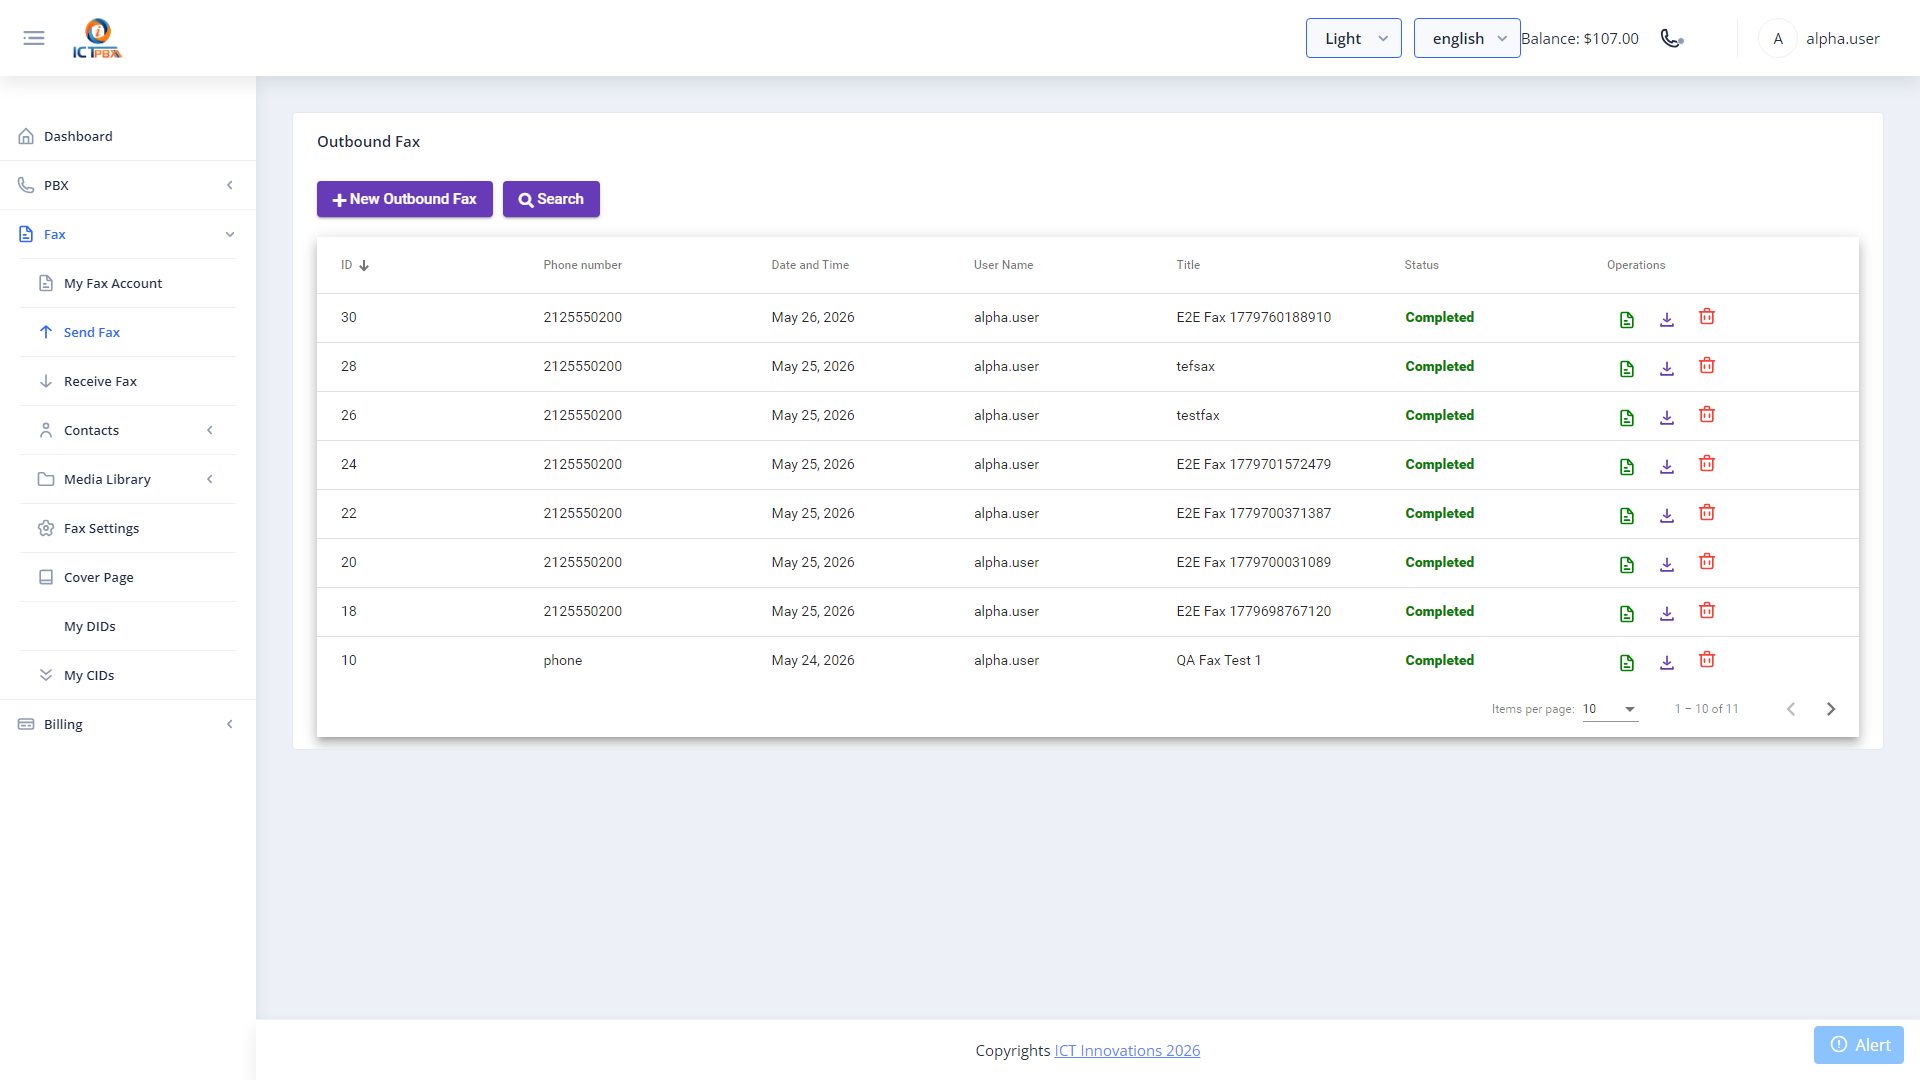
The system queues the fax for transmission. You can monitor its progress in the Outbound Fax list — statuses include: Queued, Sending, Sent, Failed.
Note: Always send faxes as PDF files. Other formats may not transmit correctly. If a fax fails, verify the recipient number is correct and retry.
6A. Bulk Fax Campaigns
Bulk fax lets you send one document to a whole list of recipients in a single run. You pick a fax document, point it at a contact group, and the platform dials each number for you, retrying failures and tracking delivery as it goes.
Navigate to Fax › Bulk Fax.
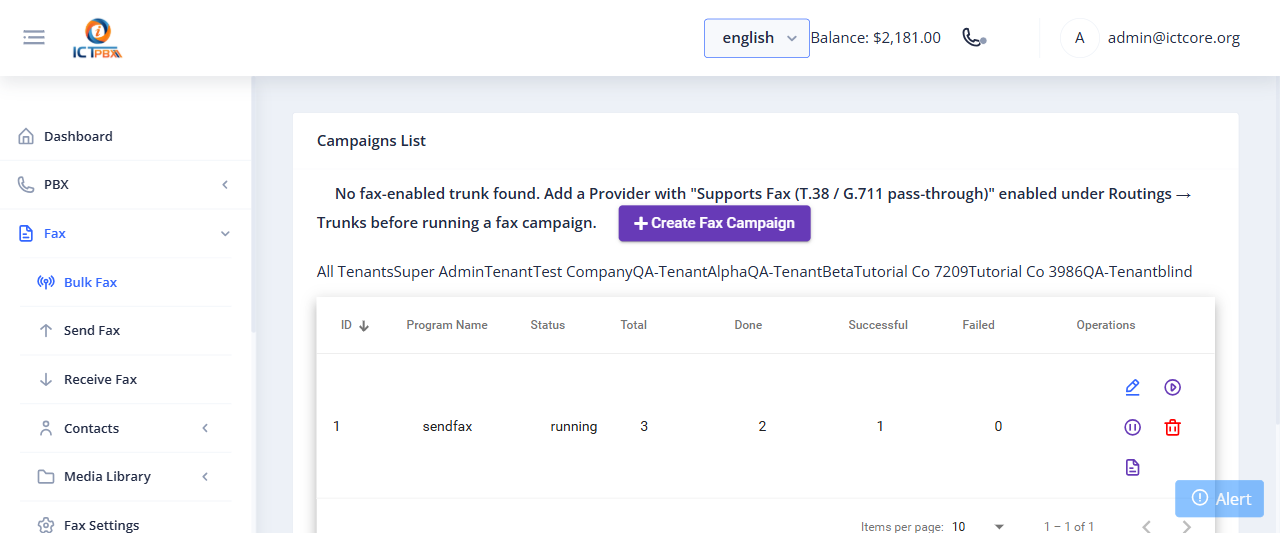
The campaign list shows the Program Name, current Status, and live counters for Total, Done, Successful, and Failed recipients. The action buttons on each row let you view the detail report, pause, resume, or stop a running campaign.
6A.1 Creating a Campaign
- Click Create Fax Campaign.
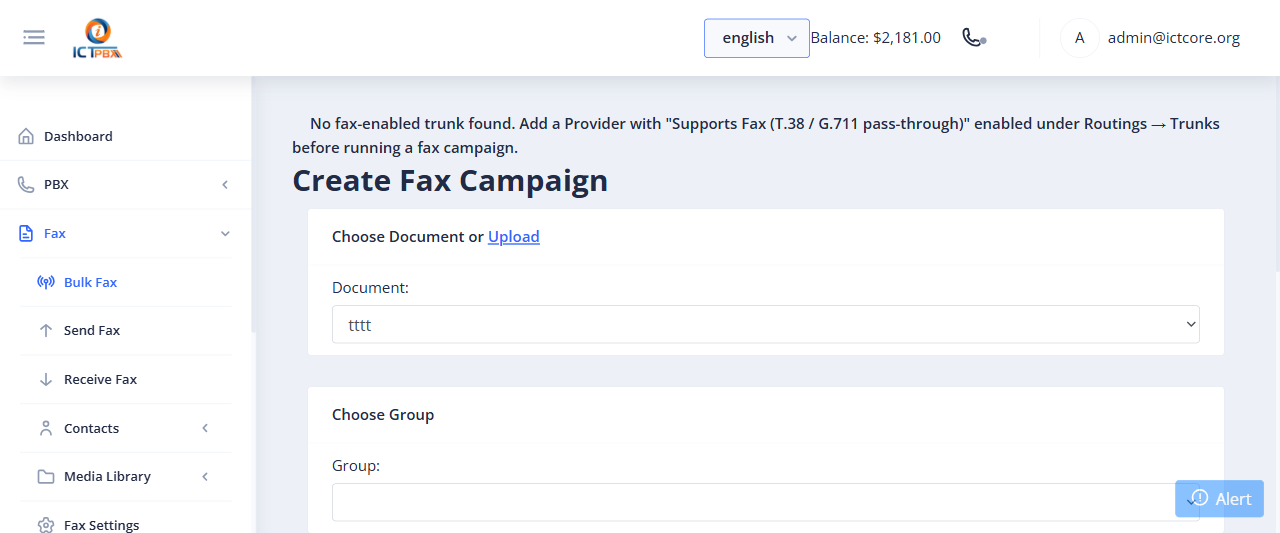
- Click Submit. The campaign starts and its progress updates on the list.
6B. Fax Contacts, Groups & DNC
Contacts are the address book behind your faxes. Build groups of recipients, import them in bulk from a CSV, and keep a do-not-contact list so you never fax a number that has opted out.
6B.1 Contacts
Navigate to Fax › Contacts › Contacts.
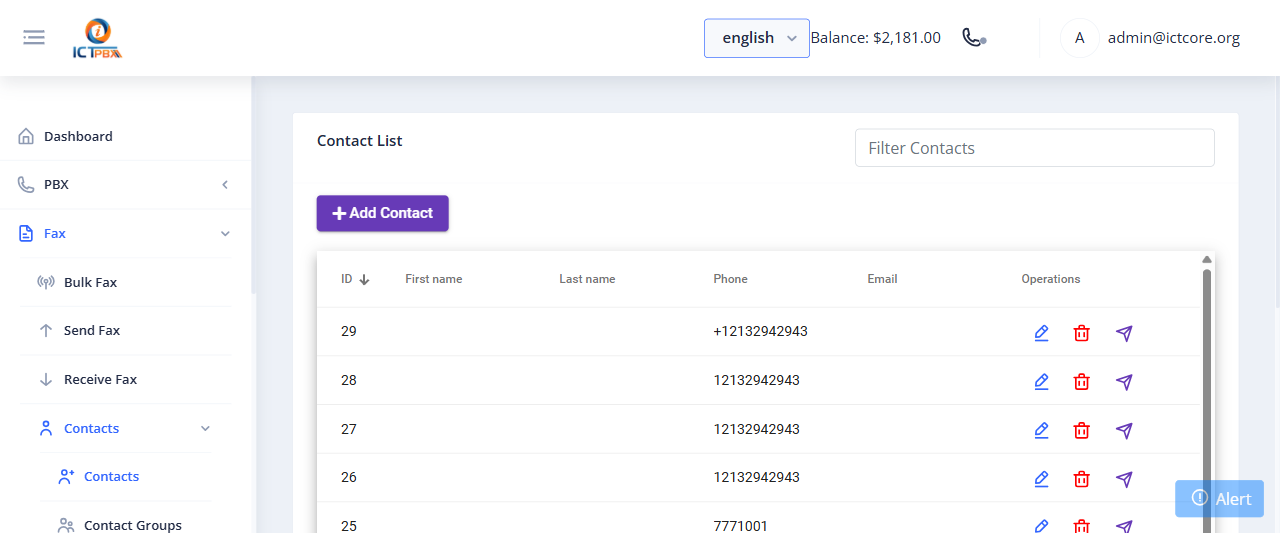
The contact list shows every saved recipient with their name, phone, and email. Use Add Contact to create one, or the filter box to find an existing entry. Each row has edit and delete actions.
6B.2 Contact Groups
Navigate to Fax › Contacts › Contact Groups.
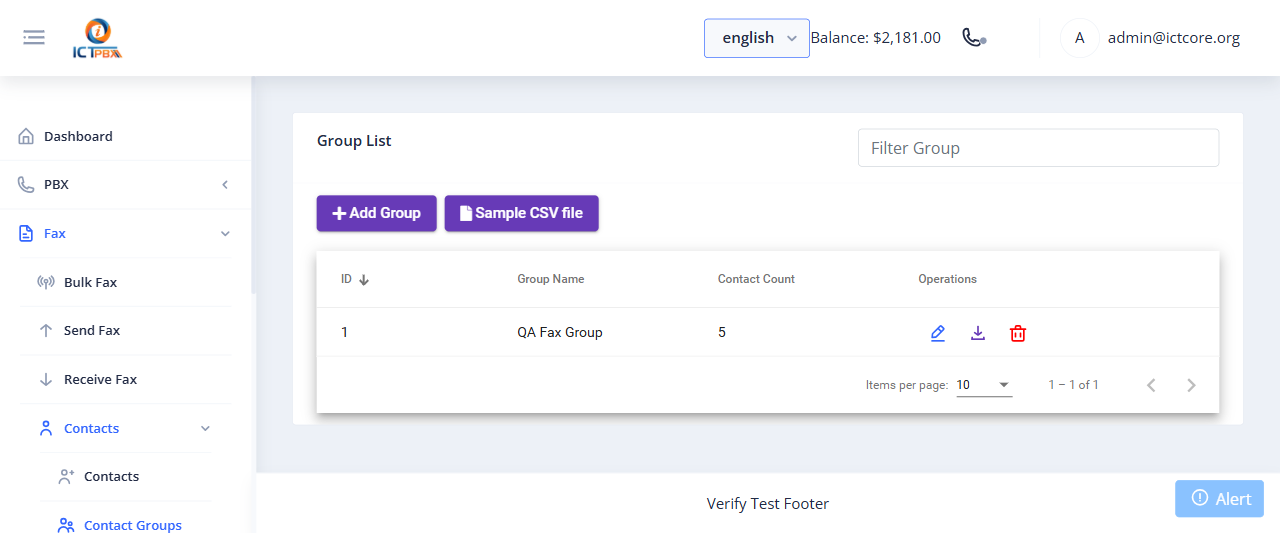
Groups bundle contacts together so a bulk fax can target them in one shot. The list shows each group name and its contact count. Click Add Group to create one. To load many recipients at once, download the Sample CSV file, fill it in, and import it.
6B.3 Contact DNC
Navigate to Fax › Contacts › Contact DNC.
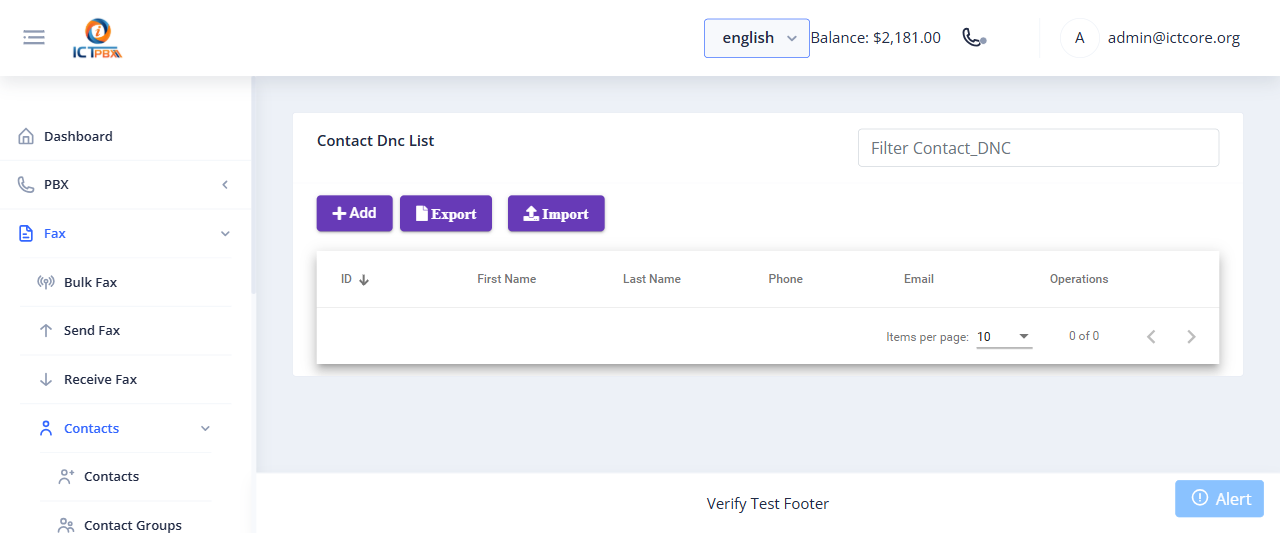
The Do Not Contact list holds numbers that must be excluded from fax campaigns. Add entries with Add, use Import to upload a suppression list, and Export to download the current one. Numbers on this list are skipped when a campaign runs.
7. Viewing Received Faxes
Navigate to Fax → Inbound Fax to see all faxes received on your fax extension.

Each entry shows:
- Sender number
- Date and time received
- Number of pages
- Status (Received, Failed, etc.)
Click the download icon to save any fax as a PDF. Faxes are also automatically delivered to your configured fax delivery email address (see My Account → Fax Delivery Email).
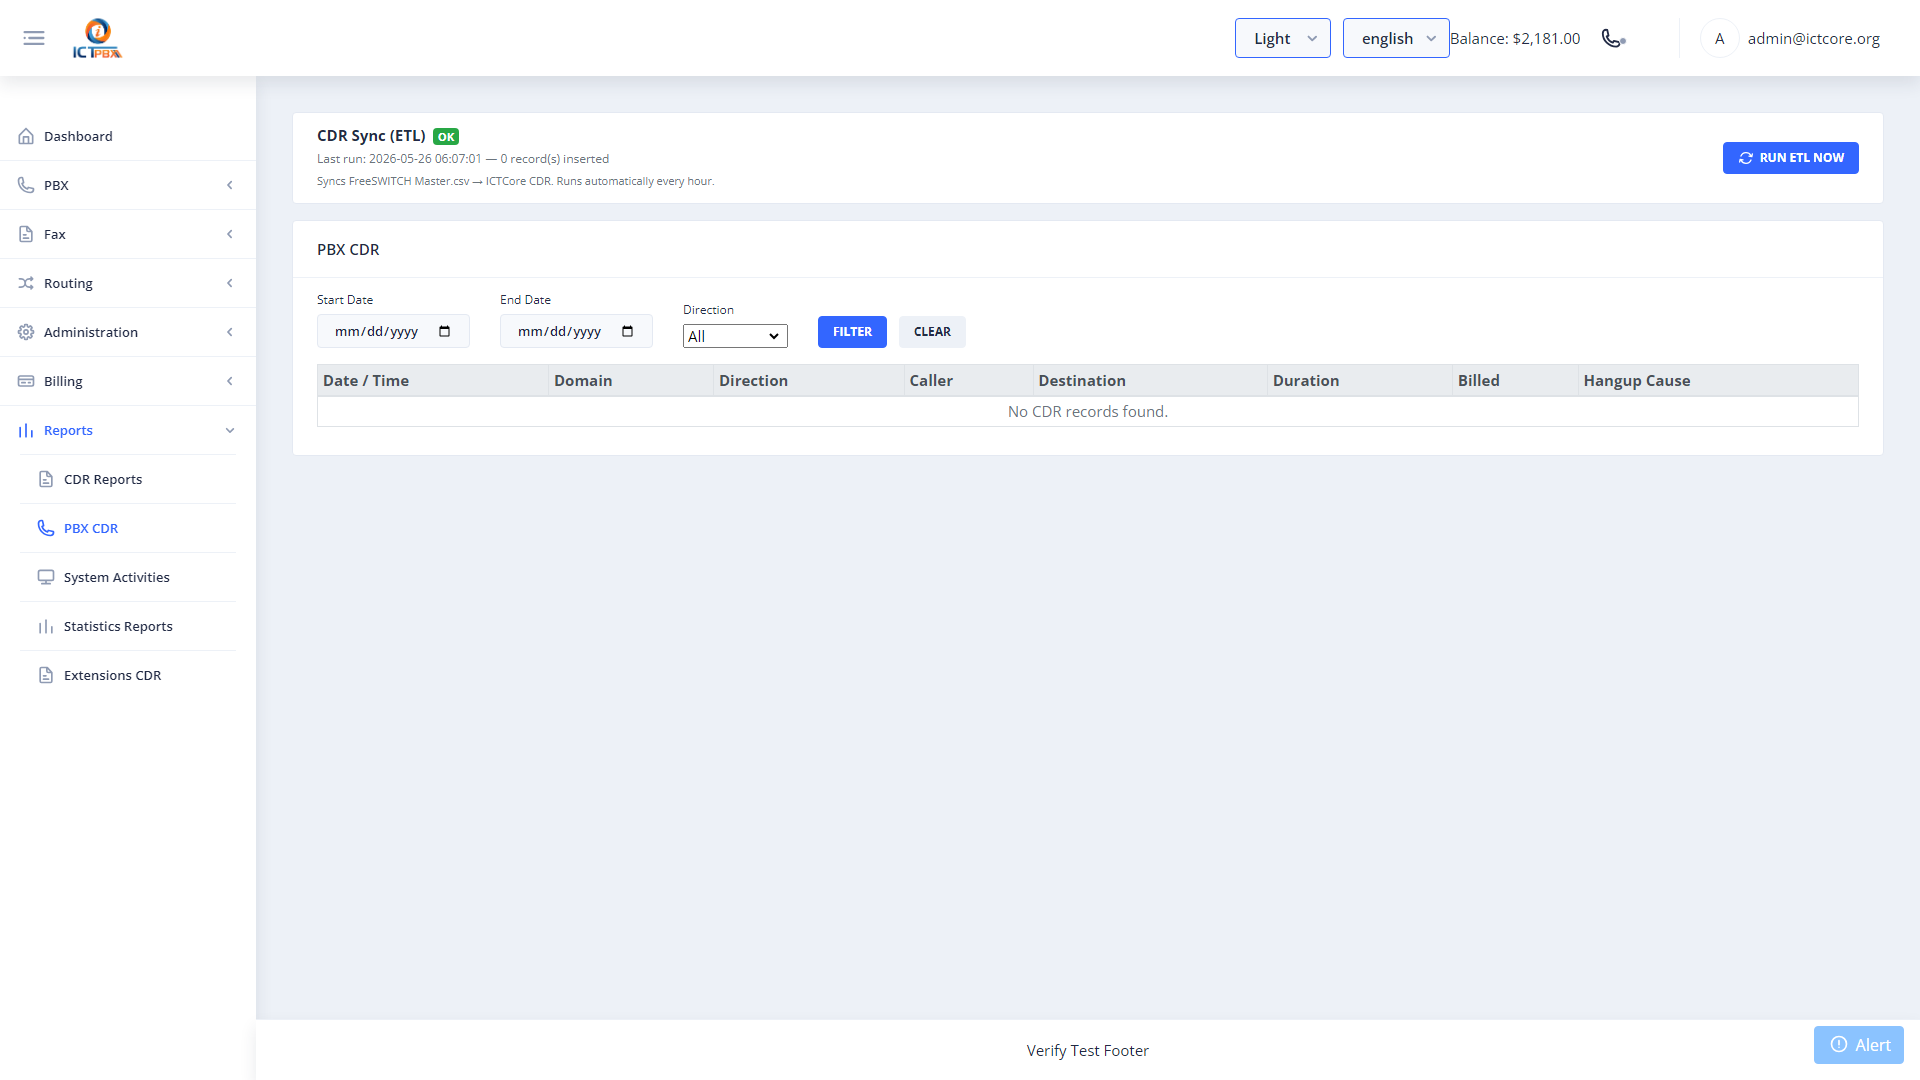
8. Call Detail Records (CDR)
Navigate to Reports → CDR to view a log of all calls associated with your account.
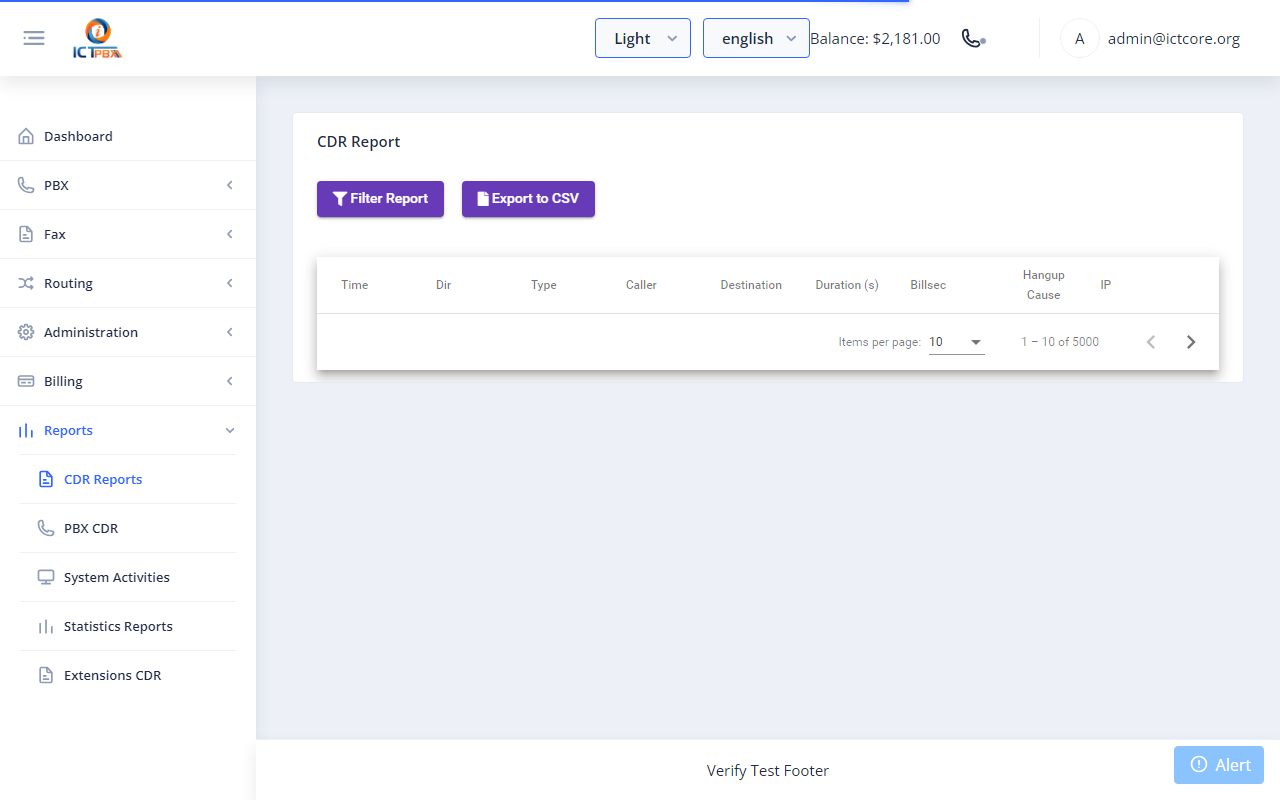
The CDR table shows:
Use the date filter at the top of the page to narrow results to a specific period.
8.1 PBX CDR
Navigate to Reports → PBX CDR for detailed FreeSWITCH-level records — codec used, hangup cause, SIP call ID, and call recording link (if recording is enabled on your extension).
9. My DIDs — Assigned Phone Numbers
Navigate to My DIDs from the sidebar to see the DID phone numbers assigned to your account.
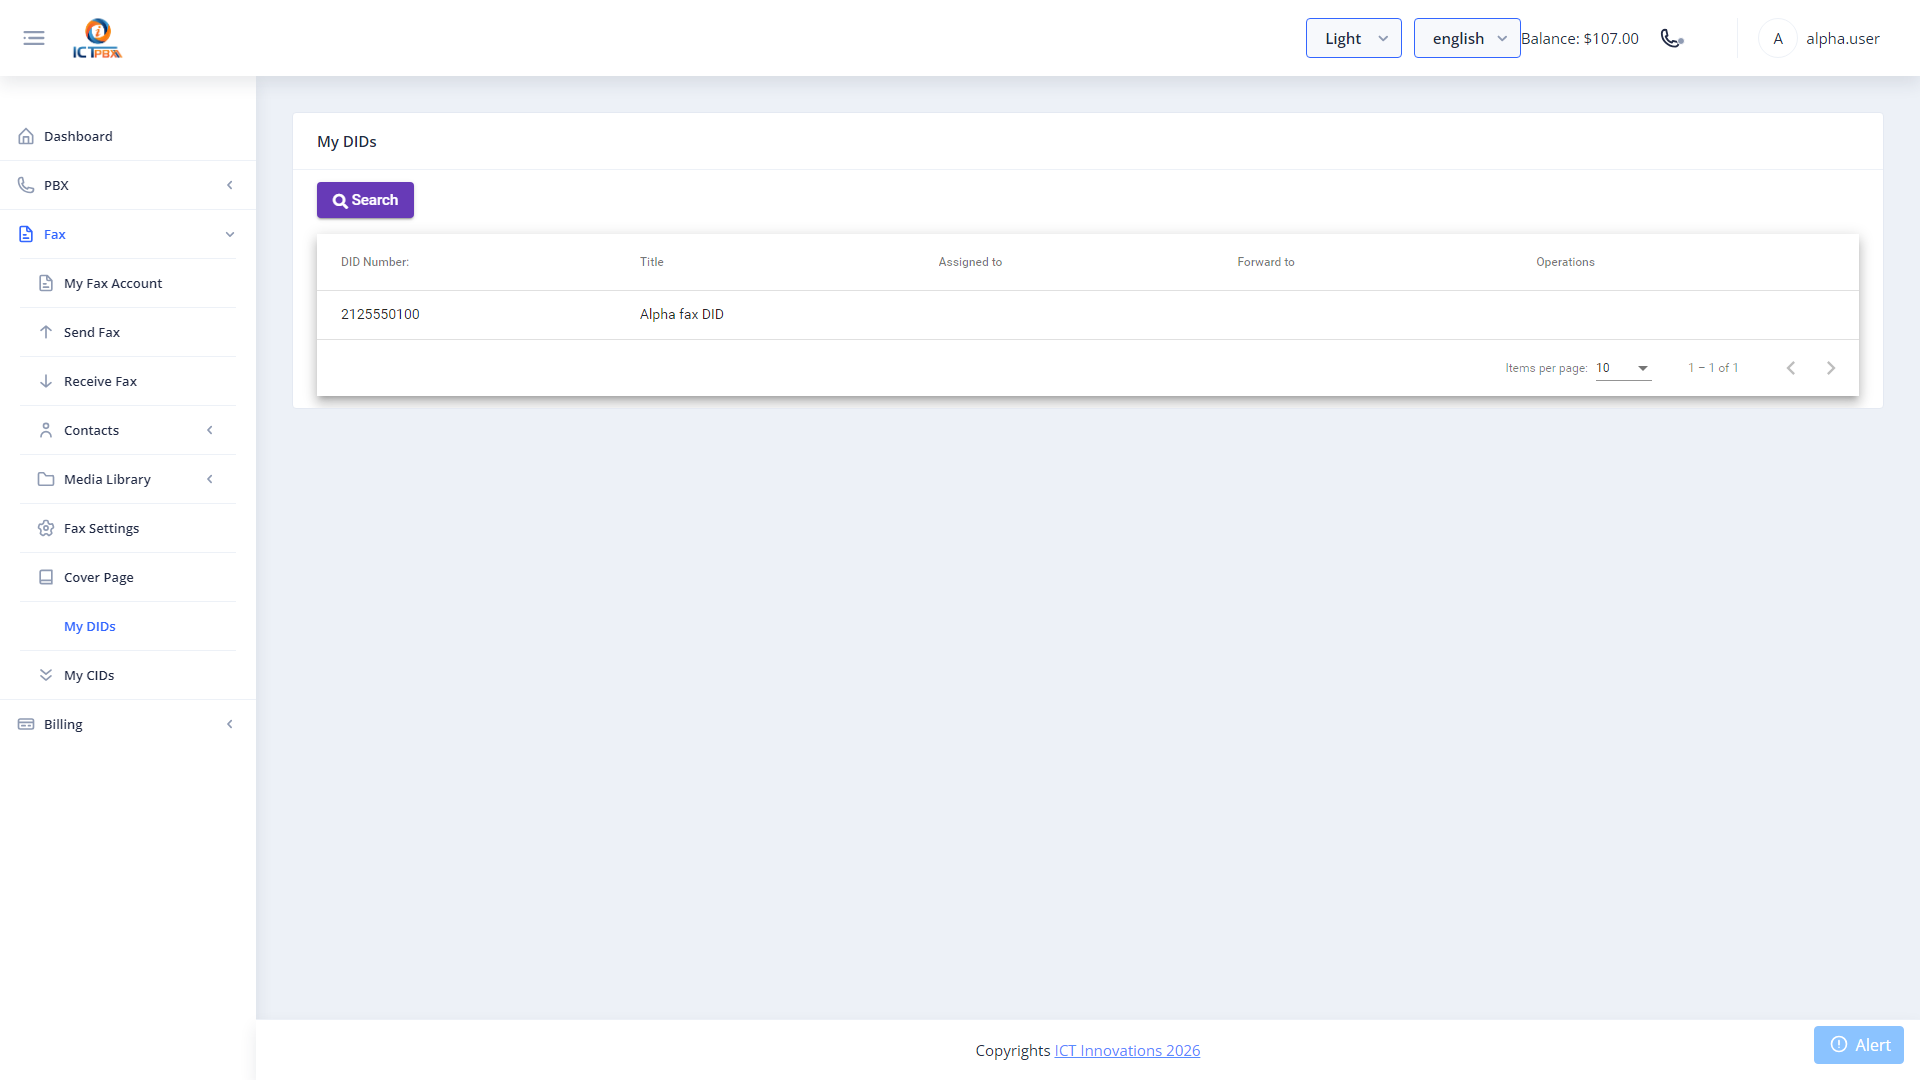
This view shows each number, its current routing destination, and whether it is active.
Contact your tenant administrator to change DID routing or to request additional numbers.
10. Billing Quota
Navigate to Billing → Billing Quota to see your current usage against your allocated plan limits.
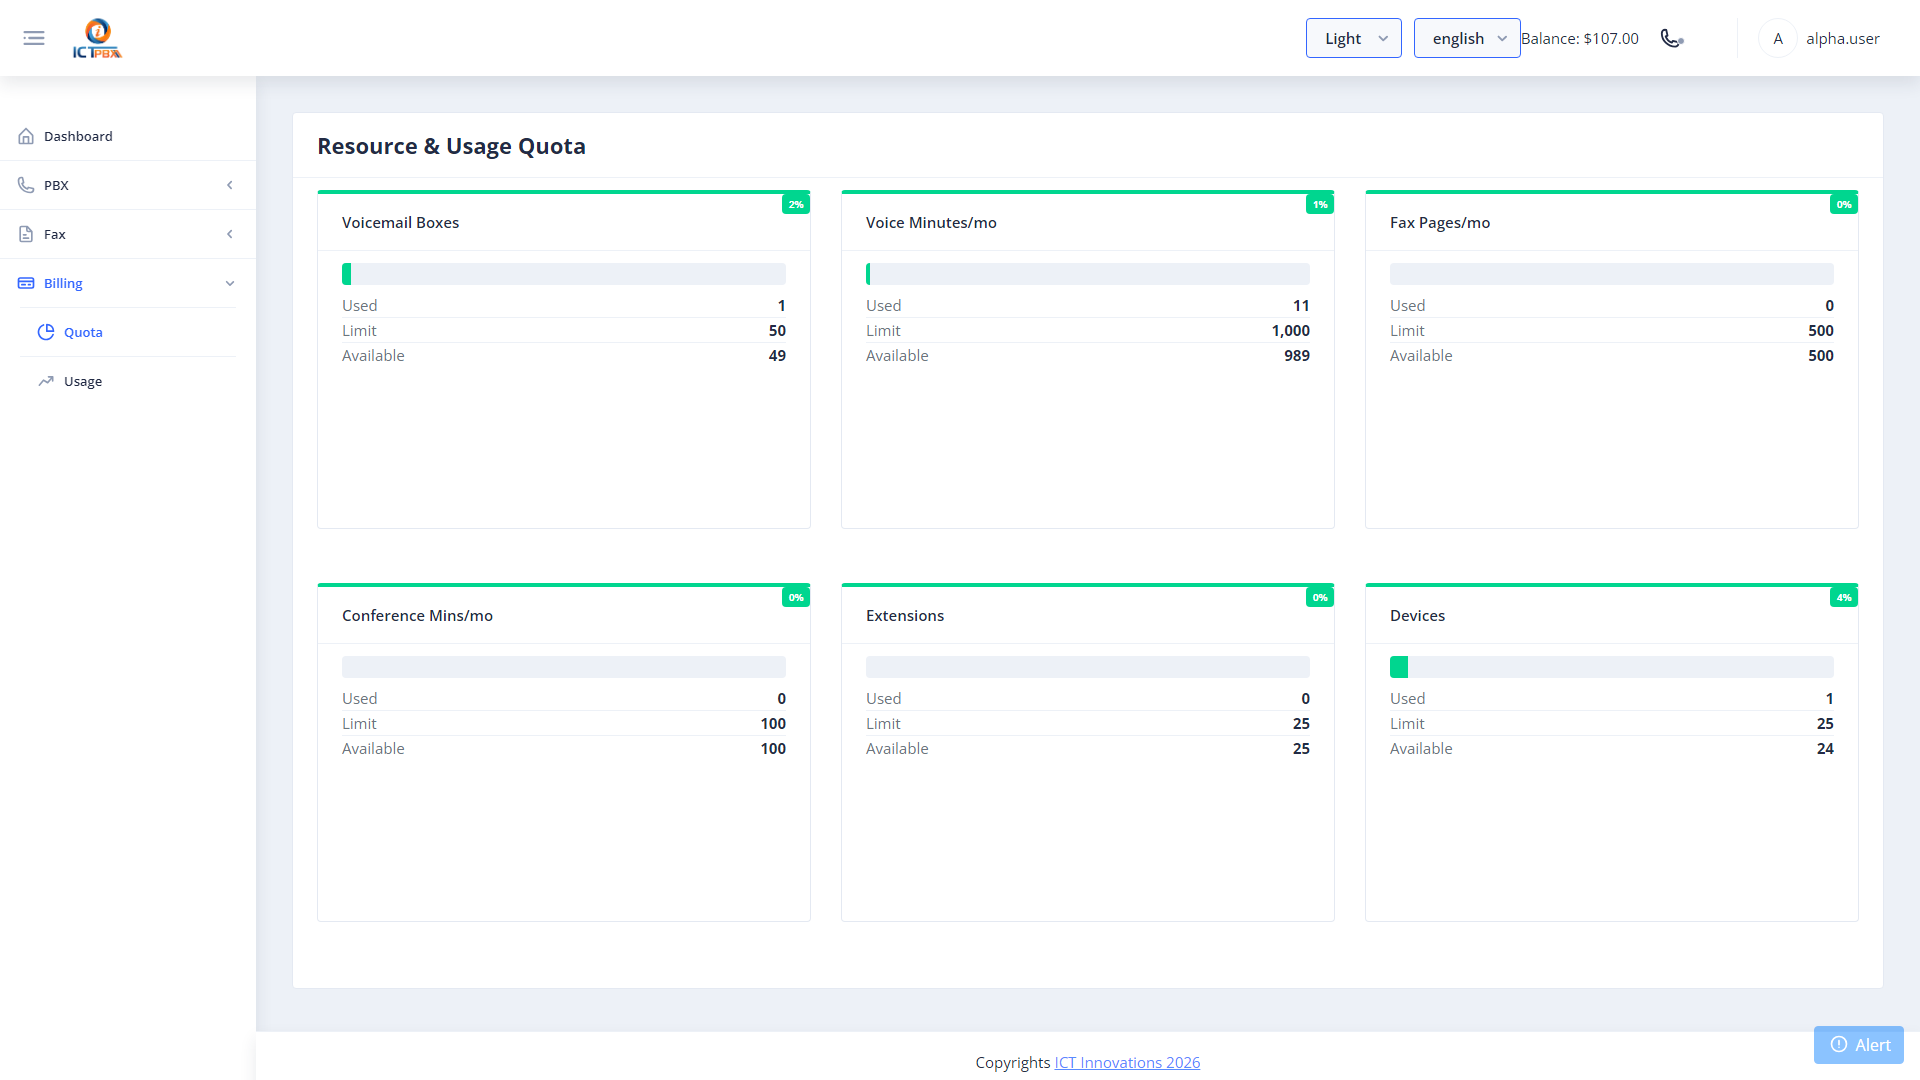
Cards displayed include:
If a usage card approaches its limit, contact your administrator to review your subscription package.
11. Feature Codes
Navigate to PBX → Feature Codes for a quick reference of star-code features available on your extension.
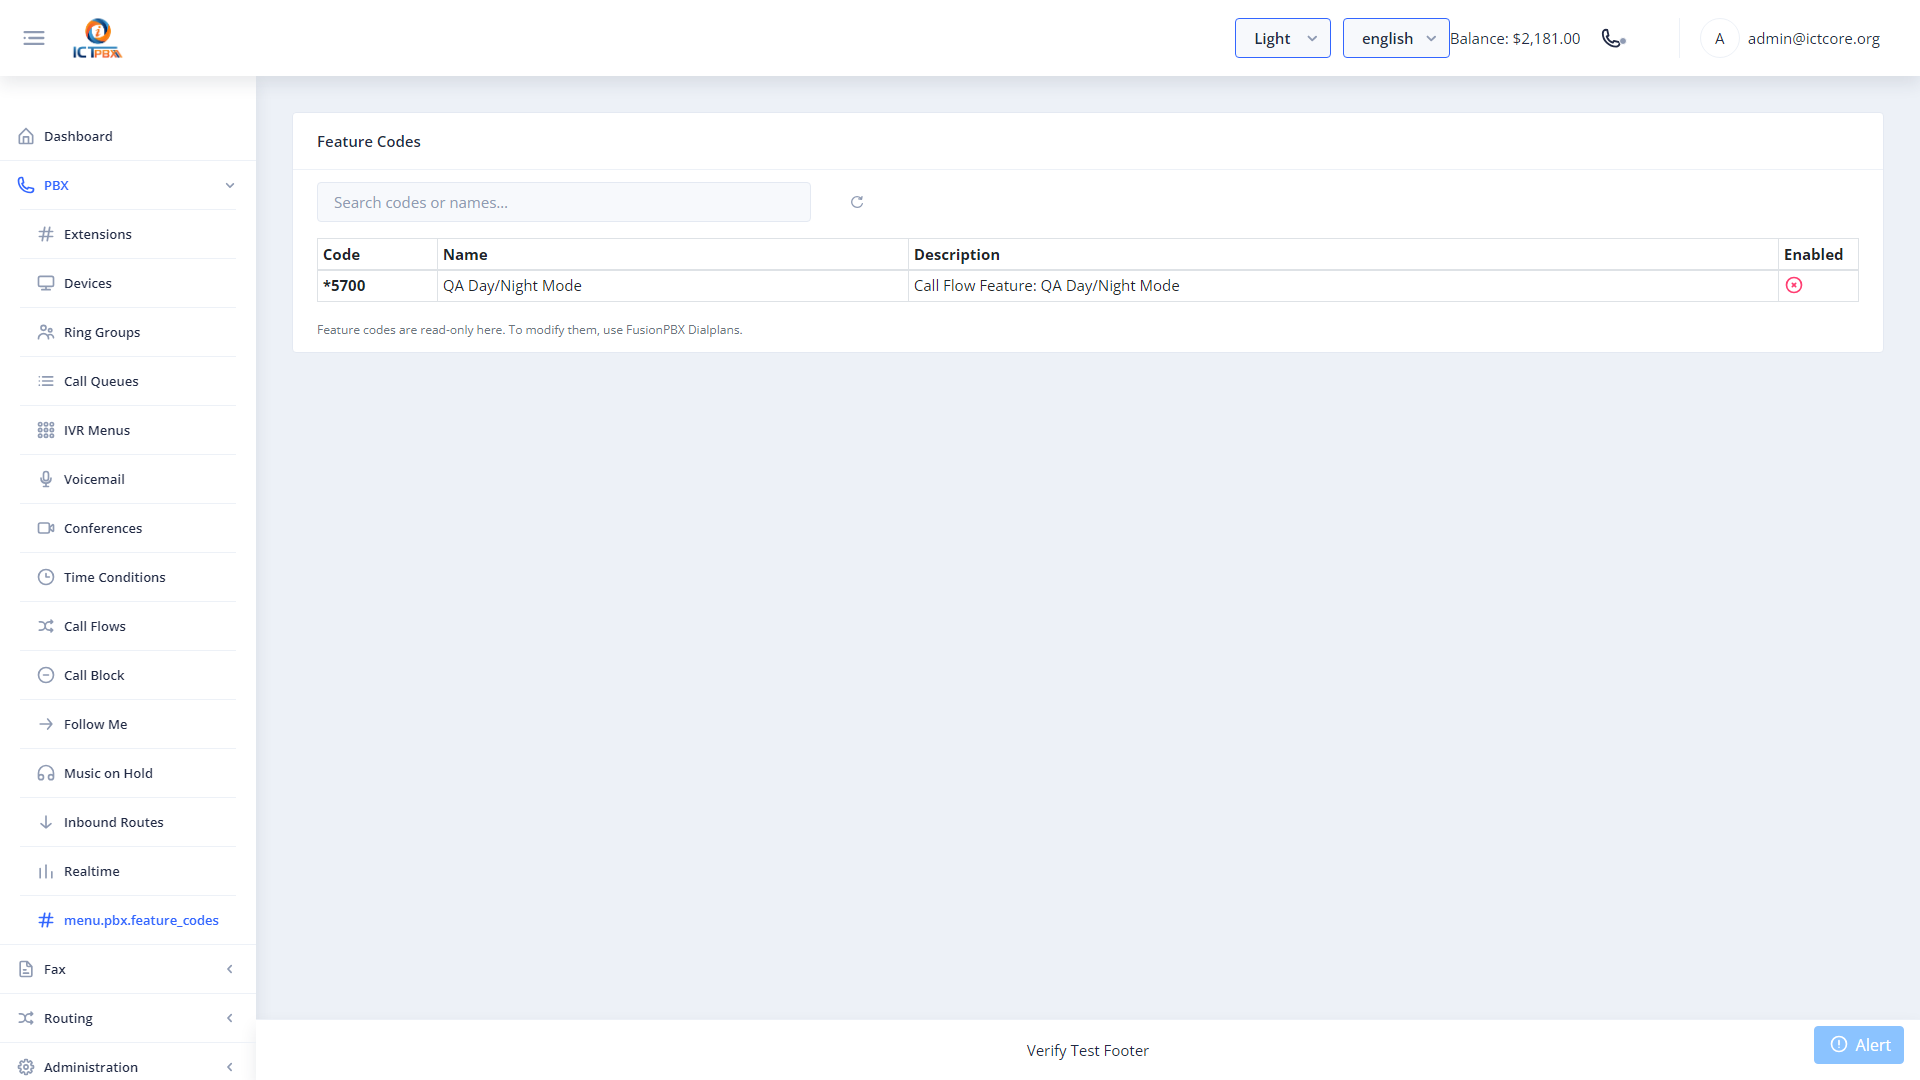
Dial these codes from your softphone or desk phone:
12. Tips & Best Practices
Softphone audio quality
- Use a wired headset for best call quality — Bluetooth headsets can introduce audio latency.
- Close unused browser tabs to reduce CPU load during calls.
- If you experience one-way audio (you can hear the other party but they cannot hear you), check that your browser has microphone permission: click the lock icon in the browser address bar → Microphone → Allow.
- If the softphone shows as disconnected (red status), refresh the page and re-open the softphone panel.
Before you leave for the day
- Check that Do Not Disturb is disabled — inadvertently leaving DND on will cause all calls to your extension to be missed.
- If you enabled Follow Me, confirm it is still pointing to the correct number.
Fax best practices
- Always send faxes as PDF files.
- Verify the recipient fax number before sending — international numbers must include the country code.
- If a fax status shows Failed, check the number, wait a few minutes, and retry.
- Set your Fax Delivery Email in My Account so you receive inbound faxes even when you are not logged into the portal.
Security
- Never share your SIP password — it allows anyone to make calls charged to your account.
- Never share your portal password — it gives access to your call records, faxes, and settings.
- Log out of the portal when using a shared computer.
- Contact your administrator immediately if you suspect your credentials have been compromised.
ICTPBX Service Provider Edition — End User Guide Platform: demo.ictpbx.com