
3 — Administration Guide #
This guide covers tasks performed by the System Administrator (admin role).
Tenant Management EE only #
Tenants represent organisations. Each tenant has its own users, fax quota, PBX domain, and optionally custom branding.
Viewing Tenants #
Go to Administration → Tenants.
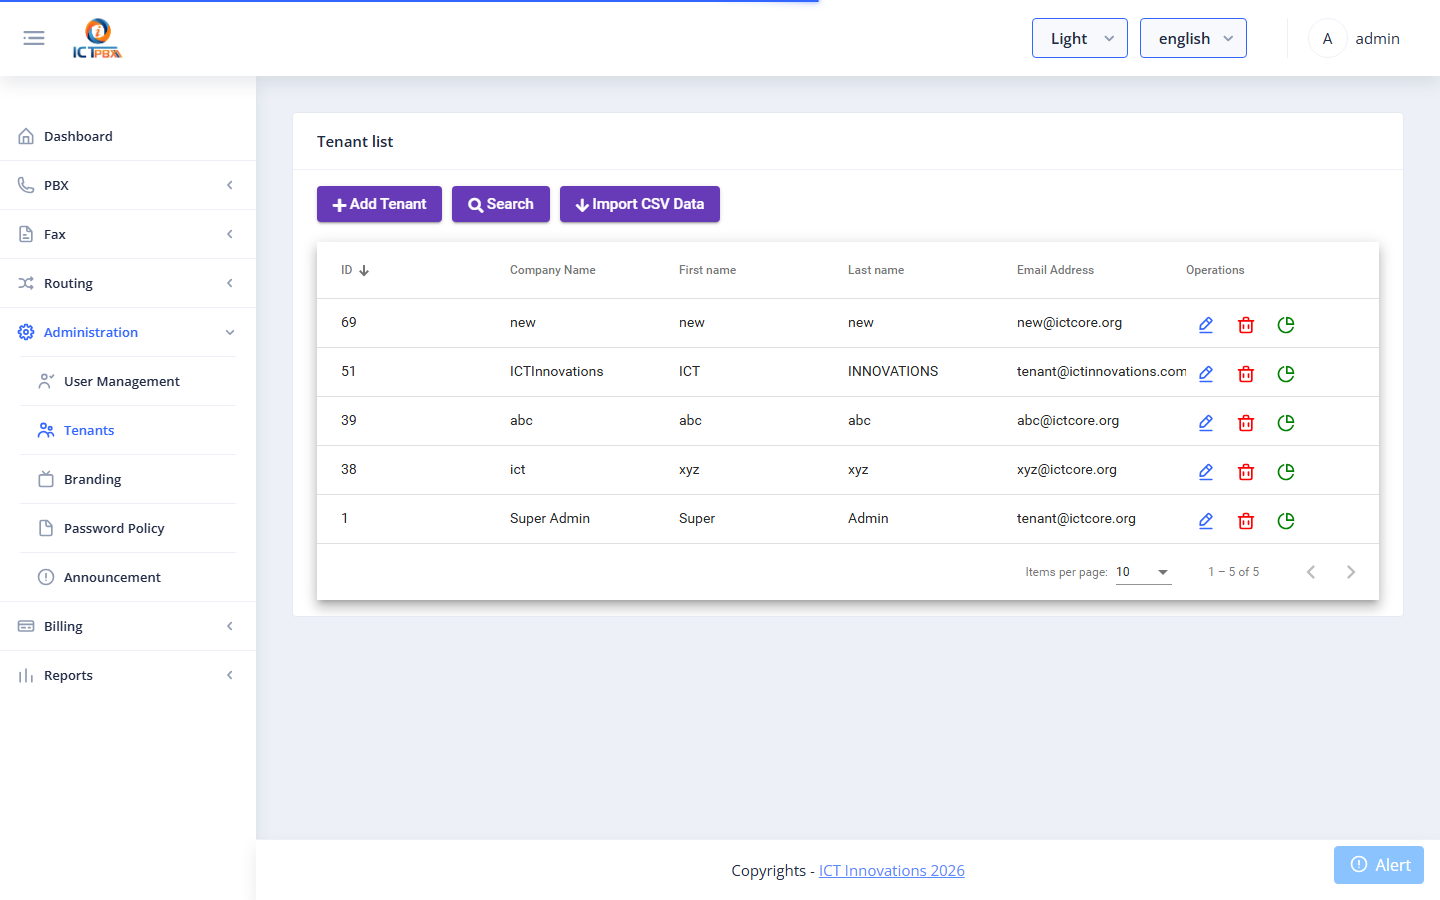
The list shows each tenant’s company name, email, daily/monthly fax limits, and status.
Creating a Tenant #
Click Add Tenant.
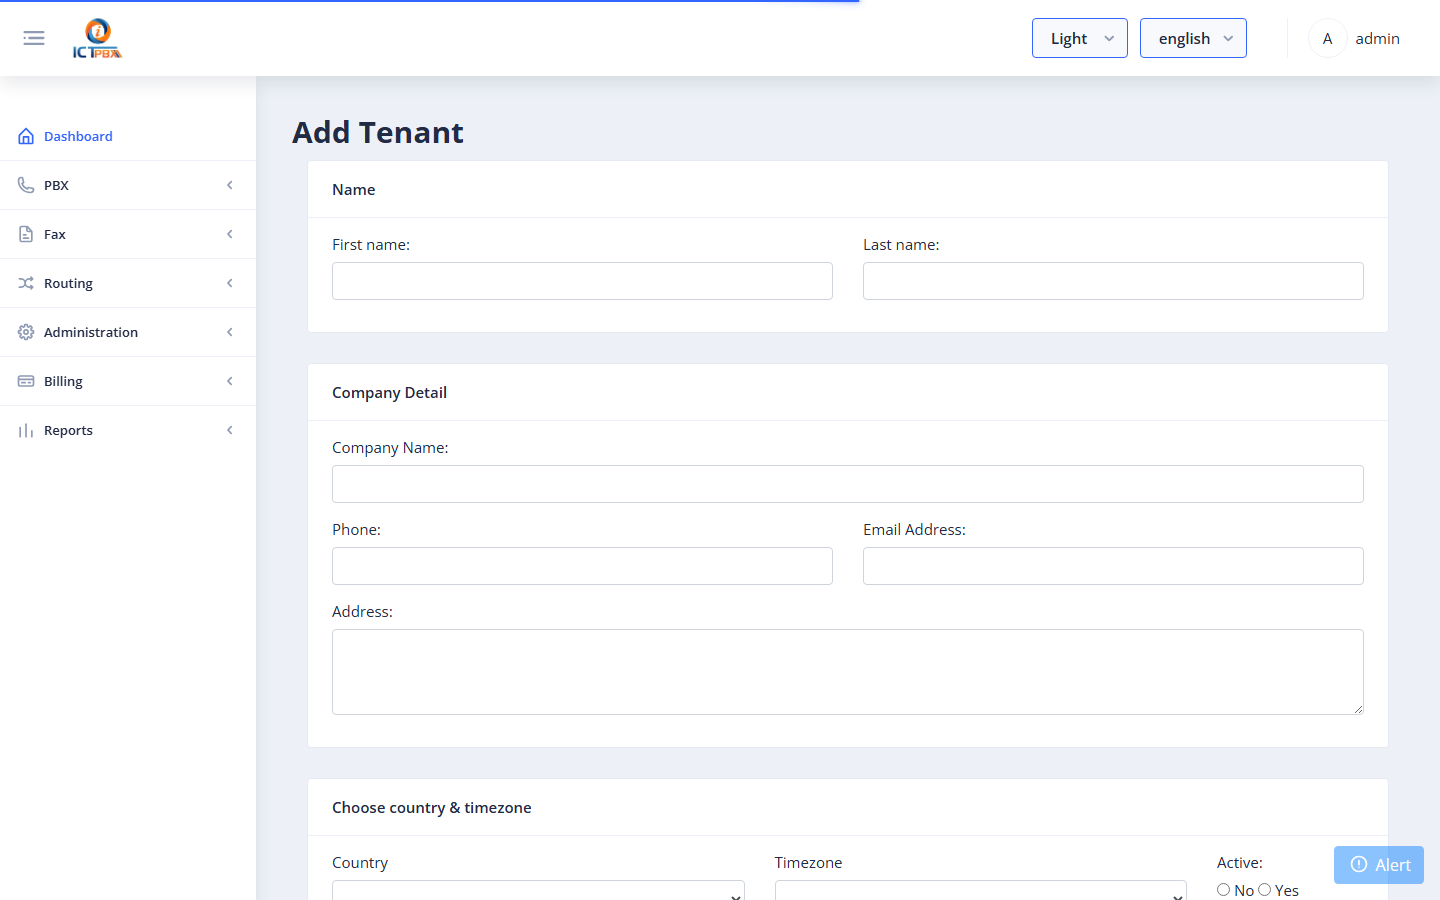
| Field | Required | Description |
|---|---|---|
| Company | ✅ | Organisation name |
| ✅ | Primary contact email | |
| Phone | Contact phone | |
| Address / City / Country | Optional location info | |
| Daily Fax Limit | Max faxes/day. -1 = Unlimited |
|
| Monthly Fax Limit | Max faxes/month. -1 = Unlimited |
|
| Permissions | Features available to all users under this tenant |
Permissions determine which menu items and actions are available to users under this tenant. Check every feature this organisation should have access to:
- Fax permissions: Send Fax, Receive Fax, Fax to Email, Email to Fax, Personalize Fax, Bulk Fax, Cover Page, Fax Documents, Fax Accounts, Fax Settings
- Contacts permissions: Contacts, Contact Groups, Contact DNC
- PBX permissions: Extensions, Devices, Ring Groups, Call Queues, IVR Menus, Voicemail, Conferences, Time Conditions, Call Flows, Call Block, Follow Me, Music on Hold, Inbound Routes, Realtime
Click Save.
Editing a Tenant #
Click the Edit (pencil) icon on any tenant row. All fields are editable. Reducing a tenant’s permissions does not immediately revoke existing user permissions — those are enforced at login and on save.
Deleting a Tenant #
Click the Delete (trash) icon. This removes the tenant record. Associated users should be removed first.
User Management #
Users are individuals who log in to ICTPBX. Every user belongs to a tenant.
Viewing Users #
Go to Administration → Users.
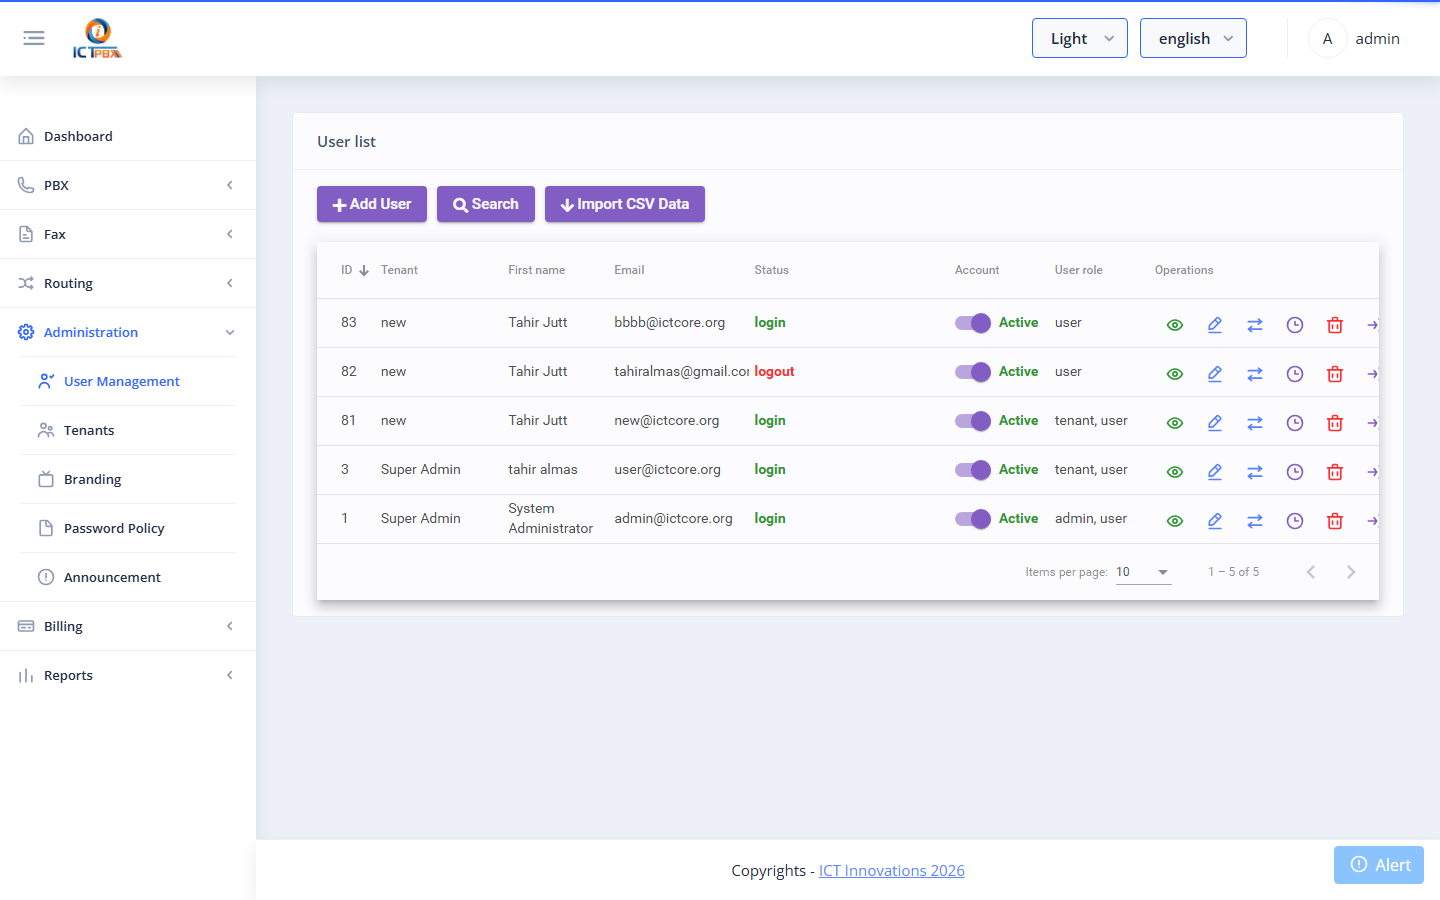
The list shows username, full name, tenant, role, and status. Use the search field to filter.
Creating a User #
Click Add User.
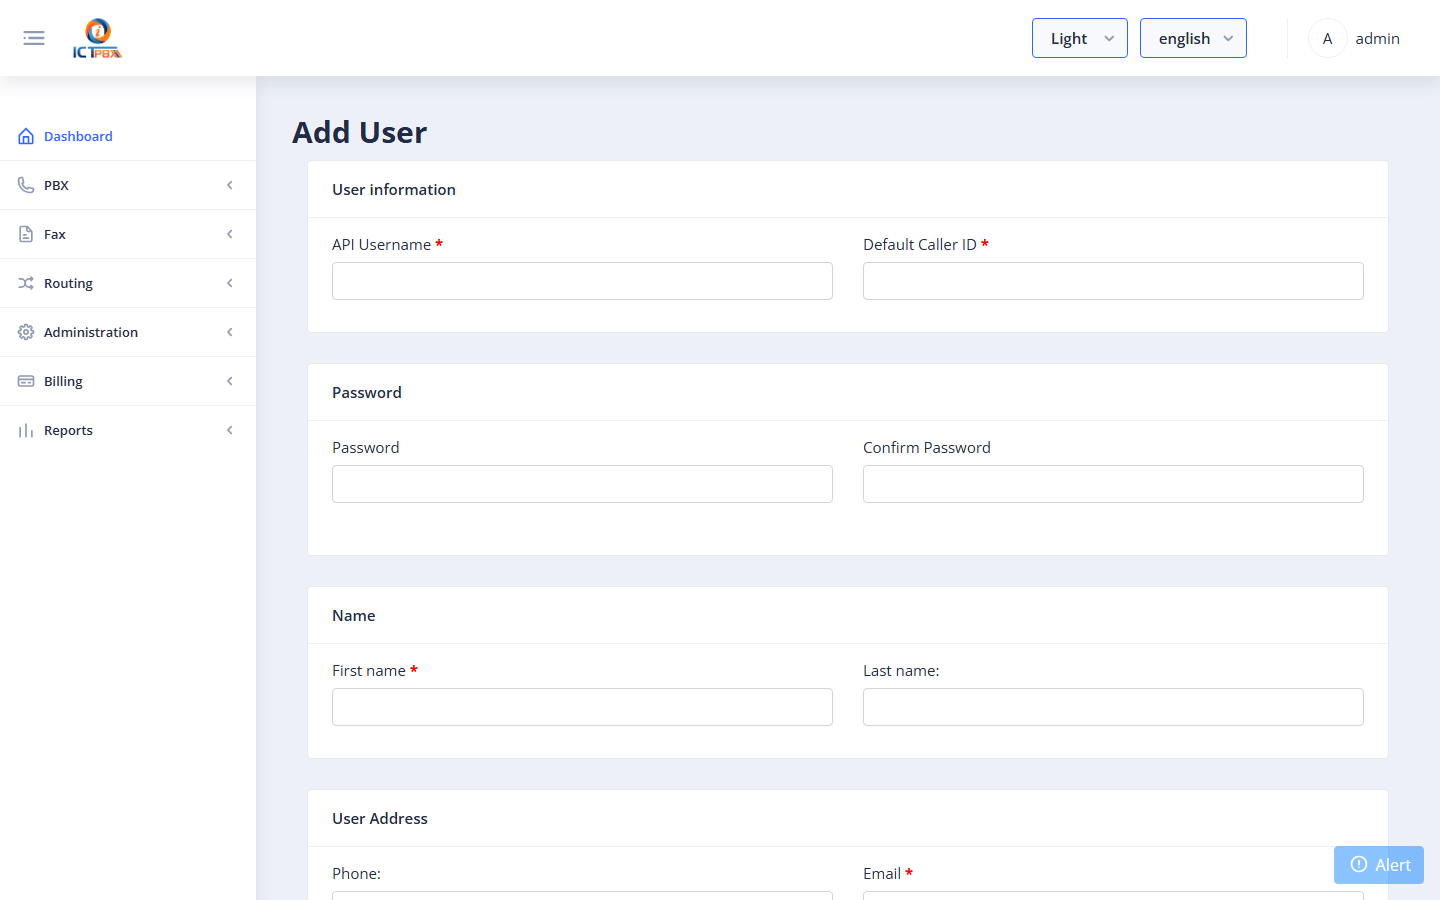
Basic Information #
| Field | Required | Description |
|---|---|---|
| First Name | ✅ | |
| Last Name | ||
| Username | ✅ | Used as the login email address |
| Password | ✅ (new users) | Must meet the password policy |
| Confirm Password | ✅ | Must match password |
| Tenant | ✅ | The tenant this user belongs to |
| Role | ✅ | Tenant = tenant admin; User = end user |
| Timezone | Used for scheduling and call routing |
Fax Quota #
| Field | Description |
|---|---|
| Daily Fax Limit | Max faxes this user can send per day. Cannot exceed the tenant’s remaining daily pool. -1 = Unlimited (admin only). |
| Monthly Fax Limit | Max faxes per month. Same constraints. |
PBX Resource Allocation #
Enter how many PBX objects of each type this user can create:
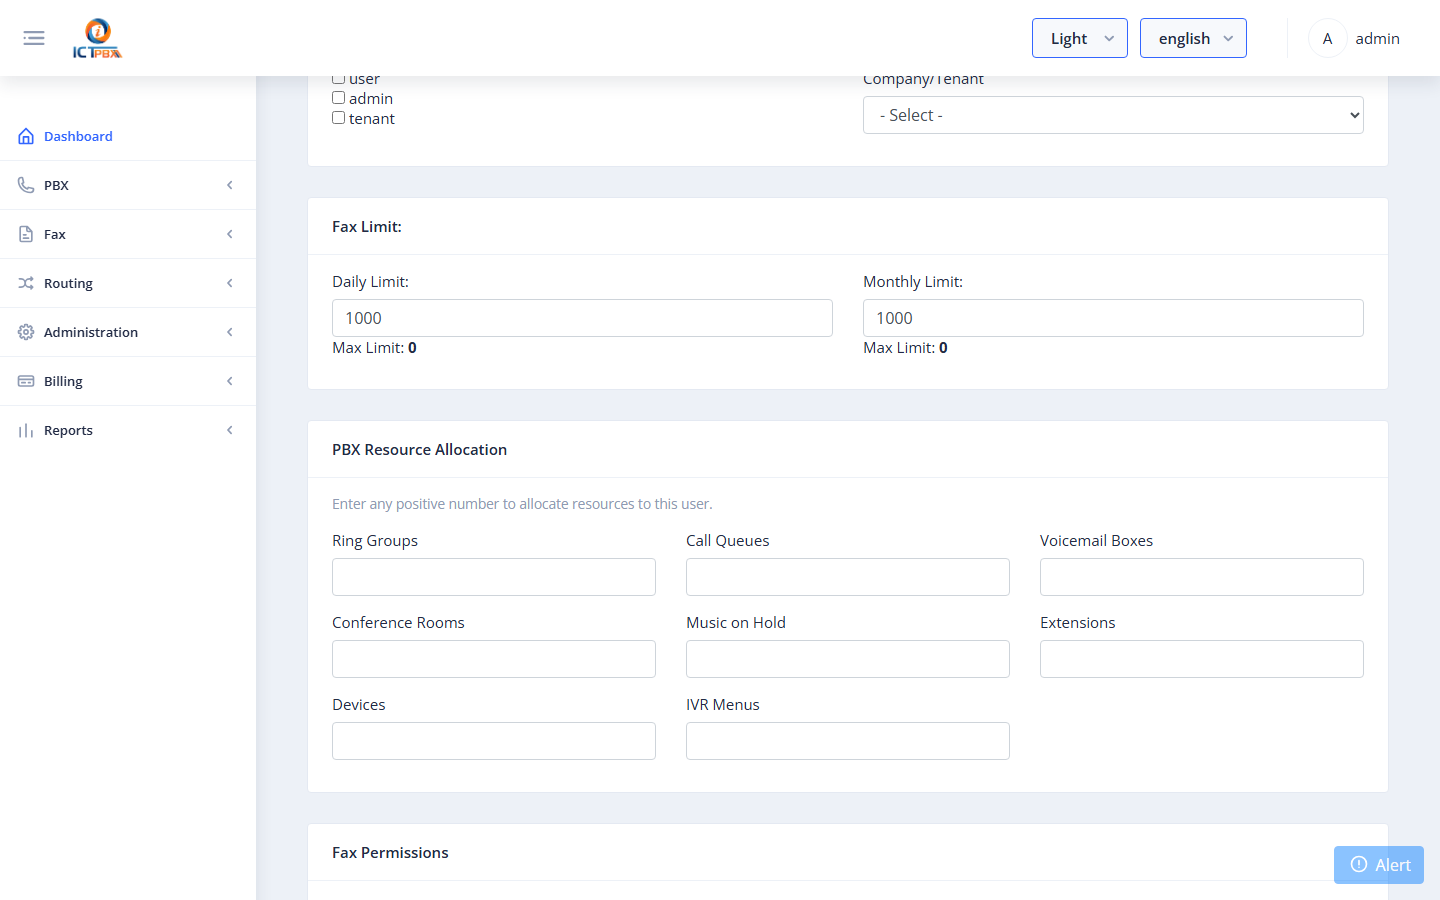
| Resource | Description |
|---|---|
| Extensions | SIP extensions |
| Devices | SIP/IP phones |
| Ring Groups | Simultaneous ring groups |
| Call Queues | ACD queues |
| IVR Menus | Auto-attendant menus |
| Voicemail Boxes | Mailboxes |
| Conferences | Conference rooms |
| Music on Hold | MOH categories |
As admin you can enter any positive value — there is no upper cap enforced.
Permissions #
Scroll to the Fax Permissions and PBX Permissions cards and check each feature to enable.
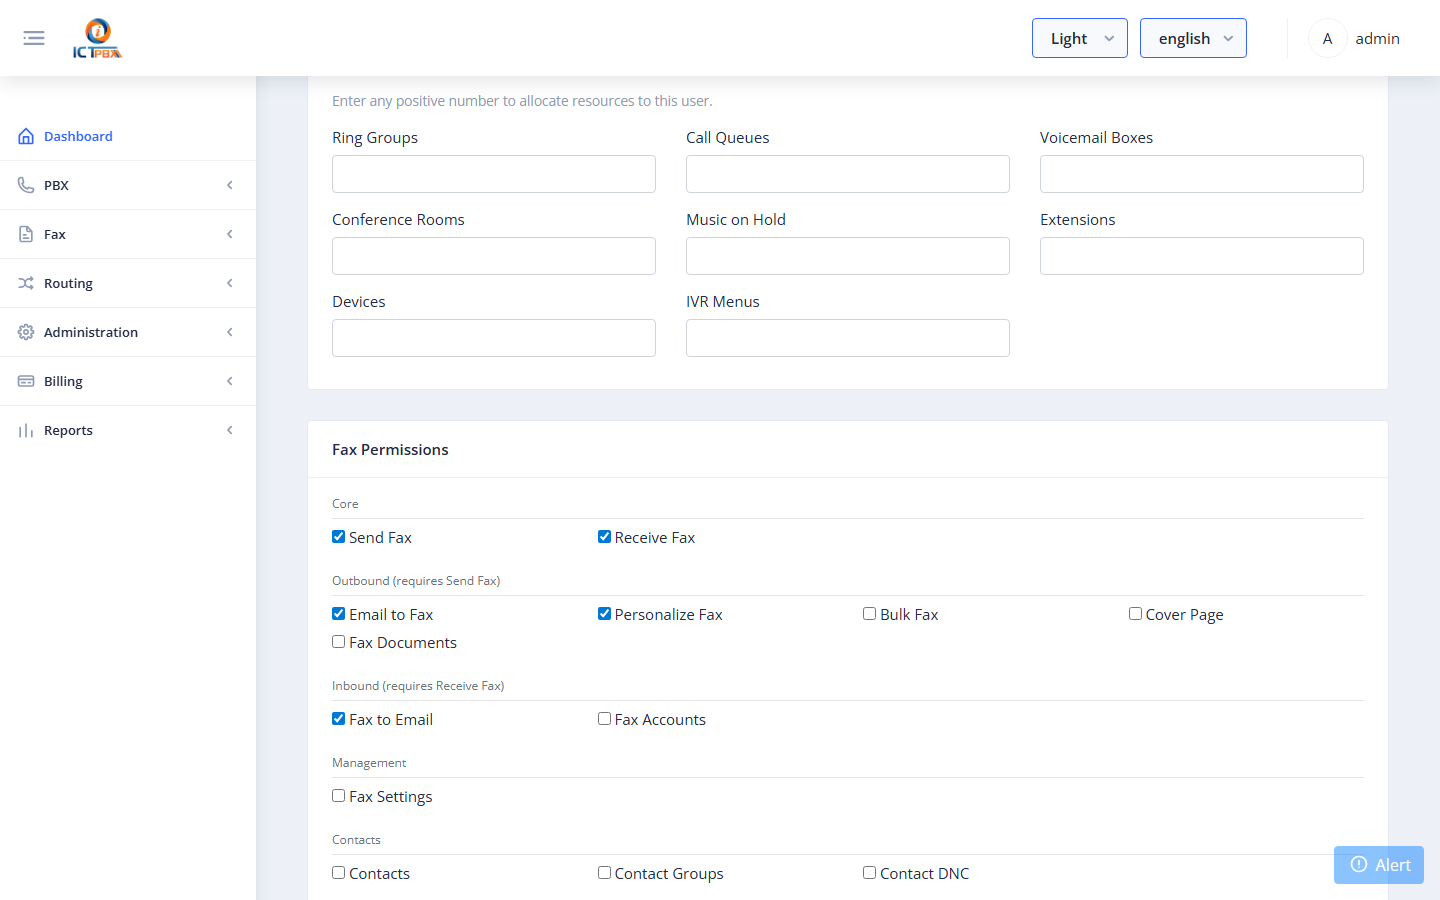
Permissions are grouped by category. Only permissions the tenant holds are visible.
Click Save (or Update when editing).
Editing a User #
Click Edit on any user row. All fields including permissions and quotas are editable.
Deleting a User #
Click Delete on any user row.
Password Policy #
Go to Administration → Password Policy to set requirements:
- Minimum length
- Uppercase / lowercase / numeric / special character requirements
- Password expiry (days)
- Maximum failed login attempts before lockout
Branding EE only #
Branding lets you customise the portal appearance per tenant.
Go to Administration → Branding.
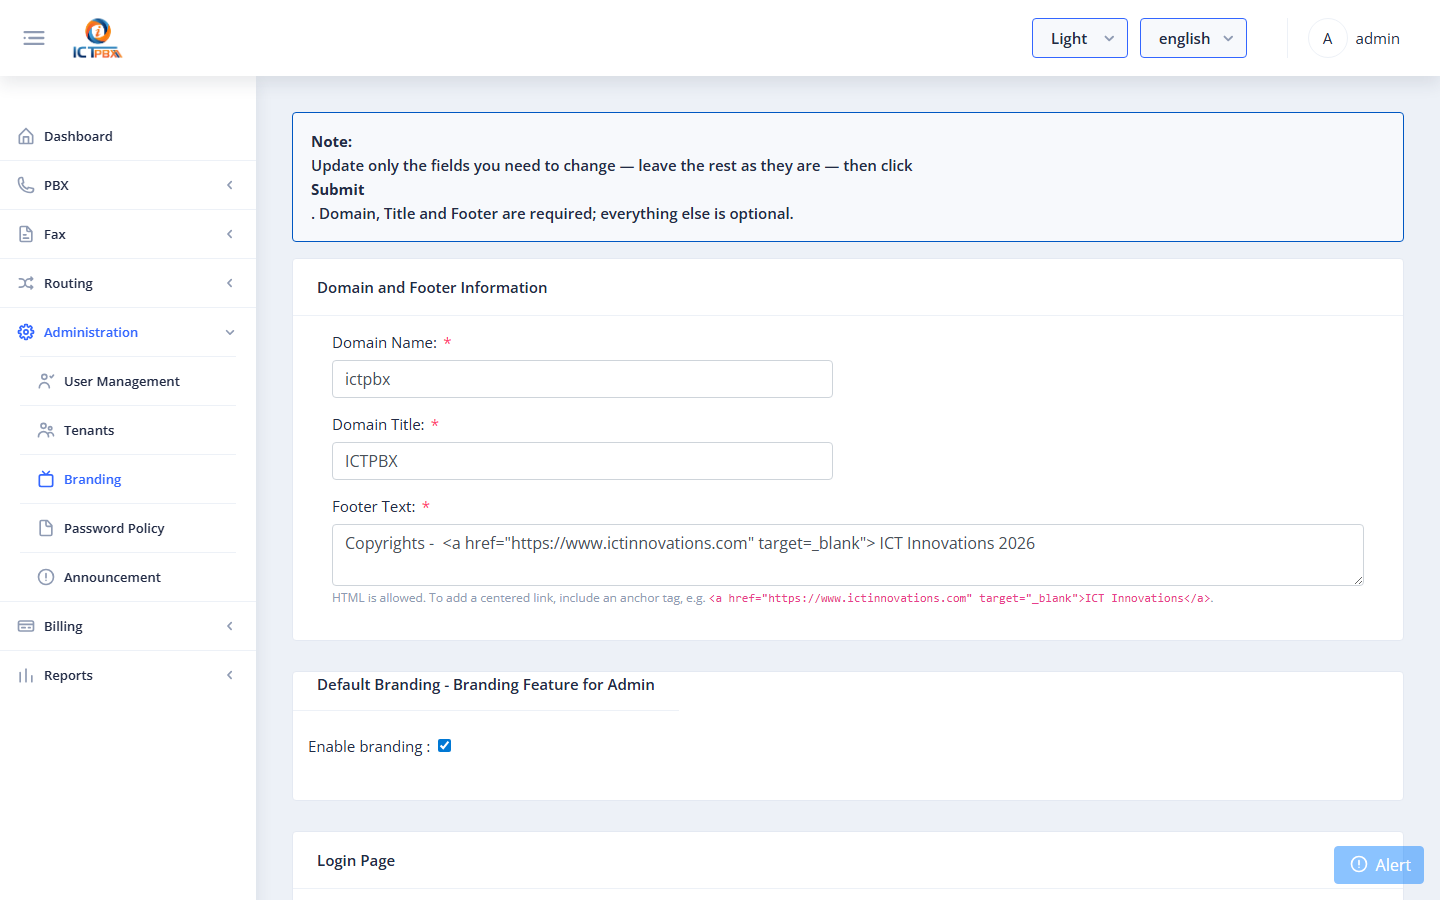
| Field | Description |
|---|---|
| Domain | Hostname this branding applies to (matched at login) |
| Title | Browser tab / page title |
| Logo | Uploaded image shown in the header |
| Favicon | Browser tab icon URL |
| Login Subtitle | Tagline shown below the logo on the login page |
| Support Email | Shown in the footer |
| Login Background | URL of the login page background image |
| Footer | HTML content shown at the bottom of every page |
| Theme Lock | Force a specific Nebular theme; hides the user’s theme dropdown |
The Default flag marks the fallback branding used when no domain match is found.
Billing & Quota EE only #
Go to Billing → Quota to view resource usage across all tenants.
The quota page shows for each tenant: fax daily/monthly limits, assigned vs remaining, and PBX slot usage per resource type.
CDR Reports #
Go to Reports → CDR to view call and fax detail records.
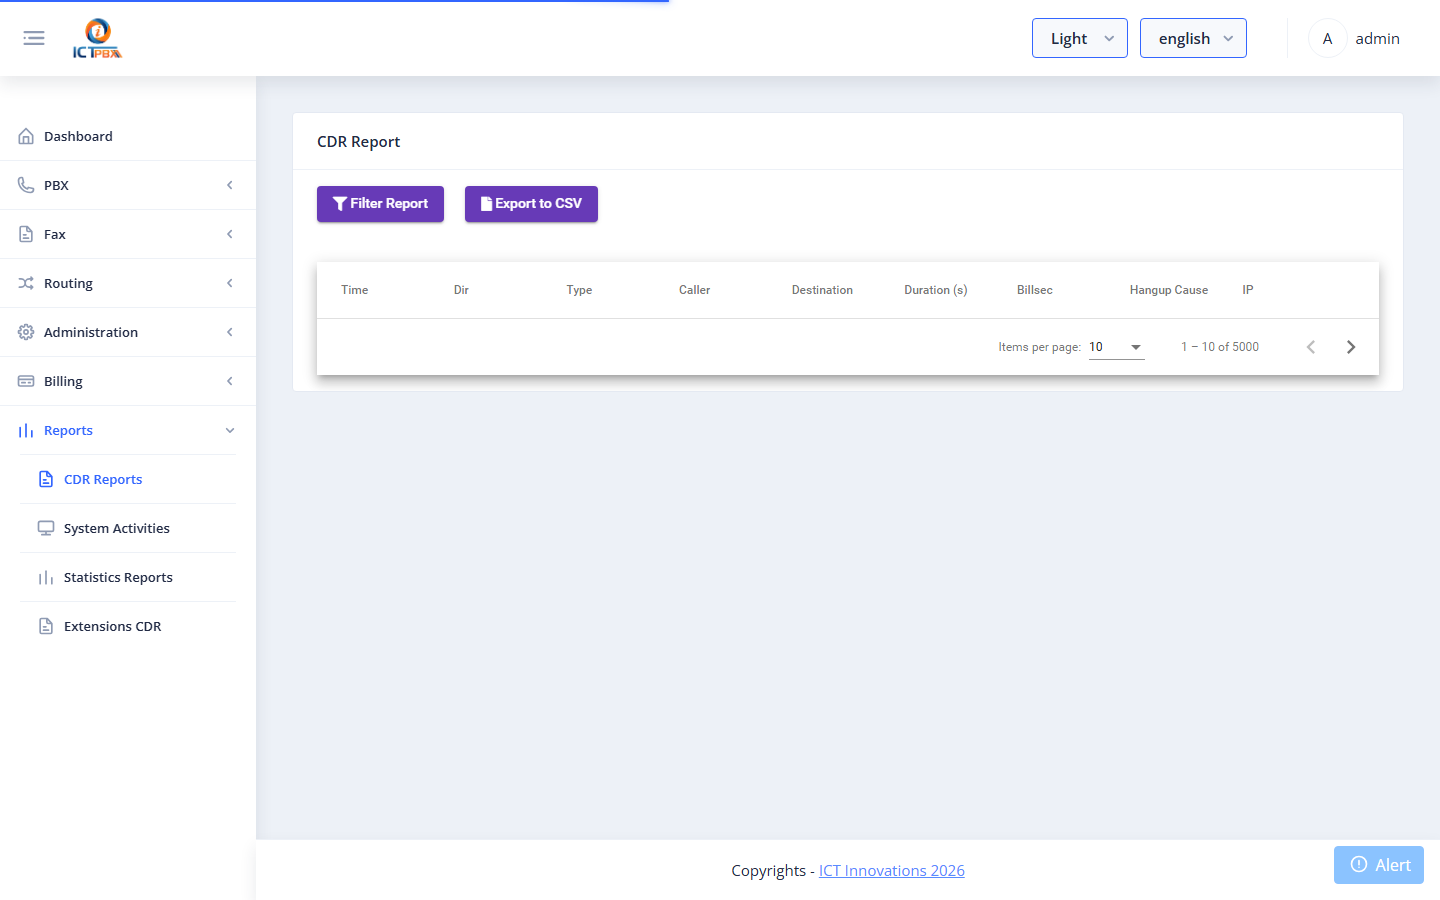
Filter by date range, tenant, user, or direction. Export to CSV for billing or compliance purposes.
Gateways (Trunks) #
Go to PBX → Gateways to manage SIP trunks connecting to your telecom carrier.
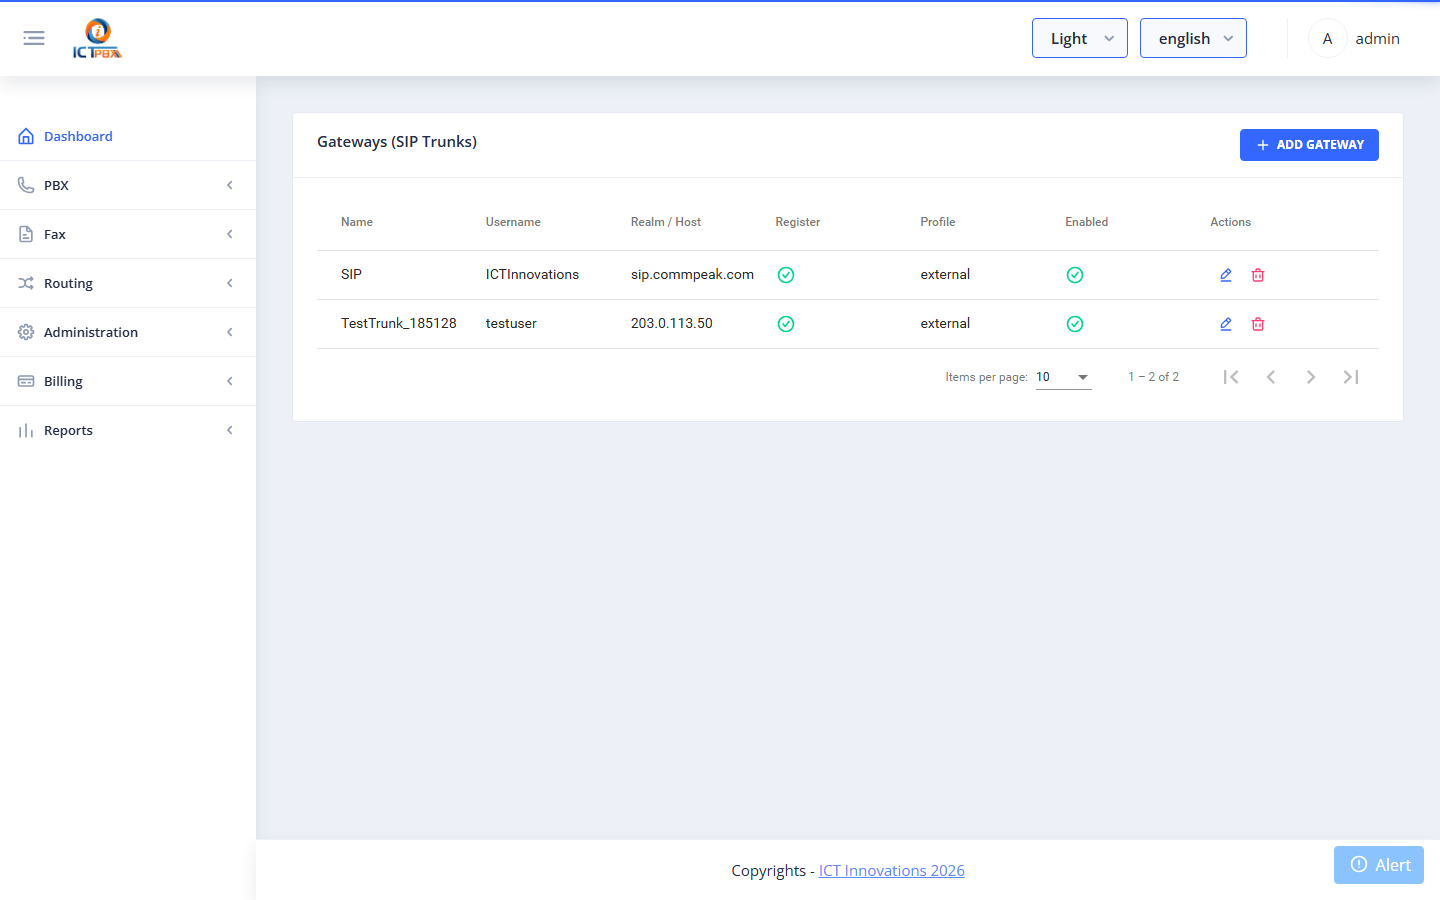
Each gateway maps to a SIP provider. ICTPBX writes the gateway configuration directly to FusionPBX and materialises the SIP profile XML on disk, then reloads FreeSWITCH automatically.
See PBX Features → Gateways for field-level details.


